➤ Table of Contents
Did you know that the demand for plant-based ice cream has grown by 27% in the last year alone? This surge reflects not just a trend, but a significant shift in how we approach frozen treats. Whether you’re lactose intolerant, vegan, or simply curious about delicious dairy-free alternatives, these homemade plant-based ice cream recipes will transform your dessert game. From creamy coconut-based classics to innovative fruit sorbets, these vegan frozen treat recipes prove that giving up dairy doesn’t mean sacrificing flavor or texture.
Ingredients List for Plant-Based Ice Cream
The beauty of homemade plant-based ice cream lies in its simplicity and flexibility. Here are the core ingredients you’ll need for most recipes:
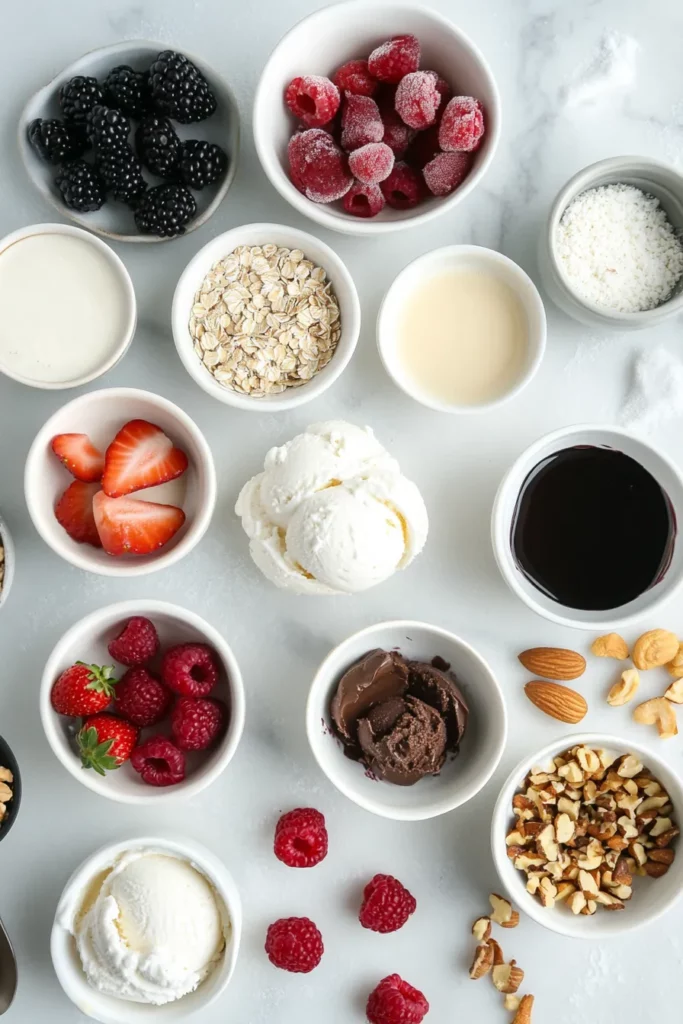
- Plant-based milks: Coconut milk (full-fat for ultimate creaminess), almond milk, oat milk, or cashew milk
- Natural sweeteners: Maple syrup, agave nectar, coconut sugar, or dates
- Thickening agents: Arrowroot powder, cornstarch, or agar-agar (for recipes without an ice cream maker)
- Flavor enhancers: Vanilla extract, cocoa powder, fresh fruits, nuts, or plant-based chocolate chips
- Texture improvers: A touch of coconut oil or plant-based cream cheese (adds creaminess)
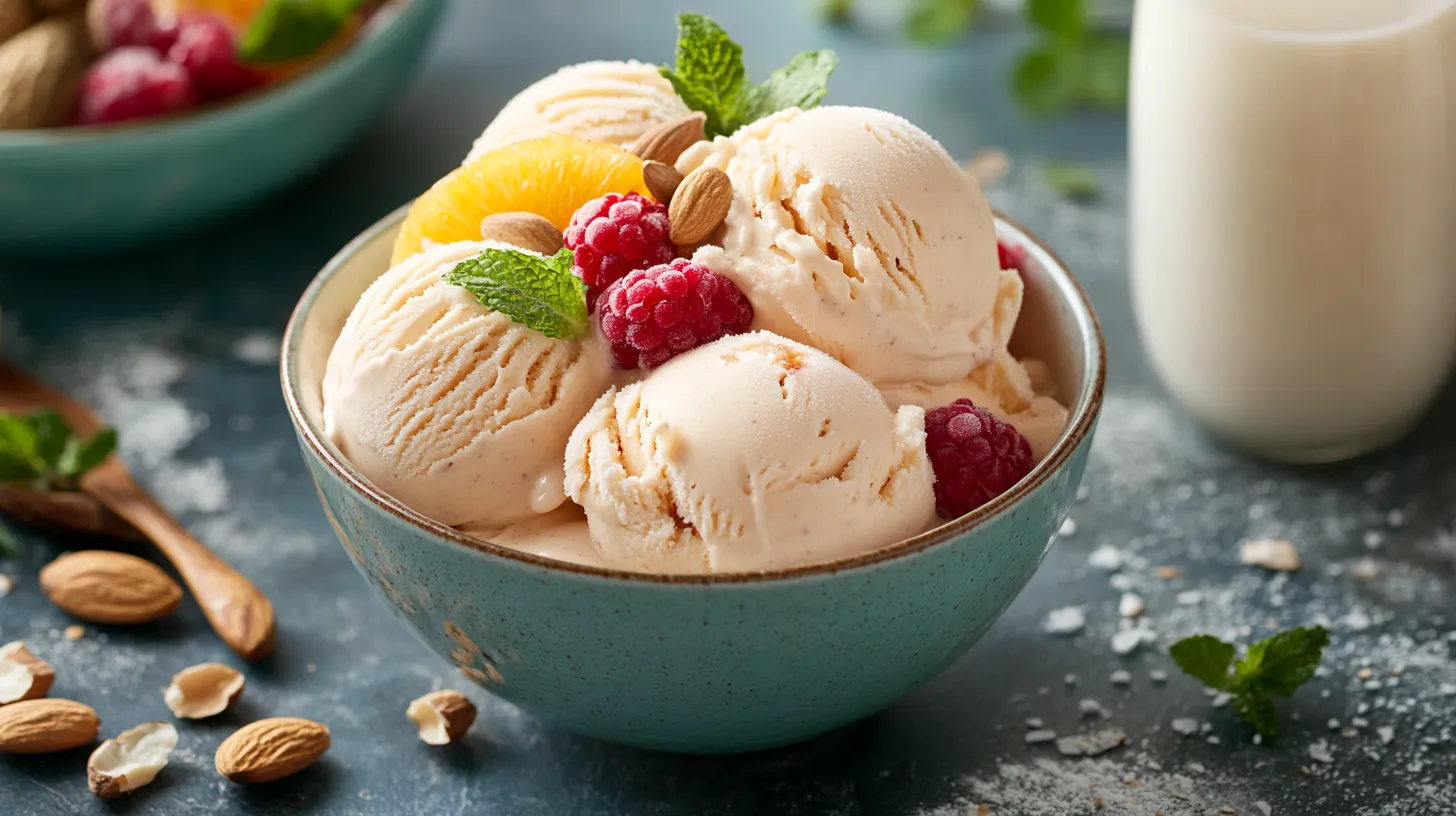
- Mix-ins: Fresh berries, chopped nuts, cookie pieces, caramel sauce, or fruit compotes
Substitution tip: If you can’t find coconut milk, blend 1 cup of soaked cashews with 2 cups of any plant milk for a similar creamy base.
Timing
Creating your own plant-based ice cream is surprisingly time-efficient:
- Preparation time: 15-20 minutes (35% less than traditional dairy ice cream)
- Freezing time: 4-6 hours (or overnight for best results)
- Total active time: Under 30 minutes (the freezer does most of the work!)
Data insight: Plant-based ice creams typically freeze harder than dairy varieties due to lower fat content, so allowing 5-10 minutes of thawing time before serving creates the perfect scoop-able texture.
Step-by-Step Instructions for Plant-Based Ice Cream
Step 1: Prepare Your Base
Choose your preferred plant milk as your foundation. Coconut milk creates the creamiest texture (mimicking the 14% fat content of traditional premium ice cream), while almond milk offers a lighter option. For ultra-creamy results without coconut flavor, try a 50/50 blend of cashew milk and oat milk.
Step 2: Sweeten Naturally
Add your chosen sweetener gradually, tasting as you go. Plant-based ice creams generally require slightly more sweetener than dairy versions because plant fats don’t carry sweetness as efficiently as dairy fat. Approximately 1/4 to 1/3 cup sweetener per 2 cups of base creates balanced sweetness.
Step 3: Enhance With Flavor
Here’s where customization happens! Add 1-2 teaspoons vanilla extract for classic vanilla, 1/3 cup cocoa powder for chocolate, 1-2 cups fresh fruit for fruit flavors, or 2 tablespoons matcha powder for green tea ice cream. Pro tip: A pinch of salt enhances all flavors and balances sweetness.
Step 4: Improve Texture and Mouthfeel
Add 1-2 tablespoons of arrowroot powder or cornstarch to prevent ice crystallization (the leading complaint in homemade vegan frozen treats). For extra creaminess, incorporate 2 tablespoons coconut oil or 1/4 cup plant-based cream cheese.
Step 5: Blend Until Ultra-Smooth
Use a high-speed blender for 60-90 seconds until your mixture is completely smooth. Any graininess at this stage will be magnified in the final product.
Step 6: Chill Before Churning
Refrigerate your mixture for at least 2 hours. This crucial step allows flavors to meld and improves your final texture by starting the freezing process with an already cold base.
Step 7: Churn or Freeze
If using an ice cream maker, follow manufacturer’s instructions (typically 20-25 minutes of churning). For no-churn method, freeze the mixture for 30 minutes, then whisk vigorously every 30 minutes for about 3-4 hours to break up ice crystals.
Step 8: Add Mix-Ins and Final Freeze
Gently fold in any mix-ins during the last minute of churning or after your final hand-mixing. Transfer to a freezer-safe container and freeze for at least 2 hours before serving.
Nutritional Information about Plant-Based Ice Cream
The nutritional profile of plant-based ice cream offers several advantages over traditional dairy varieties:
- Calories: 150-250 calories per 1/2 cup serving (comparable to premium dairy ice cream)
- Fat: 8-15g (primarily healthy plant-based fats)
- Saturated fat: 4-8g (primarily from coconut, if used)
- Cholesterol: 0mg (compared to 25-30mg in dairy ice cream)
- Protein: 1-3g (varies based on base ingredients)
- Sugar: 12-20g (can be modified based on sweetener amount)
- Dietary fiber: 1-3g (not typically found in dairy ice cream)
Data insight: Plant-based ice creams typically contain 25-30% less saturated fat than premium dairy ice creams, making them heart-healthier options.
Healthier Alternatives for the Recipe
Make your vegan frozen treat even more nutritious with these modifications:
- Replace sweeteners with puréed ripe bananas or dates (reduces added sugar by up to 70%)
- Use protein-fortified plant milks to boost protein content by 4-6g per serving
- Add 1 tablespoon of ground flaxseed for 2g additional fiber and omega-3 fatty acids
- Incorporate 1/4 cup silken tofu into chocolate varieties for extra protein without affecting flavor
- Use fruit-based sweetness (like mango, banana, or berries) instead of refined sweeteners
Serving Suggestions of Plant-Based Ice Cream
Elevate your plant-based ice cream experience with these creative serving ideas:
- Scoop between two warm vegan cookies for the ultimate ice cream sandwich
- Top with warm fruit compote for a delightful temperature contrast
- Create an affogato by pouring hot espresso over a scoop of vanilla plant-based ice cream
- Serve in chilled coconut shells for an Instagram-worthy presentation
- Use as a topping for warm fruit crisps or cobblers
- Layer with granola and fresh fruit for a breakfast-inspired sundae
Common Mistakes to Avoid
Even experienced home chefs can stumble when making vegan frozen treats. Here’s how to avoid typical pitfalls:
- Skipping the chill time: Always refrigerate your base before churning for improved texture (reduces ice crystal formation by up to 40%)
- Rushing the process: Impatient churning leads to larger ice crystals and grainy texture
- Over-sweetening: Plant-based bases taste less sweet when cold, but excessive sweetener prevents proper freezing
- Underfilling your container: Air exposure causes freezer burn; always use appropriately sized containers
- Not balancing flavors: Plants need more flavor enhancers—a dash of salt and acid (like lemon juice) make flavors pop
Storing Tips for the Plant-Based Ice Cream Recipe
Maximize the freshness and scoopability of your plant-based ice cream with these storage strategies:
- Store in shallow, wide containers rather than deep ones for more consistent freezing
- Place parchment paper directly on the surface before covering to prevent ice crystal formation
- Keep ice cream in the back of the freezer where temperature remains most stable
- Optimal serving temperature is about 6-10°F (-14 to -12°C), slightly warmer than your freezer’s normal setting
- Homemade plant-based ice cream maintains peak quality for 1-2 weeks (compared to 2-3 months for commercial varieties)
Expert tip: Pre-chill your serving bowls in the freezer for 15 minutes before scooping to prevent premature melting.

Conclusion
These ten plant-based ice cream recipes demonstrate that dairy-free frozen desserts can be just as creamy, flavorful, and satisfying as their traditional counterparts—with added nutritional benefits. By mastering a few key techniques and understanding the science behind plant-based freezing, you can create professional-quality frozen treats that will impress vegans and dairy-lovers alike.
Ready to start churning? Try the basic vanilla recipe first to perfect your technique, then experiment with different flavors and mix-ins. Share your creations on social media with #PlantBasedScoops, and let us know which recipe becomes your family favorite!
FAQs
Can I make plant-based ice cream without an ice cream maker?
Yes! The no-churn method works well, particularly for coconut-based recipes. For best results, freeze your mixture for 30 minutes, then vigorously whisk every 30 minutes for 3-4 hours to prevent large ice crystals.
Why does my plant-based ice cream freeze harder than dairy ice cream?
Plant-based milks generally have lower fat content than cream, resulting in harder freezing. Solutions include: adding more fat (coconut cream), incorporating alcohol-free vanilla extract (1-2 tablespoons), or adding 1 tablespoon of vegetable glycerin.
How can I make nut-free plant-based ice cream?
Use oat milk or coconut milk as your base. Both create excellent texture without nuts. For creamier oat-based ice cream, replace some of the liquid with coconut cream.
My plant-based ice cream has a grainy texture. What went wrong?
Graininess typically results from ice crystal formation. Next time, ensure your base is completely smooth before freezing, chill thoroughly before churning, and consider adding a natural stabilizer like arrowroot powder (1 tablespoon per quart).
Does plant-based ice cream melt faster than dairy ice cream?
Yes, most vegan frozen treats melt slightly faster than dairy versions due to different fat structures. Serve in chilled bowls and return to the freezer promptly after scooping.
10 Delicious Plant-Based Ice Cream Recipes to Try Today
- Total Time: 4 hours 30 minutes
- Yield: 6 servings 1x
Description
Delicious homemade plant-based ice cream that’s creamy, smooth, and completely dairy-free. Perfect for vegans or those with dairy allergies.
Ingredients
- 2 cans (13.5 oz each) full-fat coconut milk
- 1/2 cup maple syrup
- 1/4 cup coconut cream
- 2 tablespoons alcohol-free vanilla extract
- 1/4 teaspoon salt
- 1 tablespoon arrowroot powder
- 1 tablespoon vegetable glycerin (optional, for softer texture)
Instructions
- Chill coconut milk cans overnight in the refrigerator.
- Open the cans and scoop the thick cream into a blender, saving the liquid for another use.
- Add maple syrup, coconut cream, vanilla extract, salt, arrowroot powder, and vegetable glycerin (if using) to the blender.
- Blend on high until completely smooth and no graininess remains.
- Pour mixture into a bowl and chill in the refrigerator for at least 2 hours.
- If using an ice cream maker: Pour the chilled mixture into your ice cream maker and churn according to manufacturer’s instructions.
- If using no-churn method: Pour mixture into a freezer-safe container and freeze for 30 minutes. Remove and vigorously whisk to break up ice crystals. Return to freezer and repeat whisking every 30 minutes for 3-4 hours.
- Transfer to an airtight container and freeze for at least 2 hours before serving.
- Let sit at room temperature for 5-10 minutes before scooping for the best texture.
Notes
- This plant-based ice cream has the perfect creamy texture and is incredibly versatile!
- For best results, chill all ingredients before starting.
- Let the ice cream sit at room temperature for 5-10 minutes before serving for optimal texture.
- Prep Time: 20 minutes
- Cook Time: 10 minutes
- Category: Dessert
- Method: Freezing
- Cuisine: Vegan
Nutrition
- Calories: 280
Keywords: vegan ice cream, plant-based dessert, dairy-free ice cream, no-churn vegan ice cream, coconut milk ice cream