📑 Table of Contents ▶
- Pumpkin Pie Crumble Bars
- Creating the Perfect Pumpkin Pie Crumble Bars
- Fundamentals
- Preparation/setup
- Mastering the Art of Pumpkin Pie Crumble Bars
- Technique
- Tips and Tricks
- Perfecting Your Pumpkin Pie Crumble Bars
- Perfecting Results
- Troubleshooting and Variations
- Enjoying Your Pumpkin Pie Crumble Bars
- Serving and Presentation
- Pairings and Storage
- Conclusion
- FAQs – Pumpkin Pie Crumble Bars
- Related posts:
- Cranberry Almond Coffee Cake: Irresistibly Moist and Flavorful Delight
- Pumpkin Spice Latte Cake: Indulge in Ultimate Fall Bliss
- The Best Bread Pudding Recipe
Growing up, the aroma of pumpkin pie always filled our home during the autumn months. My grandmother had a knack for transforming simple ingredients into delightful treats, and her pumpkin pie was no exception. I remember the warmth of the kitchen and the joy of sneaking a taste of the filling before it went into the oven. As I now carry on her tradition, I’ve added my twist with these Pumpkin Pie Crumble Bars.
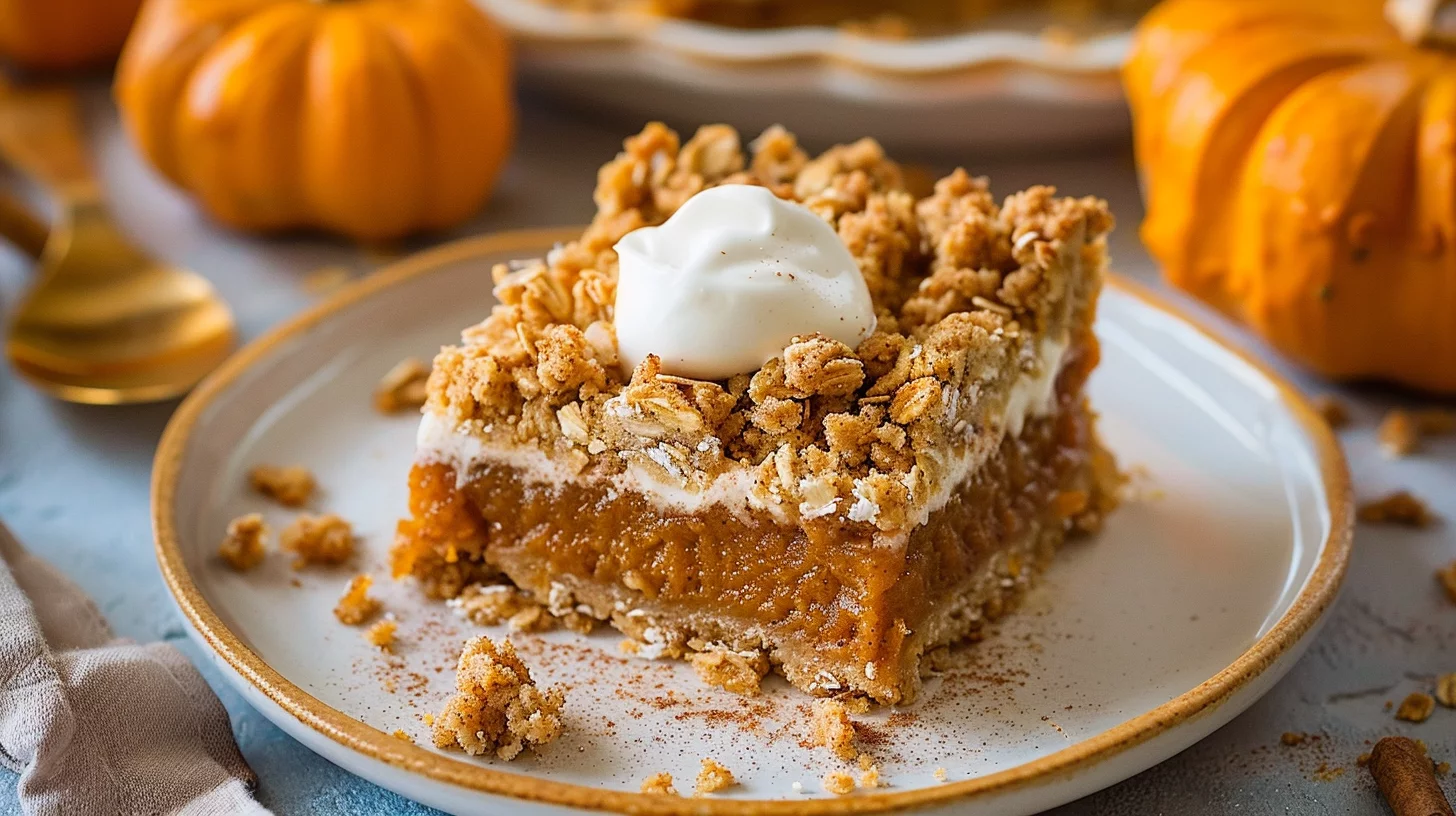
Pumpkin Pie Crumble Bars have become a staple in my kitchen, capturing the essence of fall in every bite. The combination of a buttery oat crust and a creamy pumpkin filling makes them irresistible. Whenever I make them, I’m reminded of those cherished family gatherings, where food brought us all together.
These bars are perfect for those who crave the flavors of pumpkin pie but want something a little different. The simplicity of the ingredients and the ease of preparation make them a go-to dessert for any occasion. Whether it’s a cozy evening at home or a festive holiday gathering, Pumpkin Pie Crumble Bars are sure to delight.
As you embark on this culinary adventure, I hope you find as much joy in making these bars as I do. The process is straightforward, yet the results are nothing short of spectacular. Let’s dive into the world of Pumpkin Pie Crumble Bars and create something truly special.
Print
Pumpkin Pie Crumble Bars
- Total Time: 1 hour 15 minutes
- Yield: 9 servings 1x
Description
Indulge in fall flavors with our irresistible Pumpkin Pie Crumble Bars recipe. Learn how to make these delicious seasonal treats today!
Ingredients
- 1 1/4 cups (176g) all-purpose flour
- 1 1/4 cups (116g) quick oats (old fashioned works too)
- 1/2 tsp (3 ml) salt
- 1/2 tsp (3 ml) baking soda
- 1/2 cup (105g) granulated sugar
- 1/2 cup (110g) packed light-brown sugar
- 3/4 cup (170g) unsalted butter, melted
- 1 tsp (5 ml) vanilla extract
- 1/4 cup (50g) granulated sugar
- 1/4 cup (55g) packed light brown sugar
- 1 tsp (5 ml) ground cinnamon
- 1/2 tsp (3 ml) ground nutmeg
- 1/4 tsp (1 ml) ground ginger
- 1/8 tsp (1 ml) ground cloves
- 1/4 tsp (1 ml) salt
- 1 large egg
- 1 large egg yolk
- 1/2 tsp (3 ml) vanilla extract
- 1 1/4 cups (296g) canned pureed pumpkin
- 1/3 cup (85ml) coconut milk or soy milk
- Sweetened whipped cream and cinnamon, for serving (optional)
Instructions
- Set your oven to a temperature of 350°F. In a bowl, combine the flour, oats, salt, and baking soda using a whisk for half a minute. Incorporate 1/2 cup of granulated sugar and 1/2 cup of brown sugar, mixing until smooth.
- Blend the melted butter with vanilla and add it to the dry ingredients, stirring with a spoon until the mixture is uniformly moist.
- Lightly press half of this mixture into a greased 8×8-inch baking dish (a 9×9-inch dish is also suitable; just slightly reduce the baking time if needed) and bake in the preheated oven for 15 minutes.
- In the meantime, in another bowl, mix together 1/4 cup of granulated sugar, 1/4 cup of brown sugar, cinnamon, nutmeg, ginger, cloves, and salt.
- Add the egg, egg yolk, and vanilla extract, stirring until combined. Then, mix in the pumpkin puree followed by the milk.
- Pour this pumpkin mixture over the baked base and return it to the oven for another 15 minutes. Take it out and scatter the reserved crumb mixture on top, breaking it into small pieces.
- Move the oven rack a bit higher, not directly under the top, but a few levels below, and continue baking for about 20 to 25 more minutes until the top is golden and the center slightly wobbles.
- Take it out of the oven and let it cool at room temperature for an hour, then refrigerate for an additional hour (or serve warm right from the oven like a crumble with ice cream).
- Slice into squares and, if you wish, accompany with sweetened whipped cream and a sprinkle of cinnamon.
Notes
- Prep Time: 20 minutes
- Cook Time: 55 minutes
- Category: Dessert
- Method: Baking
- Cuisine: American
Nutrition
- Calories: 280
- Fat: 12g
- Protein: 4g
Keywords: american, dessert, homemade
Creating the Perfect Pumpkin Pie Crumble Bars
Fundamentals
The foundation of any great Pumpkin Pie Crumble Bar lies in the balance of flavors and textures. At the heart of these bars are the oats and flour, providing a hearty base that contrasts beautifully with the creamy pumpkin filling. The combination of granulated sugar and brown sugar adds a sweetness that complements the spices perfectly.
Incorporating melted butter into the mix helps bind the ingredients together, creating a crumbly texture that is both satisfying and delicious. The addition of spices like cinnamon, nutmeg, ginger, and cloves gives the bars their signature fall flavor. Understanding these elements is key to mastering the art of Pumpkin Pie Crumble Bars.
Preparation/setup
Preparing your workspace is essential for a smooth baking experience. Start by preheating your oven to 350°F and greasing an 8×8-inch baking dish. This will ensure that your bars bake evenly and are easy to remove from the pan.
In a large bowl, whisk together the flour, oats, salt, and baking soda. This dry mixture forms the base of your bars, while the sugars and melted butter provide the necessary moisture. Once combined, half of this mixture will become the crust, which you should press into the prepared baking dish and bake for 15 minutes.
Mastering the Art of Pumpkin Pie Crumble Bars
Technique
The technique for creating the perfect Pumpkin Pie Crumble Bars involves layering and timing. After baking the initial crust, you’ll prepare the pumpkin filling by mixing the remaining sugars, spices, egg, egg yolk, pumpkin puree, and milk. This mixture should be smooth and well-blended before pouring it over the baked crust.

Pumpkin Pie Crumble Bars
Return the dish to the oven for another 15 minutes to allow the filling to set slightly. During this time, the aroma of spices will begin to fill your kitchen, evoking the feeling of fall. Once the filling is partially set, sprinkle the reserved crumb mixture over the top and continue baking until golden brown.
Tips and Tricks
For best results, make sure your ingredients are at room temperature before starting. This will ensure a smoother blend and even baking. If you’re looking for additional flavor, consider adding a dash of vanilla extract to the pumpkin filling for a touch of sweetness.
To achieve the perfect crumb topping, break the mixture into small pieces before scattering it over the filling. This will create a delightful texture contrast that enhances every bite. If you love bars with an oat base, you’ll definitely want to check out these Healthy Chocolate Banana Oat Muffin Bars with Greek Yogurt.
Perfecting Your Pumpkin Pie Crumble Bars
Perfecting Results
Achieving the perfect Pumpkin Pie Crumble Bars requires attention to detail and patience. Once baked, allow the bars to cool at room temperature for an hour. This cooling period is crucial as it helps the filling set properly, making it easier to slice and serve.
If you’re in a hurry, you can serve the bars warm, similar to a crumble. However, for the best texture and flavor, refrigerate the bars for an additional hour. This not only enhances the taste but also makes them more manageable to cut into neat squares. For more delightful pumpkin recipes, explore our Golden Pumpkin Balls.
Troubleshooting and Variations
If you find that your bars are too crumbly, it may be due to overbaking. Keep an eye on the oven during the final baking stage, and remove the bars once the top is golden and the center has a slight wobble. For a dairy-free option, substitute the butter with a plant-based alternative and use coconut milk instead of regular milk.
Experimenting with spices can also add a unique twist to your bars. Try adding a pinch of cardamom or allspice for a different flavor profile. If you’re looking for more creative bar recipes, our Waffle Muffin Bars are a must-try.
Enjoying Your Pumpkin Pie Crumble Bars
Serving and Presentation
Presentation is key when serving Pumpkin Pie Crumble Bars. Slice the bars into even squares and arrange them on a platter for a visually appealing display. For an extra touch, top each square with a dollop of sweetened whipped cream and a sprinkle of cinnamon.
These bars make a delightful addition to any dessert table, especially during the holiday season. Their rich flavors and inviting aroma will surely impress your guests. For a cool contrast, pair them with our Frozen Greek Yogurt Peanut Butter Chocolate Chip Ice Cream Bars.
Pumpkin Pie Crumble Bars
Pairings and Storage
While these bars are a treat on their own, they also pair well with a hot cup of coffee or a glass of cold milk. If you love the combination of sweet and creamy, try serving them with a scoop of vanilla ice cream. To store, place the bars in an airtight container and refrigerate for up to five days.
For longer storage, freeze the bars in a single layer before transferring them to a freezer-safe container. This way, you can enjoy the taste of fall any time you like. If you’re a fan of no-bake treats, don’t miss our No-Bake Peanut Butter Oat Chocolate Energy Bars with Fudge Layers.
Conclusion
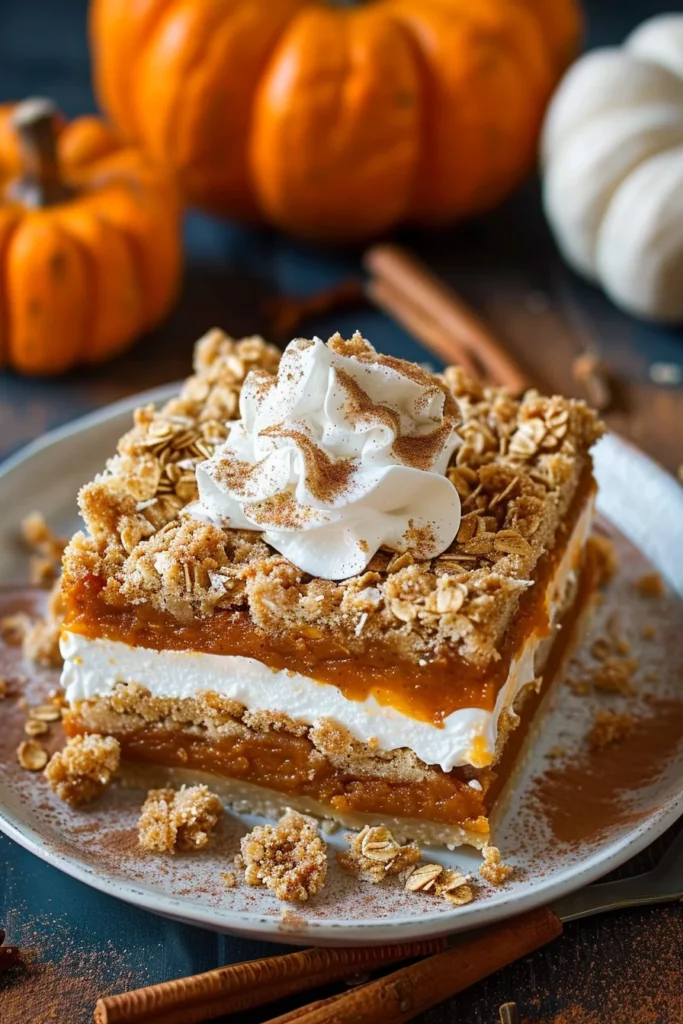
Pumpkin Pie Crumble Bars are a delightful fusion of classic pumpkin pie flavors with the ease and texture of a crumble bar. The combination of a buttery oat base and creamy spiced pumpkin filling makes them a hit at any gathering. With simple ingredients and straightforward preparation, these bars offer a delicious taste of fall that can be enjoyed year-round.
As you perfect your own Pumpkin Pie Crumble Bars, remember the fundamentals of balance and texture. With a few tips and tricks, you can create a dessert that’s both comforting and impressive. Whether served warm or chilled, these bars are sure to become a family favorite, bringing warmth and joy to every occasion.