📑 Table of Contents ▶
- Perfecting Your Bread Recipe with Instant Yeast
- Fundamentals
- Preparation/setup
- Directions
- Enhancing Your Bread Recipe with Instant Yeast
- Technique
- Tips/Tricks
- Troubleshooting Your Bread Recipe with Instant Yeast
- Perfecting Results
- Troubleshooting/Variations
- Serving and Presenting Your Bread Recipe with Instant Yeast
- Serving/Presentation
- Pairings/Storage
- Conclusion
- Related posts:
- Soft Brioche Loaf Easy French Bread Recipe
- Sugar-Dusted Butter Doughnut Bites: How to Make the Best Recipe Ever
- Healthy Double Chocolate Banana Muffins With Peanut Butter Swirl - Decadent Indulgence for Guilt-Fre...
Bread Recipe With Instant Yeast
Creating homemade bread is a cherished ritual that turns any ordinary day into something special. I remember the first time I baked bread on my own, the scent filling the kitchen and spilling into every corner of the house. The golden crust and soft interior were not just delightful but felt like a warm hug shared with family. This nostalgia drives my love for a simple bread recipe with instant yeast.
The beauty of a bread recipe with instant yeast lies in its convenience. Instant yeast simplifies the process, allowing us to enjoy freshly baked bread without waiting for hours. It’s all about transforming basic ingredients into delicious loaves that bring loved ones together. There’s nothing like a slice of homemade bread, slathered in butter or transformed into a scrumptious sandwich.
Throughout my culinary journey, I’ve learned that mastering a bread recipe with instant yeast is a fundamental skill, unlocking endless possibilities. Let’s dive into the details and uncover the joy of baking bread from scratch, making cherished memories along the way.
Perfecting Your Bread Recipe with Instant Yeast
Fundamentals
Understanding the essential elements of a bread recipe with instant yeast is a great starting point. Instant yeast serves as the star ingredient because it needs no warm water activation like traditional yeast. It goes directly into the dry ingredients, making it straightforward and user-friendly.
In this recipe, the combination of warm water, sugar, and yeast sets the foundation for a successful dough. Sugar nourishes the yeast, helping it to grow and create that lovely rise in the bread. The choice of flour also matters; all-purpose flour provides the right texture and strength needed for the loaf.
Salt adds flavor and controls the fermentation process, balancing out the sweetness of the sugar. With these fundamentals in place, your homemade bread will shine with flavor and texture.
Preparation/setup
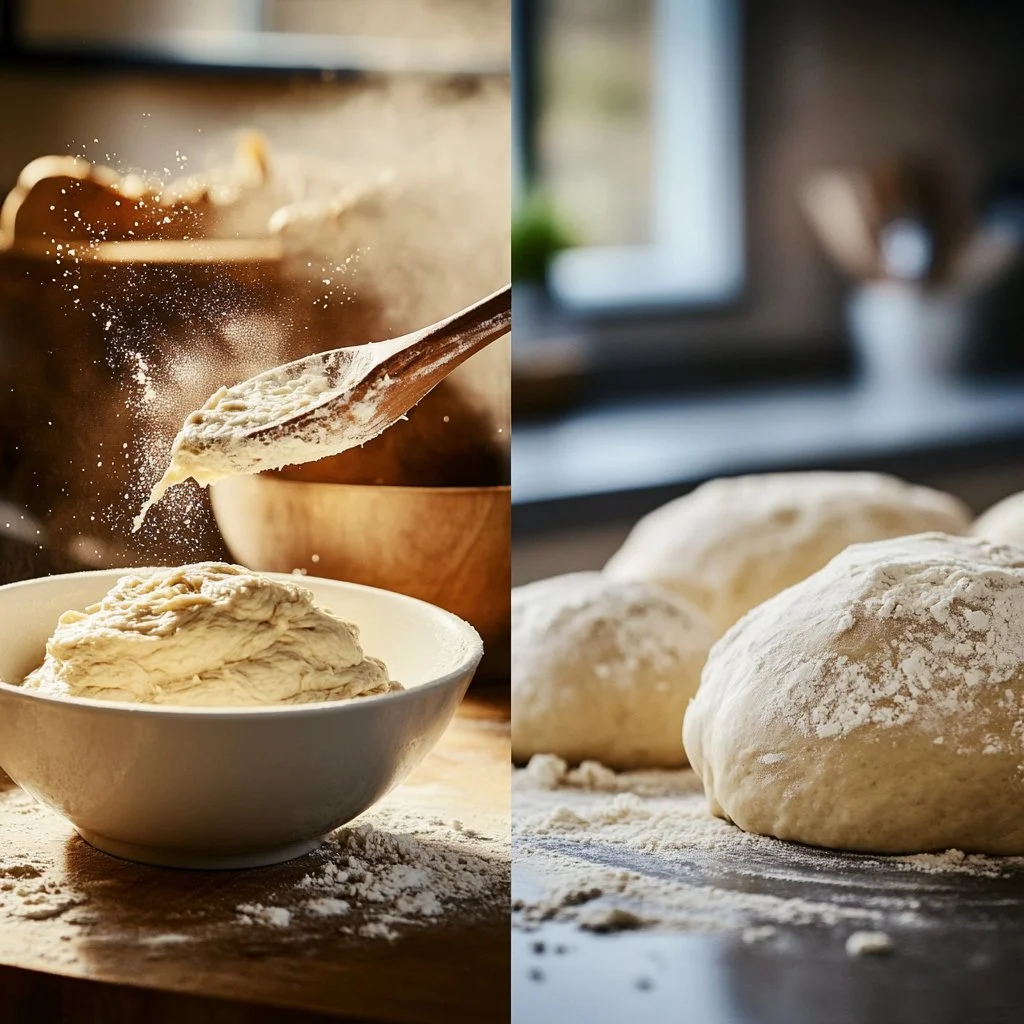
Preparation plays a crucial role in the bread-making process. Begin by gathering all your ingredients to streamline the workflow. Having everything in place ensures a smooth baking experience and helps maintain focus during the mixing process.
Start by pouring 2 cups of very warm water into a large mixing bowl. Then, sprinkle in one packet of rapid-rise yeast, followed by ¼ cup of granulated sugar. Stir this mixture gently and let it rest for about 5 minutes. This step is essential for proofing the yeast; you’ll notice a creamy foam forming on the surface when it’s ready.
Next, incorporate 2 tablespoons of vegetable oil along with half of the flour (about 2¼ cups) and 1½ teaspoons of salt. Whether using a dough hook or mixing by hand, start blending these ingredients together. Gradually add the remaining flour until the dough pulls away from the sides of the bowl.
Ingredients
Here are the ingredients you’ll need for your bread recipe with instant yeast:
- 2 cups very warm water (tap water works well)
- 1 packet rapid rise yeast (or 2 1/4 teaspoons)
- ¼ cup granulated sugar
- 2 tablespoons vegetable oil
- 4¾ – 5¼ cups all-purpose flour
- 1½ teaspoons salt
Directions
- Place warm water, yeast, and sugar in a large bowl. Stir and allow it to stand for 5 minutes to proof.
- Add vegetable oil, half of the flour (2¼ cups), and salt. Mix using a dough hook or by hand.
- Add the remaining flour gradually until the dough pulls away from the sides of the bowl. Knead the dough either with the dough hook or on a lightly floured surface for 4-5 minutes.
- Cover the dough with a dish towel and allow it to rise in a warm spot for 20 minutes, or until it almost doubles in size.
- Divide the dough in half, placing each half into a well-greased loaf pan.
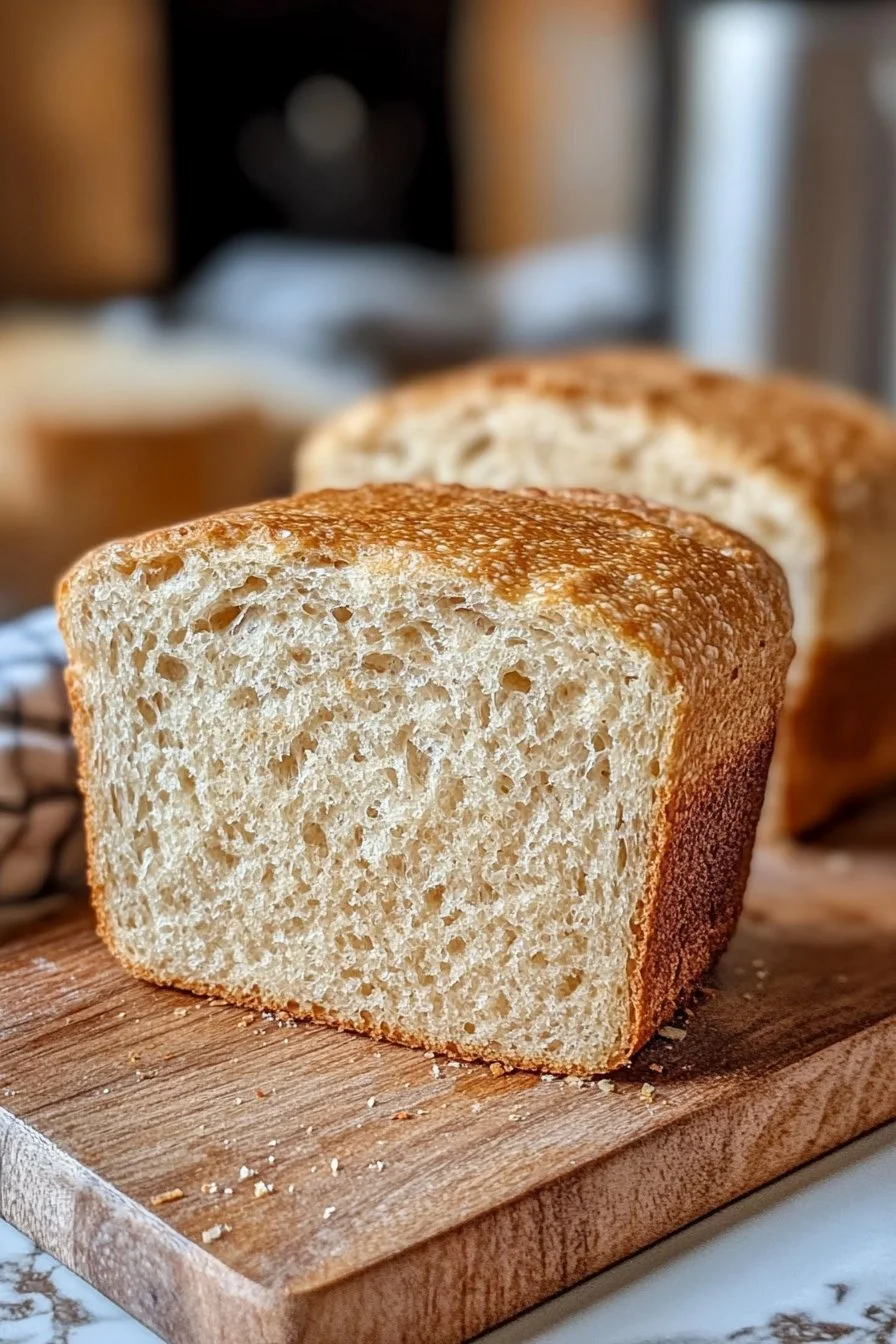
- Bake in a preheated 350°F oven for 25-30 minutes. The top should be golden brown, and tapping on it should sound hollow.
- Remove from the oven and let cool in the pans for 5-10 minutes before transferring to a cooling rack to cool completely.
- Slice the cooled bread into ½-inch slices for sandwiches or toast. Store in an airtight container for up to 3 days or freeze for up to 3 months.
Enhancing Your Bread Recipe with Instant Yeast
Technique
Perfecting the technique in your bread recipe with instant yeast can elevate your baking game. Kneading the dough is where the magic happens, as it develops the gluten necessary for structure and texture. Make sure not to skimp on this step. Kneading thoroughly ensures a light, airy loaf.
If you’re kneading by hand, add a bit of flour to your work surface to prevent sticking. It’s a tactile experience, and you’ll know the dough is ready when it’s smooth and elastic. For those using a stand mixer, start with a low speed to combine ingredients, gradually increasing as the dough comes together.
A warm, draft-free environment is ideal for allowing the dough to rise. Whether it’s the oven set to warm or a cozy corner in your kitchen, make sure it is conducive to fermentation. Covering the bowl with a damp cloth helps retain moisture, ensuring the dough stays hydrated.
Tips/Tricks
Here are a few helpful tips to ensure success when using a bread recipe with instant yeast:
- Use a kitchen thermometer to check the water temperature. It should be warm but not hot, ideally around 110°F.
- When you proof the yeast, don’t skip the sugar; it significantly helps the yeast become active.
- If you want to add seeds or herbs for extra flavor, do so during the mixing stage. They will integrate beautifully into the dough.
Furthermore, always have extra flour nearby in case you need to adjust the consistency. If the dough is too sticky, sprinkling a little flour while kneading can help.
Troubleshooting Your Bread Recipe with Instant Yeast
Perfecting Results
Achieving the perfect loaf can be a rewarding journey. The first consideration is the rise of the dough. If it fails to rise adequately, check the temperature of your water; it should not exceed 120°F, as too-hot water can kill the yeast.
Another factor affecting the rise is the amount of flour used. Adding too much flour too quickly can impact the humidity in the dough. A good bread dough should feel tacky but not overly sticky, allowing it to rise well.
Lastly, the baking time can also vary. If your oven runs cool, extending the baking time slightly may be necessary to achieve that golden crust. Conversely, if it browns too quickly, you may need to tent it with foil to prevent burning.
Troubleshooting/Variations
Don’t hesitate to experiment with variations once you comfortably master the basics. You might try whole wheat flour or a combination of grains for a different texture and taste. Adding herbs like rosemary or garlic can further personalize your bread recipe with instant yeast, infusing unending flavor into each slice.
In case of unanticipated issues, you can always revert to your tried-and-true techniques. For example, if the bread turns out dense, ensure proper measuring methods by weighing ingredients for accuracy next time.
Serving and Presenting Your Bread Recipe with Instant Yeast
Serving/Presentation
When serving homemade bread, presentation matters. A beautifully sliced loaf arranged on a rustic cutting board instantly elevates any meal. Consider serving it warm, alongside butter or spreads for a delightful accompaniment to your dinner.
For special occasions, consider transforming slices into tasty appetizers. Create bruschetta or toast topped with fresh ingredients, highlighting the versatility of your homemade bread.
Pairings/Storage
Enjoy your freshly baked bread in various ways. It serves wonderfully as a base for sandwiches or toasted as a breakfast staple. Pair it with soups, salads, or pasta dishes for a complete meal.
Storing your bread properly extends its life. An airtight container keeps it fresh for three days on the countertop, while freezing slices allows you to savor them later. Wrap individual slices in plastic wrap before placing them in a freezer bag for easy access.
Conclusion
Baking bread opens a world of culinary possibilities and lovely moments shared with family and friends. Your journey with a bread recipe with instant yeast transforms simple ingredients into something spectacular, creating fond memories along the way. The method becomes a foundation for your baking skill set, allowing you to experiment and enjoy the fruits of your labor. By mastering this recipe, you ensure that the aroma of freshly baked bread becomes a comforting presence in your home.