
📑 Table of Contents ▶
- Fundamentals
- Preparation/setup
- Directions
- Perfecting Spring Roll Wrappers
- Technique
- Tips/tricks
- Perfecting Results
- Troubleshooting/variations
- Serving Spring Roll Wrappers
- Pairings/storage
- Homemade Spring Roll Wrappers
- Related posts:
- Teriyaki Ginger Tofu Recipe
- Sour Cream Chicken Enchilada Casserole: The Best Recipe to Try Tonight
- Healing Chicken Noodle Soup
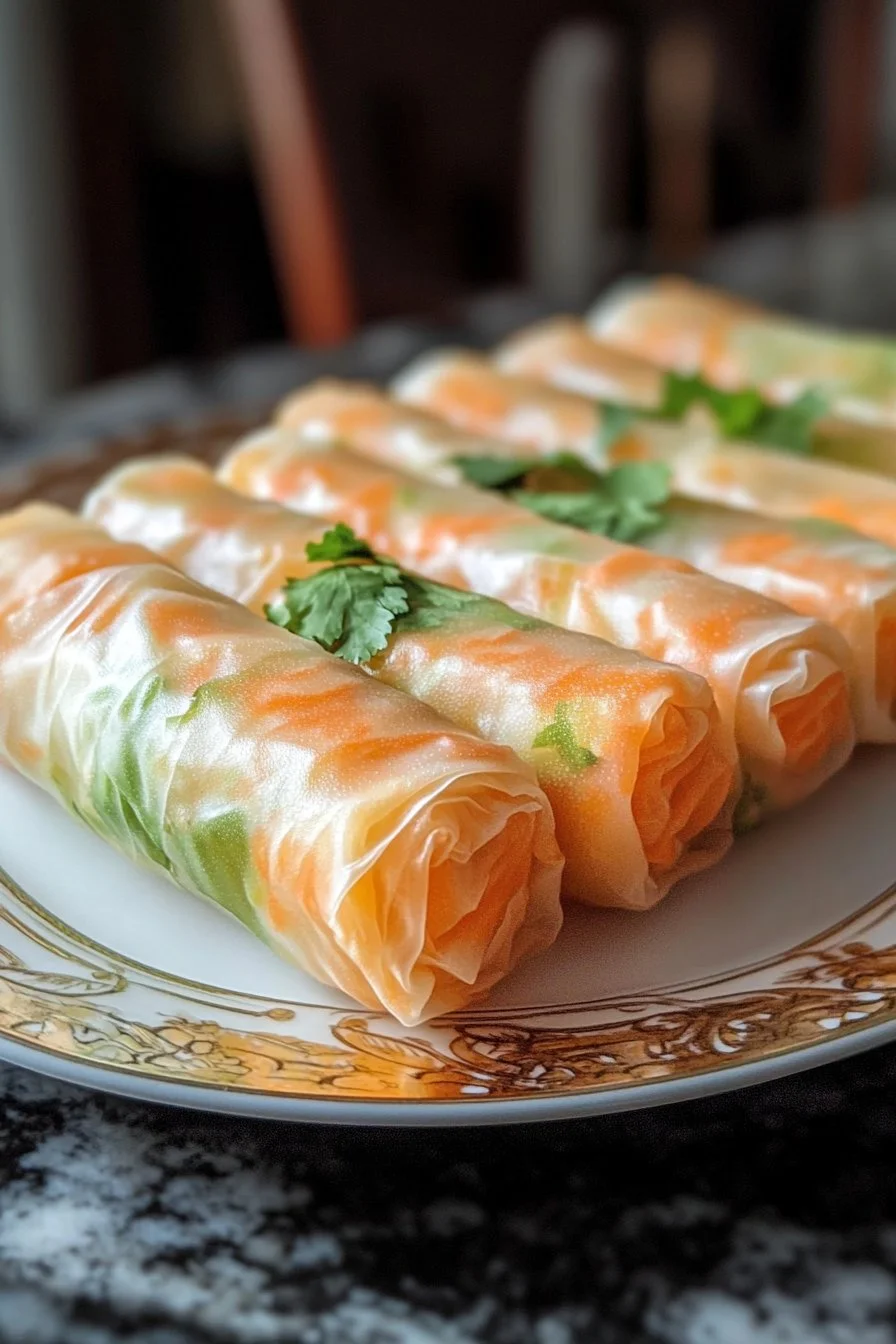
Spring Roll Wrappers
Making spring roll wrappers at home always feels like a delightful adventure. The first time I attempted it, I was captivated by the process. The scent of warm dough and the anticipation of creating something delicious filled my kitchen. Each step—from mixing the dough to rolling it out—became a moment of pure joy. I vividly recall the excitement of watching each wrapper take shape, ready to be filled with fresh and flavorful ingredients.
Using simple ingredients like all-purpose flour, hot water, and salt, I discovered the magic of crafting something from scratch. As I rolled each delicate sheet, I appreciated the versatility and personality of spring roll wrappers. They perfectly complement an array of fillings, transforming each dish into a delightful experience. The satisfaction of serving my homemade wrappers to family and friends has turned into a treasured tradition.
Spring roll wrappers represent not just a food item but a culinary connection. Each one tells a story of love, creativity, and the joy of sharing meals. This journey of learning to make spring roll wrappers has inspired me to dive deeper into the world of cooking, celebrating the simple yet profound act of making something delicious by hand.
Spring Roll Wrappers
Fundamentals
Creating spring roll wrappers relies on a few simple fundamentals. Each ingredient plays a crucial role in forming the perfect foundation. The all-purpose flour gives the wrappers their structure, while the hot water activates the gluten, ensuring a pliable texture. The salt, though seemingly small, enhances the overall flavor, making each bite a little more delightful.
When approaching the art of making spring roll wrappers, attention to detail matters. You’ll want to mix the ingredients until they form a cohesive dough. Ensuring the right consistency leads to easy handling during the rolling process. This step lays the groundwork for successful wrappers that can gracefully cradle whatever filling you choose.
Preparation/setup
Gather all your ingredients before starting. You need 240 grams of all-purpose flour, 6 fl oz of hot water, and 6 grams of salt. A clean workspace is essential, so clear your kitchen counter and get ready for a wonderful process. Having a rolling pin on hand will also make things easier as you bring your wrappers to life.
Start by measuring the flour and salt accurately. Proper measurements are key to success. Once you have everything set up, focus on mixing your dough. Gradually add the hot water to the flour mixture and watch as it transforms. This part can be both a little messy and incredibly rewarding as you feel your dough begin to form.
Ingredients
For homemade spring roll wrappers, the ingredients are minimal yet impactful. Here’s what you need:
- 240 g all-purpose flour
- 6 fl oz hot water
- 6 g salt
- Oil for cooking
These ingredients combine to create the perfect wrapper base. The all-purpose flour will support the structure and texture, while the hot water will ensure you can manipulate the dough efficiently. Salt will enhance the flavor, ensuring each bite holds a little more excitement.
Let your creativity flow as you prepare these wrappers. Experimenting with different fillings brings new life to your spring rolls. Whether you opt for crisp vegetables, fragrant herbs, or a savory protein, the versatility of these wrappers guarantees delicious results.
Directions
- In a mixing bowl, combine the 240 g of all-purpose flour and 6 g of salt.
- Gradually pour in the 6 fl oz of hot water, mixing with a spatula or your hands.
- Knead the dough until it becomes smooth and elastic, about 5-7 minutes.
- Divide the dough into smaller balls, and cover them with a damp cloth to prevent drying.
- Preheat a non-stick skillet over medium heat and lightly grease it with oil.
- Take one ball of dough, and roll it out on a floured surface until it’s thin and translucent.
- Carefully place the wrapper in the preheated skillet and cook for about 30 seconds on each side until it becomes slightly firm.
- Transfer the cooked wrapper to a plate, and cover with a cloth to keep warm.
- Repeat the rolling and cooking process for the remaining dough balls.
These wrappers are perfect for rolling your desired filling, whether it’s vegetables, seafood, or chicken. As you master the technique, you’ll find the rhythm that makes each step enjoyable.
Perfecting Spring Roll Wrappers
Technique
Perfecting the technique for making spring roll wrappers requires practice and patience. When rolling out the dough, aim for equal thickness throughout to ensure even cooking. Thin but sturdy wrappers maintain their shape while enveloping various fillings beautifully. Pay attention to the temperature of the skillet as well; too hot can cause the wrappers to burn, while too cool may leave them undercooked.
Additionally, play around with cooking times based on thickness. Learning this technique sets you on a path to achieve wrappers that impress everyone. This approach serves as a great foundation for all your spring rolling adventures.
Tips/tricks
Here are some handy tips to elevate your spring roll wrapper game:
- Rest the dough: Allow the dough to rest for at least 30 minutes after kneading. This step improves elasticity and makes rolling easier.
- Dust the surface with flour: To prevent sticking, lightly dust the surface while rolling out each wrapper.
- Keep wrappers separated: As you cook and stack wrappers, place a piece of parchment paper in between each to avoid them sticking together.
- Try different fillings: Don’t hesitate to get creative with fillings. Use fresh vegetables, herbs, or proteins for diverse flavors.
These tricks can help you become more confident in your baking journey. The more you practice, the more enjoyable this process will become.
Perfecting Results
Troubleshooting/variations
Sometimes, making spring roll wrappers can come with challenges. If your dough feels too sticky, gradually incorporate more flour while kneading. If the dough is crumbly, add tiny amounts of warm water until you reach the desired consistency.
For variations, consider adding a pinch of seasoning, like garlic powder or ground pepper, into the dough for a flavor boost. You could also explore adding a splash of sesame oil for a nutty aroma.
Don’t be discouraged by initial attempts; each batch is a step closer to mastering the art of rolling. Embrace any challenges you face and view them as part of the enjoyable cooking journey.
Serving Spring Roll Wrappers
Pairings/storage
Once you finish making your spring roll wrappers, think about how you want to serve them. A fresh, vibrant dipping sauce can elevate your dish. Consider mixing soy sauce with vinegar, or creating a zesty peanut sauce.
For storage, keep any unused wrappers carefully wrapped in plastic or an airtight container to maintain their freshness. You can refrigerate them for up to a week. If you want to preserve them longer, consider freezing, layering with parchment paper to prevent sticking.
These wrappers open the door to exciting culinary creations. Enjoy the process of serving and savoring your homemade delights.
Creating spring roll wrappers at home is more than just a cooking task; it’s an invitation to connect with flavors and traditions. By embracing simple ingredients and an uncomplicated approach, you produce something delightful from the comforts of your kitchen. Every batch brings you closer to mastering this versatile skill, allowing you to share delicious meals full of love and creativity.
Print
Homemade Spring Roll Wrappers
- Total Time: 25 minutes
- Yield: 12 wrappers 1x
- Diet: Vegan
Description
Quick and easy guide to making homemade spring roll wrappers that are perfect for your favorite fillings.
Ingredients
- 240 g all-purpose flour
- 6 fl oz hot water
- 6 g salt
- Oil for cooking
Instructions
- In a mixing bowl, combine the all-purpose flour and salt.
- Gradually pour in the hot water, mixing with a spatula or your hands.
- Knead the dough until it becomes smooth and elastic, about 5-7 minutes.
- Divide the dough into smaller balls, and cover them with a damp cloth to prevent drying.
- Preheat a non-stick skillet over medium heat and lightly grease it with oil.
- Take one ball of dough, and roll it out on a floured surface until it’s thin and translucent.
- Carefully place the wrapper in the preheated skillet and cook for about 30 seconds on each side until it becomes slightly firm.
- Transfer the cooked wrapper to a plate, and cover with a cloth to keep warm.
- Repeat the rolling and cooking process for the remaining dough balls.
Notes
Allow the dough to rest for at least 30 minutes before rolling for better elasticity. Use parchment paper between wrappers to prevent sticking.
- Prep Time: 15 minutes
- Cook Time: 10 minutes
- Category: Side Dish
- Method: Cooking
- Cuisine: Asian
Nutrition
- Serving Size: 1 wrapper
- Calories: 45
- Sugar: 0g
- Sodium: 1mg
- Fat: 0.5g
- Saturated Fat: 0g
- Unsaturated Fat: 0.5g
- Trans Fat: 0g
- Carbohydrates: 9g
- Fiber: 0g
- Protein: 1g
- Cholesterol: 0mg
Keywords: spring rolls, homemade wrappers, Asian cuisine, cooking from scratch, vegan recipe