📑 Table of Contents ▶
- Perfecting Pioneer Woman Lemon Bars
- Fundamentals
- Preparation/Setup
- Directions
- Mastering the Technique of Lemon Bars
- Technique
- Tips/Tricks
- Achieving Perfect Lemon Bars
- Perfecting Results
- Troubleshooting/Variations
- Serving and Storing Lemon Bars
- Serving/Presentation
- Pairings/Storage
- Related posts:
- Cinnamon Sugar Air Fryer Churros: Irresistible Sweet Treats in Minutes!
- Cinnamon Roll Apple Pie: Irresistible Apple Bliss
- Sponge Cake Recipe: How to Make a Fluffy Delight
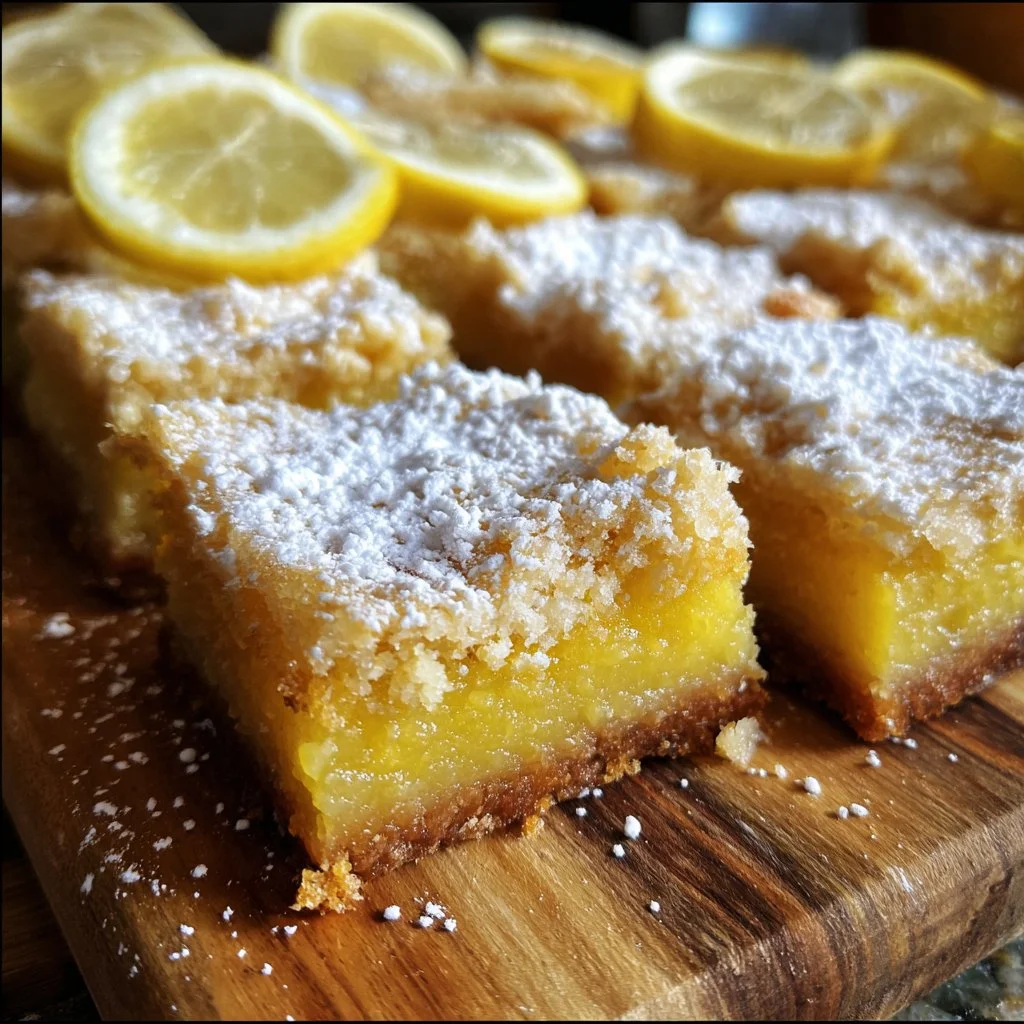
Pioneer Woman Lemon Bars
Creating delicious dishes often stems from cherished memories and simple ingredients. Pioneer Woman Lemon Bars embody everything that’s comforting and delightful about baking. They remind me of afternoons spent in the kitchen with my grandma, where the scent of citrus filled the air and laughter echoed as we whipped together delightful treats.
These lemon bars stand out with their perfect balance of sweet and tart flavors. The brightness of fresh lemon zest and juice enriches each bite. As I worked on perfecting my own version, I found that the laughter and love infused in the process truly create a dish worth sharing.
Just like Grandma did, I love to feel the buttery crust crumble under my fingers as I prepare the base for the tangy filling. Each time I bake these bars, I rediscover the joy of cooking from scratch and the magic that happens when flavors combine seamlessly. Pioneer Woman Lemon Bars celebrate those moments, bringing family and friends together around the table to enjoy a timeless dessert that’s both refreshing and indulgent.
Let’s dive into the world of lemon bars, celebrating these delightful squares that capture the essence of home cooking and cherished traditions.
Perfecting Pioneer Woman Lemon Bars
The key to creating perfect Pioneer Woman Lemon Bars lies in understanding the fundamentals of the dish. Recognizing the balance of sweetness from the sugar and the tartness from the lemon creates that delightful contrast that makes lemon bars so irresistible.
Fundamentals
At the heart of every great lemon bar is its crust and filling. The crust, buttery and tender, provides a solid base for the lemon filling. The filling, made from the zesty juice and zest of lemons, brings a bright flavor that captivates the palate. Every component contributes to the delicious outcome, and each step plays a vital role.
Preparation/Setup
Preparation starts with preheating the oven to a warm 350 degrees Fahrenheit. Grease your 9-by-13-inch pan for the crust, allowing the bars to release easily once baked. For those who prefer a thicker crust, opt for a 9×9 pan. Gathering all the ingredients creates a smooth workflow, making it easier to focus on the fun part—the mixing and baking.
Ingredients
For the crust, you’ll need:
- 2 cups of all-purpose flour
- 1/2 cup sugar
- 1/4 teaspoon salt
- 1 cup salted butter, cut into small cubes
For the lemon filling, gather:
- 1-1/2 cup sugar
- 1/4 cup flour
- 4 large eggs
- Zest and juice of 4 medium-sized lemons (approximately 1 cup lemon juice)
- Powdered sugar for dusting
Directions
To start, combine the 2 cups of flour, 1/2 cup sugar, and 1/4 teaspoon salt in a bowl. Add the 1 cup of salted butter and use a pastry cutter to blend everything until the mixture resembles fine crumbs. Press this mixture into the prepared pan and bake for about 20 minutes or until golden around the edges.
Meanwhile, for the filling, mix the 1-1/2 cup sugar with the 1/4 cup flour in a new bowl. Crack in the 4 large eggs and whisk until thoroughly combined. Add the zest and juice of the lemons, mixing well. This fragrant mixture will create that classic lemony taste everyone loves. Pour this lemon filling over the baked crust and return to the oven for another 20 to 30 minutes, or until the filling sets and does not jiggle.
Allow the bars to cool in the fridge for at least two hours. Once cooled, sift powdered sugar across the top before cutting them into squares. Remember to store leftover lemon bars in the fridge to maintain their freshness.

Mastering the Technique of Lemon Bars
The technique you use when making Pioneer Woman Lemon Bars greatly affects their outcome. Whether you’re familiar with baking or trying it for the first time, a few techniques can make all the difference.
Technique
Baking the crust until it’s just golden prevents it from becoming too hard. You want a tender base that holds the filling without crumbling apart. When preparing the lemon filling, it’s crucial to whisk it thoroughly to ensure the eggs blend seamlessly with the sugar and flour, creating a smooth texture.
Tips/Tricks
Be precise with your measurements. Baking is a science, and even a slight deviation can affect the final product. Since lemons can vary in juiciness, it’s wise to have a few extra lemons on hand in case you need more juice. Always zest the lemons before juicing them—this step saves time and ensures you capture all the essential oils from the zest that enhance the flavor.
If you’re looking for an extra touch of texture, consider adding a bit of lemon zest directly into the crust mixture for additional flavor. Experimenting with the sweetness of the sugar can also yield a personalized result; if you prefer a tangier treat, slightly reduce the sugar in the filling.
Achieving Perfect Lemon Bars
Creating Pioneer Woman Lemon Bars is all about achieving that perfect balance of flavors and textures. There are a few techniques to refine, ensuring that each bar shines with lemony goodness.
Perfecting Results
Cooling your bars properly ensures that they set correctly. If you cut into them too soon, the filling may not have fully firmed up, leading to messy squares. Once they have chilled, slicing with a clean knife gives you neat edges and a beautiful presentation.
Troubleshooting/Variations
If your lemon bars don’t set properly, it may be due to undercooking the filling. Keep an eye on the baking time, and check for doneness by gently shaking the pan. If the center jiggles significantly, they need more time in the oven.
For a delightful twist, consider adding a layer of meringue on top for a fluffy finish. Simply whip up egg whites with some sugar until stiff peaks form, then spread this on top of the cooled lemon filling and bake until golden.
Serving and Storing Lemon Bars
Serving Pioneer Woman Lemon Bars is a simple yet essential step. Presentation can elevate the experience of enjoying these delightful treats.
Serving/Presentation
Serve these lemon bars chilled. Dusting them with powdered sugar adds a touch of elegance and makes for a beautiful presentation. Consider placing a thin slice of lemon or a sprig of mint on top for a pop of color. Pairing them with a cup of tea or strong coffee complements the tartness beautifully.
Pairings/Storage
Lemon bars pair wonderfully with fresh fruit and soft, whipped cream. They are also delightful alongside a scoop of vanilla ice cream, providing a rich contrast to their bright flavor.
Store any leftovers in the fridge, where they can last up to a week. For best results, cover them tightly with plastic wrap to prevent them from drying out.
Creating Pioneer Woman Lemon Bars not only satisfies a sweet craving but also honors the joy of home-cooked goodness. Every bite of these classic lemon bars reminds us of the simpler times spent in the kitchen with loved ones, bringing smiles to faces and sweetness to gatherings.
Print
Pioneer Woman Lemon Bars
- Total Time: 65 minutes
- Yield: 12 servings 1x
- Diet: Vegetarian
Description
Delightful lemon bars with a perfect balance of sweet and tart flavors, reminiscent of cherished baking memories.
Ingredients
- 2 cups all-purpose flour
- 1/2 cup sugar
- 1/4 teaspoon salt
- 1 cup salted butter, cut into small cubes
- 1–1/2 cup sugar
- 1/4 cup flour
- 4 large eggs
- Zest and juice of 4 medium-sized lemons (approximately 1 cup lemon juice)
- Powdered sugar for dusting
Instructions
- Preheat the oven to 350°F and grease a 9-by-13-inch pan.
- Combine 2 cups of flour, 1/2 cup sugar, and 1/4 teaspoon salt in a bowl.
- Add 1 cup of salted butter and use a pastry cutter to blend until the mixture resembles fine crumbs.
- Press this mixture into the prepared pan and bake for about 20 minutes until golden around the edges.
- Mix 1-1/2 cup sugar with 1/4 cup flour in a new bowl.
- Crack in 4 large eggs and whisk until combined.
- Add the zest and juice of the lemons and mix well.
- Pour the lemon filling over the baked crust.
- Return to the oven for another 20 to 30 minutes until the filling is set.
- Cool in the fridge for at least 2 hours before dusting with powdered sugar and cutting into squares.
Notes
For a thicker crust, use a 9-by-9 pan. Store any leftovers in the fridge to maintain freshness.
- Prep Time: 15 minutes
- Cook Time: 50 minutes
- Category: Dessert
- Method: Baking
- Cuisine: American
Nutrition
- Serving Size: 1 square
- Calories: 250
- Sugar: 20g
- Sodium: 200mg
- Fat: 12g
- Saturated Fat: 7g
- Unsaturated Fat: 4g
- Trans Fat: 0g
- Carbohydrates: 30g
- Fiber: 1g
- Protein: 3g
- Cholesterol: 80mg
Keywords: lemon bars, dessert, baking, sweet, tart