➤ Table of Contents
I’m Emma, the heart and hands behind GrandMmaDelights. My love for cooking blossomed in my grandmother’s kitchen, where Japanese cheesecake was a family favorite. This cheesecake, with its cloud-like texture, captivated me from the first bite. Its delicate balance of creaminess and lightness is what makes it truly special. Today, I’m thrilled to share this Japanese Cheese Cake Recipe, a dish that transforms simple ingredients into a delightful dessert.
GrandMmaDelights is where I share approachable recipes that bring joy to any table. This Japanese cheesecake, in particular, embodies the magic of transforming everyday ingredients into something extraordinary. As you embark on this culinary journey, you’ll discover the joy of baking from scratch and the rewarding experience of creating a dessert that delights both the eyes and the taste buds.
Through GrandMmaDelights, I aim to inspire you to explore the beauty of home cooking. This Japanese Cheese Cake Recipe is not just a dessert; it’s an experience that brings people together. The simplicity of the ingredients and the elegance of the final product make it a perfect addition to any gathering.
Join me as we dive into the world of Japanese cheesecake. We’ll explore each step of the process, ensuring that your creation is as perfect as it can be. Let’s embark on this culinary adventure together, embracing the joy of creating something truly special from scratch.
Print
Japanese Cheese Cake Recipe
- Total Time: 60 minutes
- Yield: 6–8 servings 1x
Description
Discover the secrets to making a fluffy, melt-in-your-mouth Japanese cheesecake with this step-by-step recipe guide. Perfect for impressing guests or enjoying yourself!
Ingredients
- 226g (1 cup) Cream cheese full fat Philadelphia
- 55g (1/4 cup) Unsalted butter
- 120g (1/2 cup) Whole milk
- 40g (1/3 cup) All purpose flour low protein content flour e.g. pastry flour is ideal
- 15g (2 tablespoon s) Corn starch
- Pinch of salt
- 5 medium Eggs yolk and white separately
- 75g (2/3 cup) Granulated sugar superfine sugar is ideal
Instructions
- Prepare an 8-inch round cake pan by lining it with parchment paper, and set your oven to 150°C (300°F). Also, prepare a water bath in the oven, ensuring it reaches halfway up the sides of the pan to aid in even baking and avoiding cracks.
- If you’re using a pan with a removable base, wrap it tightly with aluminum foil to prevent water from entering the cheesecake.
- If your sugar granules are large, blend them to make superfine sugar before measuring. Separate the eggs, keeping yolks and whites apart.
- Heat the cream cheese, butter, and milk together in a saucepan on low heat, stirring until the mixture is smooth, then take it off the heat.
- Sift together the cornstarch, salt, and flour, and mix these into the cream cheese blend until the batter is smooth and lump-free.
- Add the egg yolks to the cream cheese mixture one by one, ensuring each is well mixed before adding the next.
- Using a hand or stand mixer, start beating the egg whites on low speed, gradually adding sugar one tablespoon at a time. Increase the speed and continue until soft peaks form.
- Carefully fold the whipped egg whites into the cream cheese batter using a rubber spatula, keeping the mixture light and airy.
- Transfer the batter into the lined cake pan and place it in the water bath to bake. Begin by baking for 30 minutes with the oven door shut at 150°C (300°F), then leave the door slightly ajar and bake for another 20 minutes at the same temperature. Finish with an additional 20 minutes of baking at 150°C (300°F) with the door closed, using an oven thermometer if possible to ensure temperature accuracy.
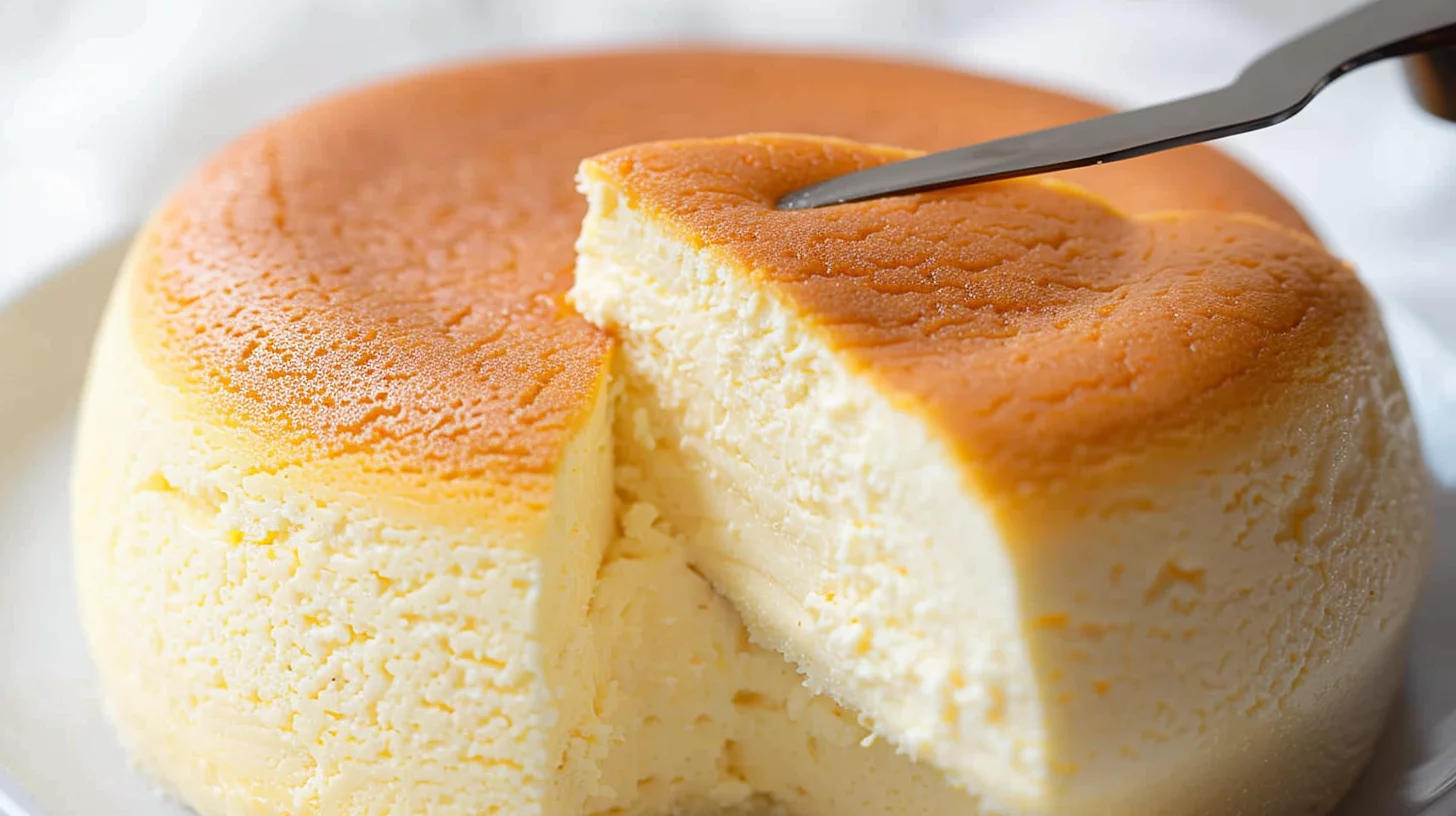
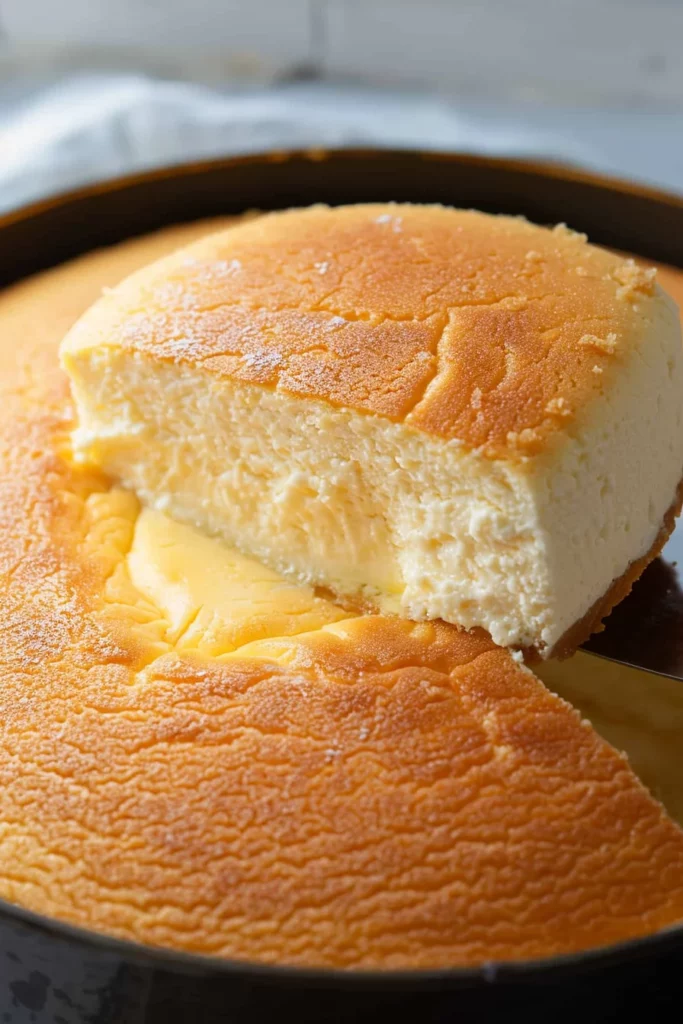
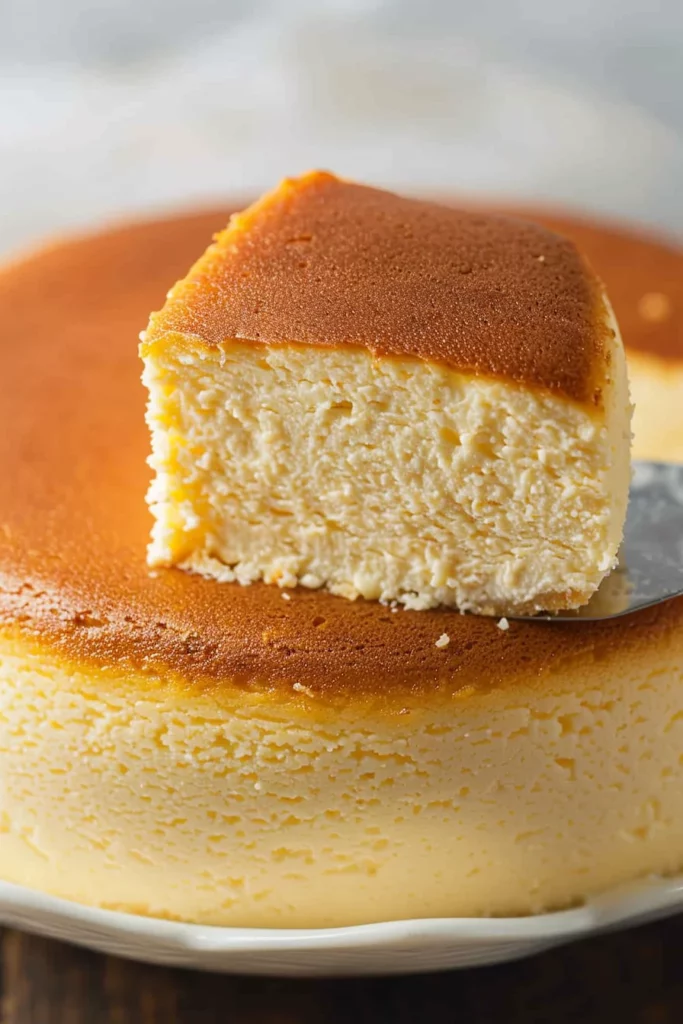
- Monitor the cheesecake during baking to ensure a gentle rise, preventing surface cracks. Aim for a golden-brown top without burning, adjusting the temperature if necessary.
- Determining when to remove the cheesecake from the oven might require some experimentation. Ideally, take it out when the top is golden-brown, the center has a slight jiggle, and it feels soft but springy.
- Once you’re confident the cheesecake is done, remove it from the oven, invert it onto a plate, and then flip it onto another plate to retain its shape.
- Serve the cheesecake immediately while it’s warm and jiggly. Store any remaining portions in the fridge for up to 2–3 days, noting that the light texture is best experienced fresh.
Notes
- Make sure cream cheese, butter, and milk are fully melted and smooth before adding dry ingredientsnUse a clean, dry bowl and beaters to whip the egg whites for a stable meringuenIf the cheesecake top browns too fast, cover with foil without touching the surface
- Prep Time: 15 minutes
- Cook Time: 45 minutes
- Category: Dessert
- Method: Baking
- Cuisine: Mexican
Nutrition
- Calories: 400
- Fat: 12g
- Protein: 20g
Keywords: japanese cheesecake, cream cheese dessert, fluffy cheesecake recipe, water bath baking, egg white meringue, golden brown cheesecake
Crafting the Perfect Japanese Cheese Cake Recipe
Fundamentals
Creating a Japanese cheesecake begins with understanding its key ingredients. The foundation lies in cream cheese, butter, and milk, which provide the creamy texture. These ingredients are gently heated together, resulting in a smooth mixture that forms the base of the cheesecake. The addition of flour and cornstarch helps to stabilize the batter, ensuring a light yet sturdy structure.
Eggs play a crucial role in this Japanese Cheese Cake Recipe, providing both richness and lightness. Separating the yolks and whites allows for precise control over the texture. The yolks are incorporated into the cream cheese mixture, adding depth and color, while the whites are whipped into soft peaks, contributing to the cake’s airy quality.
Preparation/setup
Preparation is key when baking a Japanese cheesecake. Start by lining an 8-inch round cake pan with parchment paper. This ensures easy removal and prevents sticking. Preheat your oven to 150°C (300°F) and set up a water bath. The water bath is crucial, as it provides even baking and prevents cracks on the surface of your cheesecake.
To avoid water seeping into the cheesecake, wrap the pan tightly with aluminum foil if it has a removable base. This step is essential for maintaining the integrity of the cheesecake during the baking process. Once the setup is complete, you’re ready to begin the magic of creating your Japanese cheesecake.
Mastering the Technique of Japanese Cheese Cake Recipe
Technique
The technique behind a successful Japanese Cheese Cake Recipe involves careful attention to detail. Begin by gently heating the cream cheese, butter, and milk. Stir until smooth, then remove from heat. Sift together the flour, cornstarch, and salt, ensuring a lump-free mixture. Gradually incorporate the flour blend into the cream cheese mixture, creating a smooth batter.
Add the egg yolks one by one, mixing thoroughly after each addition. This step ensures a uniform texture. In a separate bowl, beat the egg whites with sugar until soft peaks form. This process is vital for achieving the cake’s signature lightness. Carefully fold the whipped egg whites into the batter, maintaining an airy consistency.
Japanese Cheese Cake Recipe
Tips/tricks
For the best results, use superfine sugar, which dissolves more easily and contributes to a smoother batter. When folding the egg whites, use a gentle hand to preserve the airiness. Avoid over-mixing, as this can deflate the batter. Monitor the oven temperature closely, using an oven thermometer for accuracy.
During baking, aim for a gentle rise and a golden-brown top. Adjust the temperature slightly if needed to prevent burning. The center should have a slight jiggle when you remove it from the oven, indicating the perfect doneness. For more tips on baking techniques, explore Mini Taco Cupcakes with Ground Beef and Cheese for a delightful twist on classic recipes.
Perfecting and Troubleshooting Your Cheesecake
Perfecting results
Achieving perfection with this Japanese Cheese Cake Recipe requires patience and practice. The key is balancing the ingredients and monitoring the baking process. A perfectly baked cheesecake will have a golden top and a soft, springy center. The edges should be slightly set while the center remains jiggly.
Allow the cheesecake to cool slightly before inverting it onto a plate. This step helps retain its shape and ensures a smooth presentation. For those looking to enhance their baking skills, Sous Vide Steak Sirloin offers insights into precise cooking techniques, similar to the careful attention needed for a flawless cheesecake.
Troubleshooting/variations
If your cheesecake develops cracks, it may indicate that the temperature was too high or the cake was overbaked. To prevent this, maintain a steady oven temperature and avoid opening the door frequently. If you prefer a flavored twist, consider adding vanilla extract or lemon zest to the batter for an aromatic touch.
For those experimenting with different textures, try varying the amount of cornstarch for a firmer or softer result. Remember, practice makes perfect, and each attempt will bring you closer to mastering this delightful dessert. Explore more culinary tips with our Mini Taco Cupcakes with Ground Beef and Cheese for a fun and flavorful experience.
Serving and Storing Your Japanese Cheesecake
Serving/presentation
Presenting your Japanese cheesecake is an opportunity to showcase its beauty. Serve it warm with a slight jiggle for the best texture. For a touch of elegance, dust the top with powdered sugar or garnish with fresh berries. The simplicity of this presentation highlights the cake’s delicate texture and rich flavor.
Pair your cheesecake with a cup of green tea or coffee for a delightful combination. These beverages complement the cake’s sweet and creamy notes without overpowering its subtle flavors. For more dessert inspiration, explore our Sous Vide Steak Sirloin for a savory balance to this sweet treat.
Pairings/storage
Store any leftover cheesecake in the refrigerator for up to 2–3 days. Keep it in an airtight container to preserve its freshness and texture. Although best enjoyed fresh, the cheesecake remains delicious when served chilled. For an extra-special touch, serve it with a side of fruit compote or whipped cream.
Japanese Cheese Cake Recipe
Whether you’re sharing this Japanese cheesecake at a family gathering or savoring it as a personal treat, its light and airy texture promises to delight. Discover more about creating memorable meals with our Mini Taco Cupcakes with Ground Beef and Cheese, perfect for any occasion.
Conclusion
The Japanese Cheese Cake Recipe offers a unique blend of simplicity and elegance, transforming basic ingredients into a delightful culinary creation. Its light and airy texture, combined with a creamy base, makes it a standout dessert. By following the detailed steps and tips provided, you can master the art of baking this exquisite cheesecake.
This recipe not only enhances your baking skills but also brings joy to any gathering. The Japanese cheesecake is a testament to the magic of home cooking, where simple ingredients create extraordinary results. Embrace the culinary adventure and enjoy the process of making this delicious dessert.
As you perfect your cheesecake, remember that practice and attention to detail are key to achieving the ideal texture and flavor. The techniques you’ve learned here can be applied to other recipes, expanding your culinary repertoire. Enjoy the satisfaction of creating a dessert that delights both the eyes and the taste buds.