📑 Table of Contents ▶
- Jiggly Japanese Cheesecake
- The Art of Making Jiggly Japanese Cheesecake
- Fundamentals
- Preparation/setup
- Mastering the Jiggly Japanese Cheesecake
- Technique
- Tips/tricks
- Achieving Perfection with Jiggly Japanese Cheesecake
- Perfecting results
- Troubleshooting/variations
- Serving and Storing Your Jiggly Japanese Cheesecake
- Serving/presentation
- Pairings/storage
- Conclusion
- FAQs – Jiggly Japanese Cheesecake
- Related posts:
- Peppermint Cheesecake Bites: Decadent Delights for Sweet Tooth Fanatics
- Blueberry Cheesecake Cookies: Best Recipe for a Sweet Treat
- Easy Zucchini Bread Recipe Vegan: Irresistible Plant-Powered Indulgence
Emma here, from GrandMmaDelights! Today, I’m thrilled to share one of my all-time favorite recipes: the Jiggly Japanese Cheesecake. This delicate dessert holds a special place in my heart, reminding me of the joy of creating something truly delightful from simple ingredients. The excitement of watching it rise in the oven, almost as if it’s breathing, is a magical experience.
Every time I bake a Jiggly Japanese Cheesecake, I’m reminded of the shared laughter and stories around the table as we eagerly wait to slice into its soft, cloud-like texture. It’s a symbol of celebration and the happiness that comes with gathering loved ones over a homemade treat. The anticipation of that first bite, where the cheesecake jiggles invitingly, never fails to bring a smile to my face.
Creating this cheesecake is a journey of patience and love, much like nurturing a relationship. The process transforms these simple ingredients into a spectacular dessert that brings people together. In this article, I’ll guide you through the steps to make your own Jiggly Japanese Cheesecake, sharing tips and tricks along the way to ensure your success in the kitchen. Let’s dive into this culinary adventure and explore the magic of making a Jiggly Japanese Cheesecake.
Jiggly Japanese Cheesecake
- Total Time: 60 minutes
- Yield: 6–8 servings 1x
Description
Discover how to make the perfect jiggly Japanese cheesecake with our step-by-step recipe guide, ensuring a light, fluffy texture and irresistible taste every time.
Ingredients
- 226g (1 cup) Cream cheese full fat Philadelphia
- 55g (1/4 cup) Unsalted butter
- 120g (1/2 cup) Whole milk
- 40g (1/3 cup) All purpose flour low protein content flour e.g. pastry flour is ideal
- 15g (2 tablespoon s) Corn starch
- Pinch of salt
- 5 medium Eggs yolk and white separately
- 75g (2/3 cup) Granulated sugar superfine sugar is ideal
Instructions
- Prepare an 8-inch round cake tin by lining it with parchment paper, and set your oven to 300°F (150°C), ensuring there’s a water bath inside. The water should come halfway up the tin’s sides for even cooking and to prevent cracking.
- If using a pan with a loose base, wrap it well in aluminum foil to avoid water seeping into the cheesecake.
- If your sugar isn’t superfine, process it in a blender until it is, then measure the required amount. Separate the egg yolks from the whites.
- Combine the cream cheese, butter, and milk in a pan over low heat, stirring until the mixture is smooth, then take it off the heat.
- Sift together the flour, cornstarch, and salt, and blend them into the cream cheese mixture until the batter is lump-free and smooth.
- Add the egg yolks to the cream cheese batter one by one, stirring well after each addition.
- With a stand or hand mixer, begin beating the egg whites at a low speed. Slowly incorporate the sugar, a tablespoon at a time, increasing the speed gradually until soft peaks form.
- Carefully fold the whipped egg whites into the cream cheese mixture with a rubber spatula, maintaining a light and airy texture.
- Pour the batter into the prepared tin and place it in the water bath to bake. Bake initially for 30 minutes at 300°F (150°C) with the oven door shut, then for another 20 minutes at the same temperature with the door slightly open. Finish with a final 20 minutes at 300°F (150°C) with the door closed, using a digital thermometer if available for accuracy.
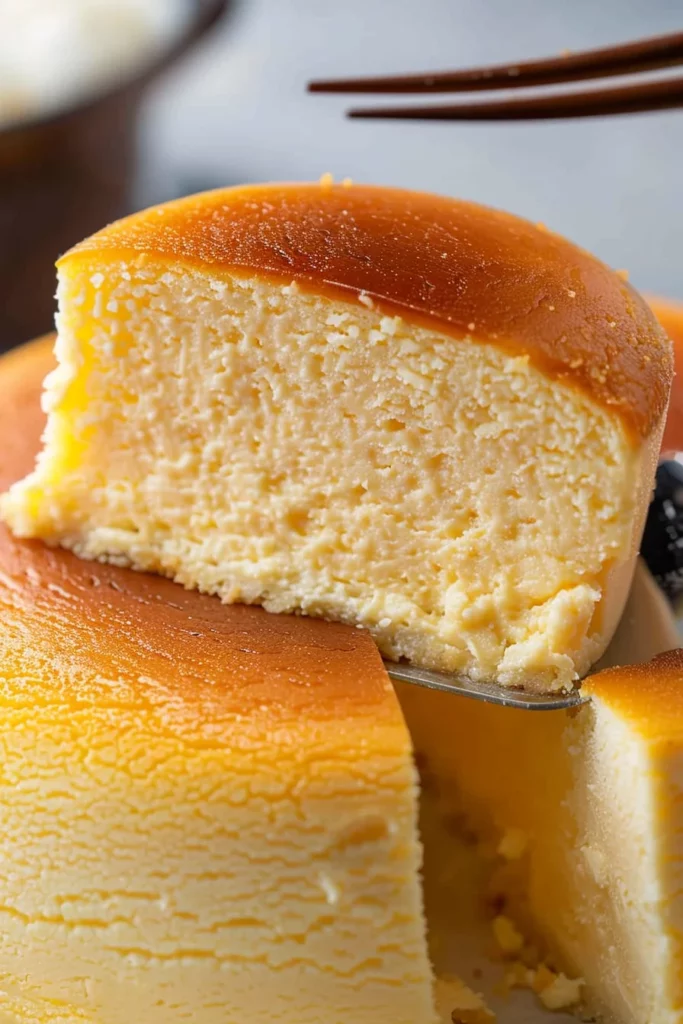
- Monitor the cheesecake as it bakes; aim for a gentle rise to avoid surface cracks. Look for a golden-brown top—fully colored but not burnt—and adjust the heat if necessary to achieve this.
- Determining the right time to remove the cheesecake from the oven may require some experimentation. Ideally, take it out when the top is golden-brown, the center jiggles slightly, and it feels soft and springy.
- Once satisfied with the bake, remove the cheesecake from the oven, invert it onto a plate, then flip it back onto another plate to retain its shape.
- Serve the cheesecake warm while it’s still jiggly, and refrigerate any leftovers for up to 2–3 days, noting that the cheesecake’s airy texture is best enjoyed when fresh.
Notes
- Allow cream cheese, butter, and milk to reach room temperature for a smoother mixture. Gradually sift flour, cornstarch, and salt for even batter distribution. Fold egg whites gently into the batter with a wide spatula using a figure-eight motion.
- Prep Time: 15 minutes
- Cook Time: 45 minutes
- Category: Dessert
- Method: Baking
- Cuisine: Italienne
Nutrition
- Calories: 400
- Fat: 12g
- Protein: 20g
Keywords: japanese cheesecake, cream cheese cake, fluffy cheesecake recipe, water bath baking, soft meringue folding, golden-brown cheesecake
The Art of Making Jiggly Japanese Cheesecake
Fundamentals
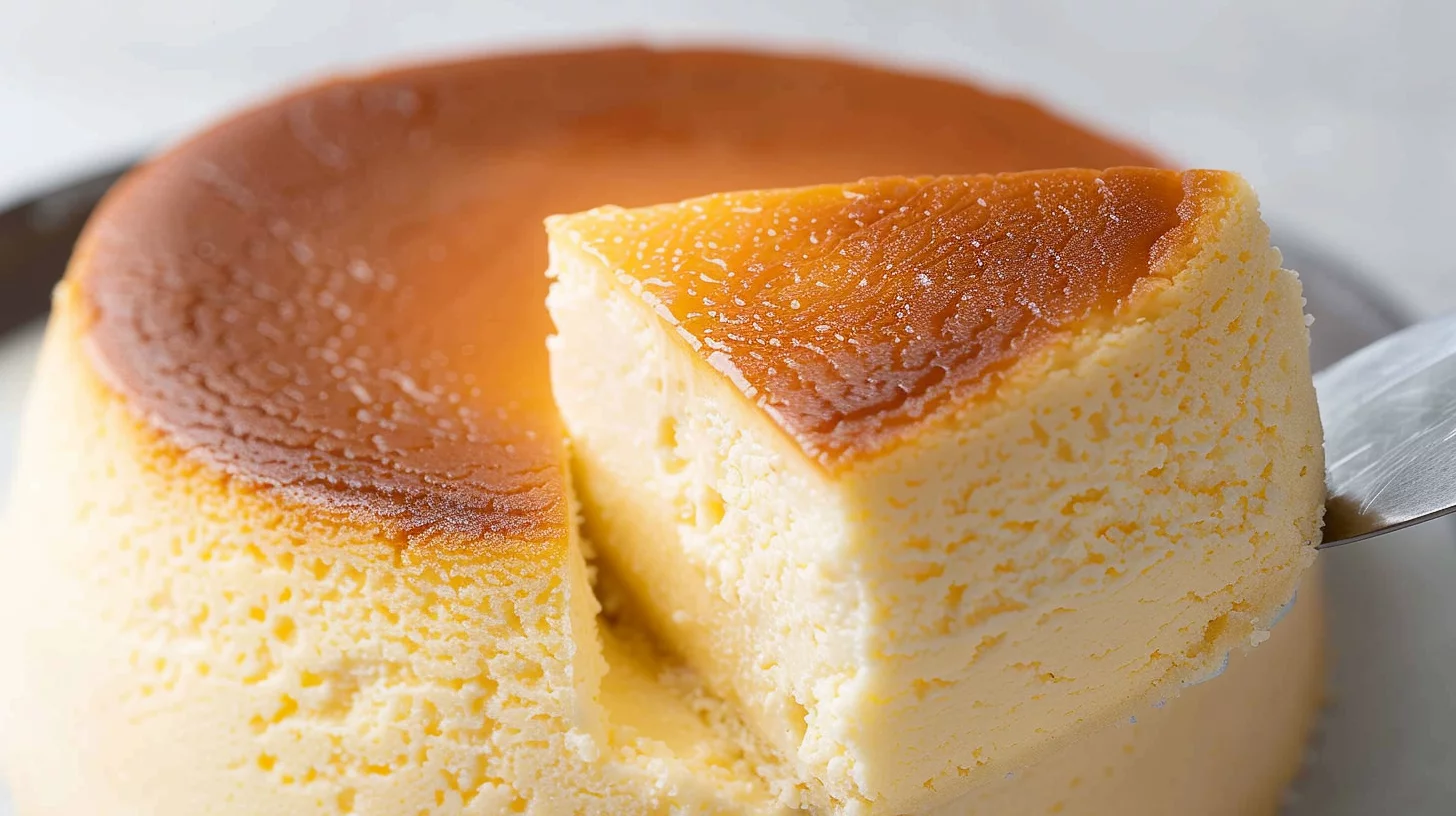
The Jiggly Japanese Cheesecake is famed for its light, airy texture and subtle sweetness. At the heart of this dessert lies a careful balance of cream cheese, butter, and milk, which create a rich yet delicate base. The use of low-protein flour, such as pastry flour, ensures a fine crumb, while cornstarch adds stability without weighing down the cake.
A crucial element of this cheesecake is the meringue, made by whisking egg whites to soft peaks with superfine sugar. This technique imparts a soufflé-like texture, allowing the cheesecake to rise beautifully in the oven. The gentle folding of the meringue into the batter is where the magic happens, creating a uniform mixture that bakes to perfection.
Preparation/setup
Preparation is key when crafting a Jiggly Japanese Cheesecake. Start by setting your oven to 300°F (150°C) and preparing an 8-inch round cake tin with parchment paper. Creating a water bath is essential to ensure even cooking and prevent the cheesecake from cracking. This technique maintains a moist environment, crucial for achieving that signature jiggle.
If your cake tin has a loose base, wrap it securely in aluminum foil to prevent any water from seeping in. This step is vital to maintain the integrity of the cheesecake. As you gather your ingredients, remember to process your sugar if it’s not already superfine. This small step can make a big difference in the texture of your meringue.
Mastering the Jiggly Japanese Cheesecake
Technique
The technique for making Jiggly Japanese Cheesecake involves a few precise steps. Begin by melting the cream cheese, butter, and milk over low heat until smooth. This mixture forms the base of your batter. Sift together the flour, cornstarch, and salt, then blend them into the cream cheese mixture, ensuring a smooth, lump-free batter.
Next, add the egg yolks one by one, mixing well after each addition. This step ensures that the yolks are fully incorporated, contributing to the richness of the cheesecake. The meringue, created by beating egg whites with sugar until soft peaks form, is gently folded into the batter. This step is crucial for maintaining the light, airy texture that gives the cheesecake its unique jiggle.
Jiggly Japanese Cheesecake
Tips/tricks
To achieve the perfect Jiggly Japanese Cheesecake, pay close attention to your meringue. Ensure your bowl and beaters are completely clean and dry before whisking the egg whites. Gradually add sugar, allowing it to dissolve completely for a stable meringue. When folding the meringue into the batter, use a gentle hand to avoid deflating the mixture.
Monitoring the baking process is equally important. Bake the cheesecake in three stages, adjusting the oven door position to control moisture and heat distribution. Keep an eye on the cheesecake’s color, aiming for a golden-brown top without burning. Using a digital thermometer can help achieve the desired internal temperature, ensuring the cheesecake is cooked through without overbaking.
Achieving Perfection with Jiggly Japanese Cheesecake
Perfecting results
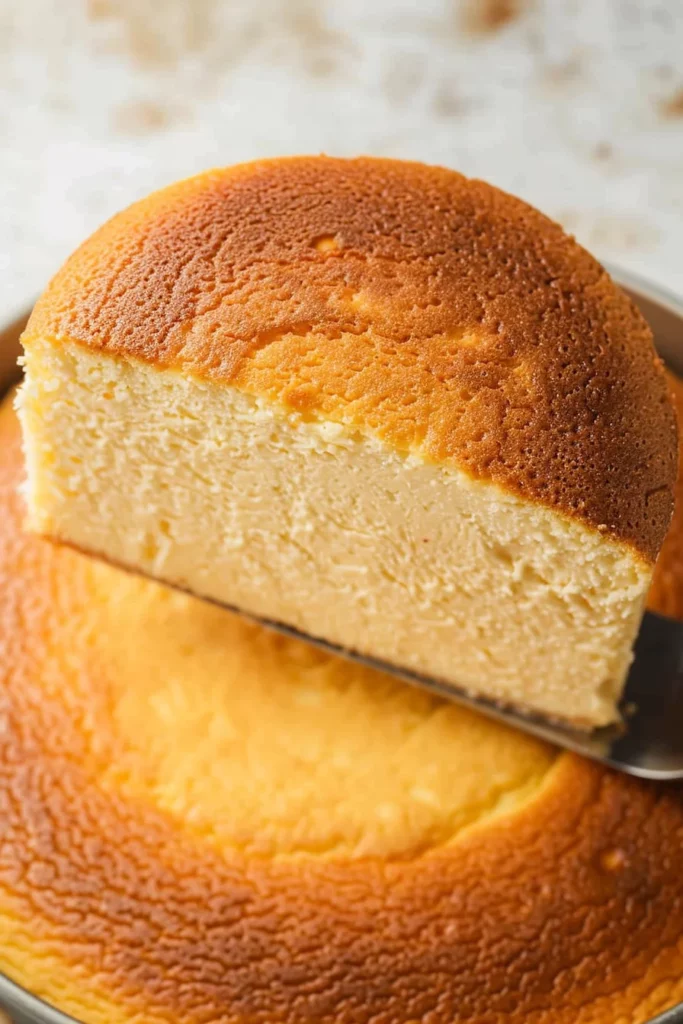
Perfecting your Jiggly Japanese Cheesecake requires patience and practice. The goal is a cheesecake that rises evenly and retains its jiggle without cracking. Allow the cake to cool gradually in the oven with the door slightly open to prevent sudden temperature changes that can cause cracks.
Once baked, invert the cheesecake onto a plate and then flip it back to retain its shape. This step may seem daunting, but it helps in maintaining the cake’s structure. Serve the cheesecake warm to fully appreciate its airy texture and flavor. For more fluffy dessert ideas, you might visit fluffiest cotton cheesecake.
Troubleshooting/variations
If your cheesecake doesn’t rise as expected, check if the meringue was beaten to the correct consistency. Overwhipping or underwhipping can affect the cake’s structure. For those seeking variations, consider adding citrus zest for a refreshing twist or a hint of vanilla for added depth.
Should you encounter any issues with cracking, ensure your oven temperature is consistent and that the water bath is adequately filled. Experimenting with different flavors can also lead to delightful surprises, such as incorporating matcha or cocoa powder for a unique spin. Explore these delightful variations by visiting our Japanese cheesecake recipes.
Serving and Storing Your Jiggly Japanese Cheesecake
Serving/presentation
Presentation plays a crucial role in serving Jiggly Japanese Cheesecake. Its golden-brown top and gentle jiggle make it naturally appealing. Serve it warm for the best texture, allowing guests to appreciate its delicate structure. A simple dusting of powdered sugar or a dollop of whipped cream can enhance its visual appeal without overpowering the subtle flavors.
This cheesecake pairs beautifully with fresh fruits like strawberries or raspberries, adding a burst of color and freshness. For a creative serving suggestion, consider slicing the cheesecake into bite-sized portions, perfect for a dessert platter. Discover more serving ideas with our strawberry cheesecake bites.
Jiggly Japanese Cheesecake
Pairings/storage
While Jiggly Japanese Cheesecake is best enjoyed fresh, you can store leftovers in the refrigerator for up to 2–3 days. Keep the cheesecake in an airtight container to maintain its moisture and texture. When ready to serve again, allow it to reach room temperature or gently warm it to revive its signature jiggle.
For those interested in dessert pairings, consider serving this cheesecake with a cup of green tea or coffee, complementing its delicate flavors. Explore more about these delightful pairings by visiting Japanese cheese cake recipe. These beverages enhance the experience, allowing the cheesecake’s subtle sweetness to shine.
Conclusion
Mastering the Jiggly Japanese Cheesecake offers a rewarding experience, blending technique with creativity. Its unique texture and delicate flavor make it a standout dessert, perfect for any occasion. The careful folding of meringue and precise baking process reveal the art of crafting a dessert that brings joy and connection.
Whether you’re sharing this cake with family or savoring it alone, its light, airy texture and gentle jiggle leave a lasting impression. The versatility of this cheesecake allows for endless variations, inviting you to experiment with flavors and presentations. Embrace the journey of baking this delightful dessert, and enjoy the satisfaction of creating something truly special.