📑 Table of Contents ▶
- Cinnamon Raisin Bread
- Embracing the Art of Cinnamon Raisin Bread
- Fundamentals
- Preparation/setup
- Mastering the Technique of Cinnamon Raisin Bread
- Technique
- Tips/tricks
- Perfecting Your Cinnamon Raisin Bread
- Perfecting results
- Troubleshooting/variations
- Serving and Storing Your Cinnamon Raisin Bread
- Serving/presentation
- Pairings/storage
- Conclusion
- FAQs – Cinnamon Raisin Bread
- Related posts:
- Bibingka Using Pancake Mix: Easy and Delicious Treat
- Bloody Red Velvet Cupcakes: Decadent Delights for the Bold Baker
- 5 Easy Ways to Make Sugar Cookie Balls
Emma here, sharing a cherished memory that ties deeply with the comforting aroma of freshly baked cinnamon raisin bread. Growing up, Sunday mornings meant waking up to the sweet, warm scent drifting through the house. My grandmother, a culinary magician in her own right, often spent the early hours kneading dough and letting it rise, creating a magical experience that I eagerly anticipated each week.
Cinnamon raisin bread has always been more than just a treat; it’s a connection to family, a tradition that brings everyone to the table. As I watched my grandmother work her magic, I learned to appreciate the beauty of simple ingredients transformed into something extraordinary. The soft, tender crumb of the bread combined with the delightful swirl of cinnamon and juicy raisins created a harmony of flavors that felt like a warm hug.
This recipe is a tribute to those cherished mornings, a chance to recreate those moments of joy and connection in your own home. With each slice of cinnamon raisin bread, you embrace a tradition of love, warmth, and togetherness. Let’s dive into this culinary adventure, bringing the magic of homemade bread to your kitchen.
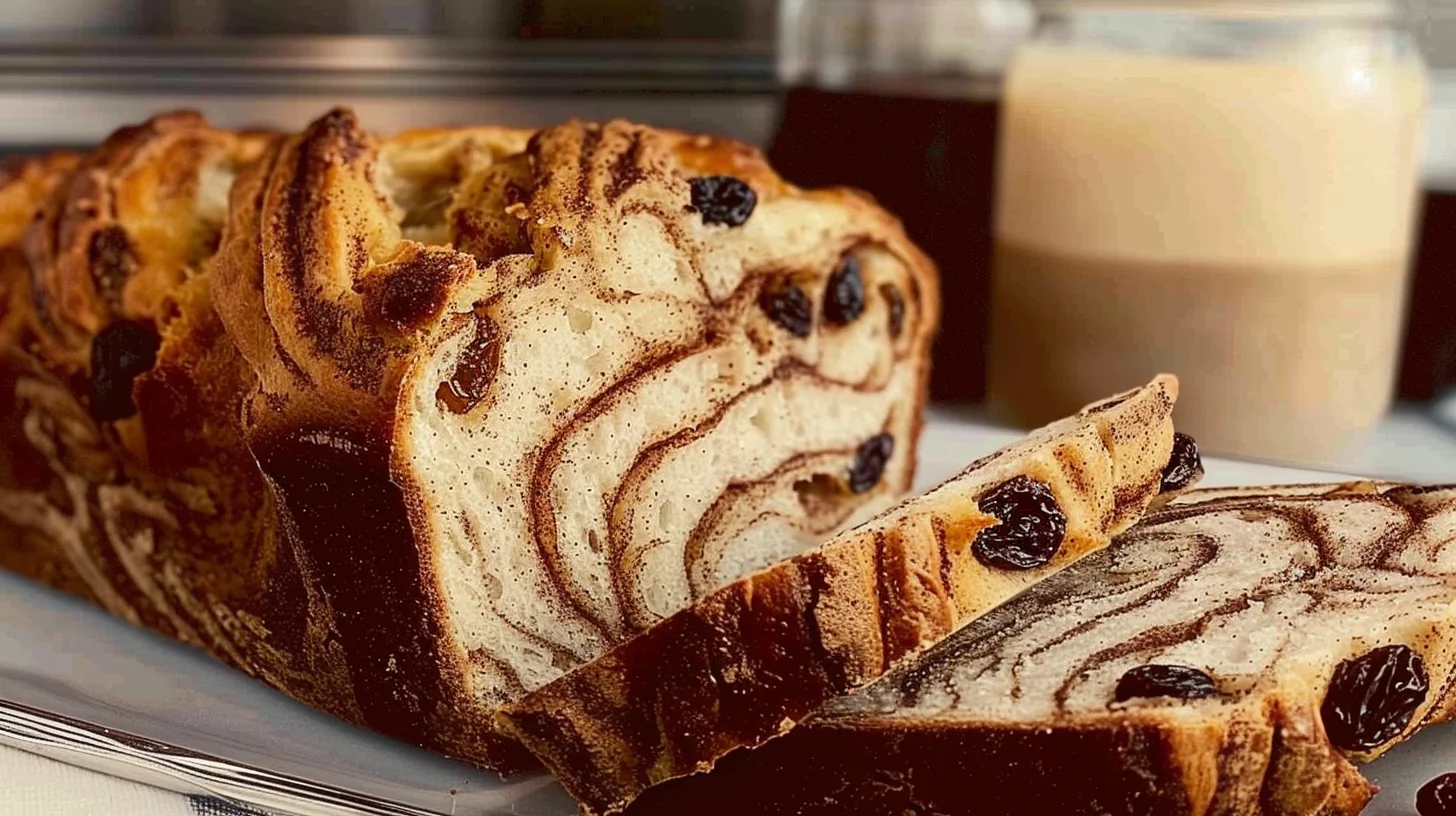
Cinnamon Raisin Bread
- Total Time: 200 minutes
- Yield: 6–8 servings 1x
Description
Discover the secrets to baking perfect cinnamon raisin bread with our easy-to-follow recipe. Learn tips on creating a soft, flavorful loaf every time.
Ingredients
- 5 cup (360 ml) s milk
- 1 cup (240 ml) warm water (110 degrees F/45 degrees C)
- 2 (.25 ounce (709 g)) packages active dry yeast
- 1 cup (240 ml) raisins
- 3 large eggs
- 25 cup (300 ml) s white sugar, divided
- 5 cup (120 ml) margarine, softened
- 1 teaspoon (5 ml) salt
- 8 cup (1920 ml) s all-purpose flour
- 2 tablespoon (30 ml) s milk
- 2 tablespoon (30 ml) s ground cinnamon
- 2 tablespoon (30 ml) s vegetable oil, melted
Instructions
- Heat 1.5 cups of milk in a small pot over medium heat until it starts to bubble, then take it off the stove. Allow it to cool until it is just warm.
- Combine the warm water and yeast in a big mixing bowl; let it rest until it becomes bubbly, which takes about 5 minutes. Blend in the raisins, eggs, 0.5 cup sugar, margarine, and salt until everything is mixed well. Add the cooled milk to the mixture. Gradually incorporate the flour to form a firm dough.
- Place the dough on a surface lightly dusted with flour and knead it for a few minutes. Move it to a large, greased bowl, turning the dough so all sides are coated. Cover the bowl with a damp cloth and leave it to rise until it doubles in size, roughly 1 hour.
- Prepare three loaf pans measuring 9×5 inches by greasing them; put them aside.
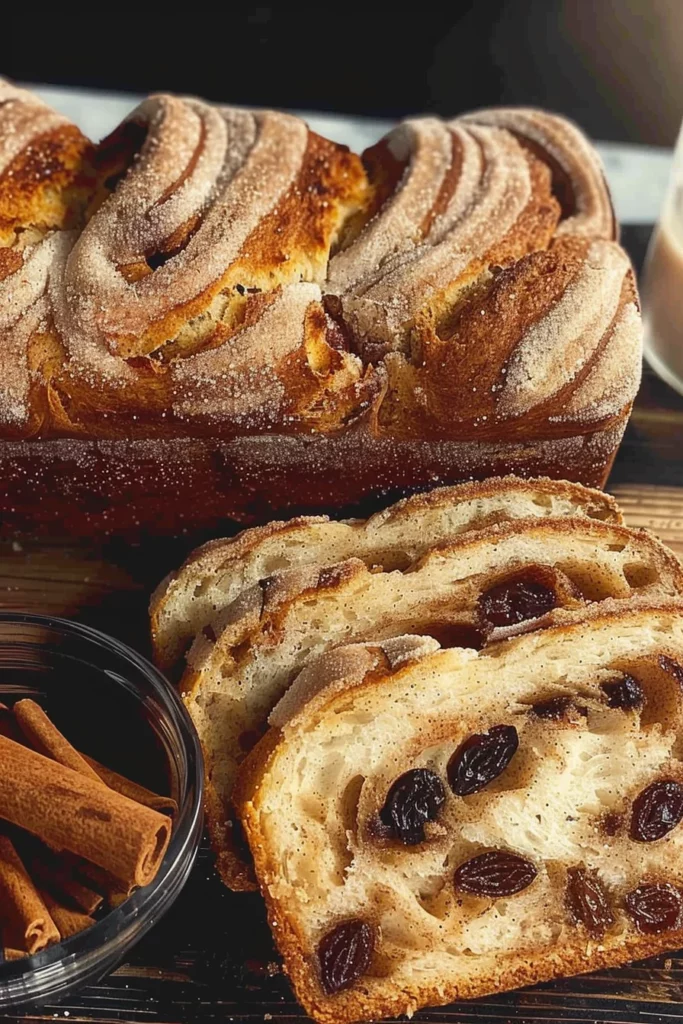
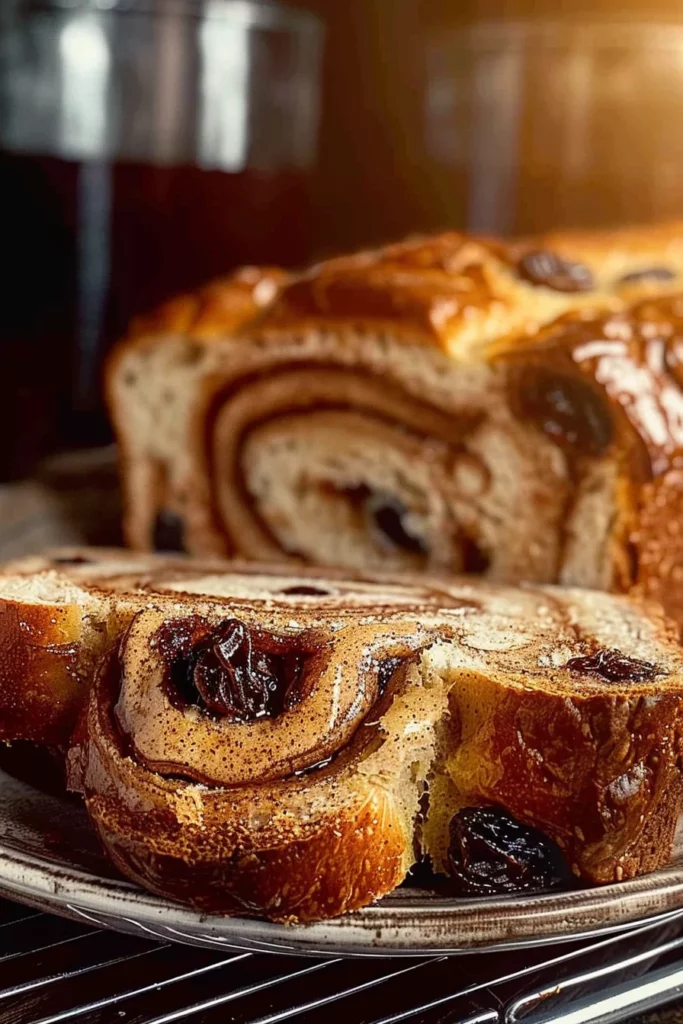
- Deflate the dough and put it back on a lightly floured surface. Shape the dough into a large rectangle, about 1/2-inch thick. Brush the dough with 2 tablespoons of milk. In a small bowl, combine the remaining 0.75 cup sugar and cinnamon; sprinkle this mixture over the dough. Roll the dough tightly into a log about 3 inches in diameter.
- Divide the log into three equal parts; tuck the ends underneath to form loaves. Place them in the greased loaf pans and lightly oil the tops. Cover them and let them rise again for about 1 hour.
- Set your oven to 350 degrees F (175 degrees C) to preheat.
- Bake in the preheated oven until the tops are golden brown and the loaves sound hollow when tapped, which should take about 45 minutes. Take the loaves out of the pans and brush them with melted vegetable oil. Allow them to cool on a wire rack before cutting into slices.
Notes
- Warm the milk slightly before combining with yeast to ensure the dough rises properlynIf the dough is sticky during kneading, lightly dust with flour but use sparingly to maintain softnessnTightly roll the dough to evenly spread the cinnamon-sugar, creating a distinct swirl
- Prep Time: 30 minutes
- Cook Time: 45 minutes
- Category: Breakfast
- Method: Baking
- Cuisine: International
Nutrition
- Calories: 182 kcal
- Fat: 4 g
- Protein: 4 g
Keywords: cinnamon raisin bread, homemade bread recipe, active dry yeast baking, milk bread dough, cinnamon sugar filling, oven baked loaves
Embracing the Art of Cinnamon Raisin Bread
Fundamentals
Creating cinnamon raisin bread begins with understanding the basics. The foundation lies in the careful selection of ingredients and a methodical approach to mixing and kneading. The combination of milk, warm water, and active dry yeast forms the backbone of your dough, setting the stage for a perfect rise.
Incorporating raisins into the dough not only adds sweetness but also a delightful texture. Eggs and margarine enrich the bread, offering a tender crumb that melts in your mouth. The secret to a perfect cinnamon swirl lies in the precise layering of sugar and cinnamon, creating a visually stunning and flavorful centerpiece.
Preparation/setup
Before diving into the preparation, ensure you have all your ingredients measured and ready. Begin by heating the milk until it bubbles, allowing it to cool to a warm temperature. This step is crucial for activating the yeast without killing it. In a large bowl, combine the warm water with the yeast, letting it rest until bubbly, signaling it’s ready to work its magic.
Mix the raisins, eggs, margarine, sugar, and salt into the yeast mixture, ensuring a smooth blend. Gradually incorporate the flour, forming a firm dough. Knead the dough on a floured surface until it’s smooth, then place it in a greased bowl to rise. This initial rise is essential in developing the flavors and texture of your bread.
Mastering the Technique of Cinnamon Raisin Bread
Technique
Mastering the technique of making cinnamon raisin bread involves understanding each step’s importance. The kneading process develops gluten, giving the bread its structure. A well-kneaded dough should feel smooth and elastic, ready to rise and expand.
Shaping the dough into a rectangle before rolling it ensures even distribution of the cinnamon sugar mixture. Roll the dough tightly to prevent gaps in the swirl, ensuring each slice is a perfect balance of bread and filling. Dividing the rolled dough into three equal parts allows for uniform loaves that bake evenly.
Cinnamon Raisin Bread
Tips/tricks
To achieve the best results, pay attention to the dough consistency. If it feels too sticky, add a bit more flour; if too dry, a splash of milk can help. Allow the dough to rise in a warm, draft-free area to encourage a perfect rise. When rolling the dough, use a gentle touch to maintain its elasticity and prevent tearing.
For a glossy finish, brush the tops with milk before the final rise. This step enhances the bread’s appearance, giving it a bakery-style sheen. When baking, keep an eye on the color; if browning too quickly, cover the loaves with foil to prevent burning while ensuring a thorough bake.
Perfecting Your Cinnamon Raisin Bread
Perfecting results
To perfect your cinnamon raisin bread, focus on achieving the ideal texture and flavor balance. The bread should be soft yet sturdy enough to hold the cinnamon swirl. A well-made loaf boasts a golden crust with a tender, moist interior dotted with juicy raisins.
Timing is key. Allowing the dough to rise sufficiently ensures a light, airy texture. If your bread turns out dense, it may need more time to rise. Consistency in slice thickness helps with even toasting, enhancing the flavor and texture when served.
Troubleshooting/variations
If your bread isn’t rising as expected, check the yeast’s freshness. Old or inactive yeast can hinder the rising process. Experiment with variations by adding nuts or substituting raisins with other dried fruits for a unique twist. Adjust the cinnamon sugar ratio to suit your taste, creating a more pronounced or subtle cinnamon flavor.
For those seeking a gluten-free option, explore flourless oat chia bread recipes that bring a similar warmth and comfort without gluten. Adjusting ingredients and techniques can cater to different dietary needs without sacrificing flavor.
Serving and Storing Your Cinnamon Raisin Bread
Serving/presentation
Present your cinnamon raisin bread with a touch of elegance by slicing it into even pieces, showcasing the beautiful swirl. Serve warm with a pat of butter or a drizzle of honey for an indulgent breakfast or snack. The aromatic blend of cinnamon and sweet raisins pairs perfectly with a morning coffee or afternoon tea.
For a creative twist, turn your bread into a cinnamon roll by slicing thicker pieces and toasting them lightly. This variation offers a delightful texture contrast, with a crispy exterior and soft, flavorful interior.
Pairings/storage
Pair your cinnamon raisin bread with a variety of spreads like cream cheese or almond butter for a rich and satisfying treat. For those seeking a savory balance, consider serving it alongside garlic parmesan sheet pan breadsticks, offering a delightful contrast in flavors.
Cinnamon Raisin Bread
Store your bread in an airtight container at room temperature for up to three days, keeping it fresh and delicious. For longer storage, freeze slices individually, allowing you to enjoy a fresh slice anytime. Reheat in a toaster or oven for that just-baked taste and texture.
Conclusion
This cinnamon raisin bread recipe encapsulates the heart of home baking—transforming simple ingredients into a symphony of flavors and textures. Each step, from kneading to rolling, contributes to the final masterpiece, showcasing the beauty of homemade bread.
With its rich history and comforting taste, cinnamon raisin bread remains a beloved classic, perfect for any occasion. Its versatility and timeless appeal make it a staple in any kitchen, offering a slice of warmth and nostalgia with every bite.
Embrace the art of baking with this recipe, and explore how the simple act of making bread can become a cherished ritual, bringing joy and connection to your table.
