
📑 Table of Contents ▶
- Cinnamon Rolls
- Creating Perfect Cinnamon Rolls
- Fundamentals
- Preparation/Setup
- The Art of Cinnamon Roll Making
- Technique
- Tips/Tricks
- Mastering Cinnamon Roll Perfection
- Perfecting Results
- Troubleshooting/Variations
- Serving and Enjoying Cinnamon Rolls
- Serving/Presentation
- Pairings/Storage
- Conclusion
- FAQs – Cinnamon Rolls
- Related posts:
- Garlic Parmesan Cheeseburger Bombs: How to Make this Tasty Treat
- High Protein No-bake Peanut Butter Oat Cookie Dough Bars Recipe
- Pecan Pie Cheesecake Bars: Ultimate Indulgence in Every Bite
Emma here, from GrandMmaDelights, where my passion for cooking and sharing meals with loved ones comes to life. I still remember the first time I attempted to make cinnamon rolls. The process was messy, my dough was sticky, and I worried about everything turning out right. Yet, as the aroma of cinnamon rolls filled my kitchen, I knew I had found something special.
These cinnamon rolls became an instant favorite, bringing warmth and joy to our family gatherings. There’s something magical about turning simple ingredients into a delightful treat that everyone loves. It’s about creating memories and connections, much like how I felt that first time, eagerly watching the dough rise and transform.
Over time, I perfected my cinnamon rolls, learning the nuances of dough consistency and the right balance of cinnamon and sugar. This journey taught me the beauty of home cooking—how patience and love can create something truly unforgettable. Let’s dive into making these delicious cinnamon rolls together, exploring the fundamentals and the joy of homemade baking.
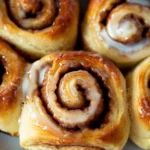
Cinnamon Rolls
- Total Time: 25 minutes
- Yield: 4 servings 1x
Description
Discover the secrets to baking perfect cinnamon rolls at home. Learn step-by-step instructions, tips for a fluffy texture, and how to create a sweet, delicious glaze.
Ingredients
- 380 g de farine de blé T45
- 1 sachet de levure boulangère instantanée (5 g)
- 195 g de lait entier
- 50 g de beurre doux, ramolli
- 1 oeuf (à température ambiante depuis 1 heure)
- 50 g de sucre blanc
- 1 pincée de sel fin
- 25 g de beurre ramolli
- 40 g de cassonade
- 8 g de cannelle
Instructions
- Combine the yeast with 335 g of the flour in your stand mixer bowl. Then add in the warmed milk, pre-beaten egg, sugar, and a pinch of fine salt. Continue mixing while gradually incorporating the very soft butter pieces until fully blended.
- The dough will be extremely sticky, which is expected. Place it on a well-floured surface and knead with well-floured hands, gradually adding about 45 g of flour. Ultimately, the dough should be just slightly sticky.
- Place the dough in a bowl, cover it with plastic wrap to prevent air exposure, and let it rise in a warm place at around 28-30°C for about 1.5 hours.
- Once it has doubled in size, generously flour your rolling pin and the work surface. Gently roll out the dough into a rectangle approximately 33 cm long and 26 cm high.
- Spread the softened butter over the dough. In a separate bowl, mix the brown sugar and cinnamon, then sprinkle this mixture over the dough. Press down lightly with your fingers to ensure it adheres.
- Roll the dough into a log, then cut it into 9 portions using string.
- Grease your baking dish with butter and lightly dust it with flour. Place the rolls inside and gently brush them with whole milk using a pastry brush. Cover the dish with plastic wrap and let it rise for another 45 minutes in a warm place at around 28-30°C.
- Preheat your oven to 180°C with the conventional heat setting. Brush the cinnamon rolls with milk once more using the brush before baking them for 28-29 minutes.
- After taking them out of the oven, lightly coat them with milk for the third time—trust me, this makes all the difference!
Notes
- Warm the milk to about 37°C before combining with the flour and yeast for optimal yeast activationnEnsure the butter is very soft to mix smoothly into the dough for a uniform texturenUse dental floss or string to slice the dough log to maintain the rolls’ shape
- Prep Time: 10 minutes
- Cook Time: 15 minutes
- Category: Breakfast
- Method: Baking
- Cuisine: Française
Nutrition
- Calories: 300
- Fat: 12g
- Protein: 20g
Keywords: cinnamon rolls recipe, homemade cinnamon rolls, soft cinnamon rolls, butter cinnamon rolls, cinnamon sugar filling, quick rising dough
Creating Perfect Cinnamon Rolls
Fundamentals
Making cinnamon rolls starts with understanding the fundamentals of dough preparation. Begin by combining yeast with flour in your stand mixer. This step is crucial for activating the yeast, ensuring your cinnamon rolls rise beautifully. Add warm milk, a pre-beaten egg, sugar, and a pinch of salt to the mixture. These ingredients form the base of your dough, providing flavor and structure.
Incorporate softened butter gradually, blending it into the dough. Expect a sticky texture at first; this is normal and will change as you knead. Transfer the dough to a floured surface, kneading with floured hands. This kneading process develops gluten, which gives the dough its elasticity and strength.
Preparation/Setup
Once kneaded, place the dough in a bowl, cover it with plastic wrap, and let it rise in a warm place. The ideal temperature for this is between 28-30°C, allowing the dough to double in size over 1.5 hours. This rising phase is essential for achieving fluffy cinnamon rolls, as it gives the dough time to ferment and develop flavor.
After rising, roll out the dough on a floured surface. Ensure the rolling pin is well-floured to prevent sticking. Aim for a rectangle approximately 33 cm long and 26 cm high. This shape is perfect for creating even rolls. Spread softened butter over the dough, then sprinkle with a mixture of brown sugar and cinnamon, pressing gently to adhere.
The Art of Cinnamon Roll Making
Technique
Rolling the dough carefully ensures even distribution of filling. Start from one edge, rolling tightly to form a log. Use string to cut the log into nine equal portions, a method that maintains the shape of each roll without squashing them. This technique is crucial for consistent baking results.
Place the rolls in a greased and floured baking dish, ensuring each has space to expand. Brush lightly with whole milk, which helps develop a golden, shiny crust. Cover the dish and let the rolls rise again for 45 minutes in a warm place. This second rise is vital for achieving the soft, fluffy texture synonymous with perfect cinnamon rolls.

Cinnamon Rolls
Tips/Tricks
For best results, preheat your oven to 180°C with the conventional heat setting. This temperature ensures even baking without over-browning. Before baking, brush the rolls with milk again. This step adds to the rolls’ final sheen and enhances flavor. Baking for 28-29 minutes is ideal, allowing the rolls to cook through while maintaining their soft texture.
After baking, brush with milk a third time. This final touch may seem excessive, but it makes a noticeable difference in the rolls’ moisture and flavor. For more inspiration and techniques, explore our collection of soft and fluffy cinnamon walnut rolls and cinnamon roll banana rolls for unique variations.
Mastering Cinnamon Roll Perfection
Perfecting Results
Perfecting cinnamon rolls involves attention to detail and patience. Ensure consistent dough texture by accurately measuring ingredients. The dough should be slightly sticky yet manageable after kneading. Use the right amount of flour, as too much can result in dense rolls.
Temperature control is crucial. Both the rising environment and baking temperature impact the final product. Use an oven thermometer for accuracy, ensuring your oven is at 180°C before baking. Additionally, the warm environment for rising is key; too cool, and your dough may not rise sufficiently.
Troubleshooting/Variations
If your rolls are dense, consider adjusting the flour-to-liquid ratio or kneading time. Sticky dough may need more flour during kneading, while overly stiff dough benefits from more kneading or hydration. Explore different fillings, such as adding walnuts for texture or bananas for sweetness, as seen in our walnut rolls with cream cheese frosting.
For a no-bake alternative, try our no-bake cheesecake cinnamon rolls. This version offers a creative twist, perfect for those seeking a quick and easy dessert option. Regardless of the variation, focus on technique and ingredient balance for the best outcome.
Serving and Enjoying Cinnamon Rolls
Serving/Presentation
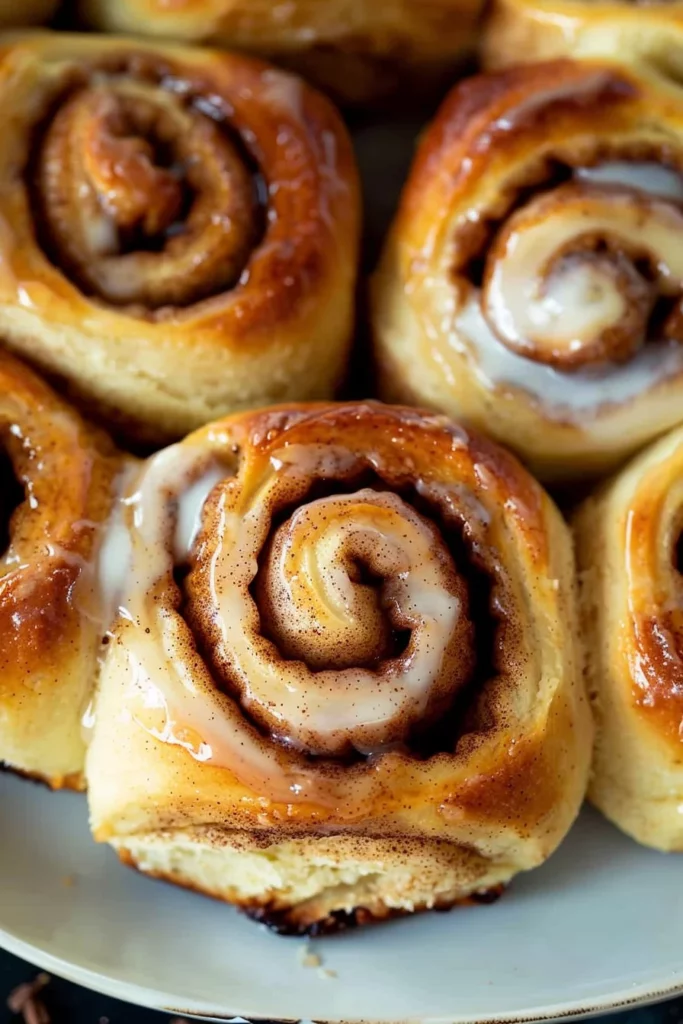
Presentation enhances the enjoyment of cinnamon rolls. Serve them warm from the oven, allowing their aroma to fill the room. Arrange rolls on a platter, drizzling with icing or serving with a side of cream cheese frosting for extra indulgence. This presentation elevates the visual appeal, making them irresistible.
Consider unique serving styles for different occasions. For a casual breakfast, serve alongside fresh fruit or yogurt. For a special brunch, pair with coffee or tea, creating a cozy, inviting atmosphere. These simple touches transform your cinnamon rolls into a memorable experience.
Cinnamon Rolls
Pairings/Storage
Pair cinnamon rolls with complementary flavors like a cup of hot cocoa or a refreshing smoothie. For storage, keep rolls in an airtight container at room temperature for up to two days. To extend freshness, refrigerate or freeze, reheating before serving to restore softness.
Explore our air fryer Pillsbury cinnamon rolls for a quick and convenient option, perfect for busy mornings. For a creative twist, try our cinnamon sugar pizza made with crescent rolls. These variations offer delightful alternatives while maintaining the essence of classic cinnamon rolls.
Conclusion
Mastering the art of cinnamon roll making is a rewarding journey. By focusing on dough preparation, technique, and presentation, you create a delightful treat that brings joy to any occasion. The perfect balance of cinnamon and sugar, combined with a soft, fluffy texture, makes these rolls unforgettable.
The utility of these cinnamon rolls lies in their versatility. Whether served as a breakfast indulgence or a dessert highlight, they never fail to impress. Embrace the process, experiment with variations, and enjoy the satisfaction of creating something truly special from scratch.
