📑 Table of Contents ▶
- Halloween Chocolate Chip Cookies: The Fundamentals
- Fundamentals
- Preparation/Setup
- Directions
- Tricks for Making Perfect Halloween Chocolate Chip Cookies
- Technique
- Tips/Tricks
- Tricks for Perfecting Halloween Cookies
- Perfecting Results
- Troubleshooting/Variations
- Serving and Storing Your Halloween Treats
- Serving/Presentation
- Pairings/Storage
- Conclusion
- Related posts:
- Decadent Chocolate Lava Brownie Cookies Recipe
- Peppermint Mocha Truffles: Decadent Joy in Every Bite
- Sugar Cookie Lemonade Crumble: The Best Summer Dessert Recipe
Halloween Chocolate Chip Cookies
Baking cookies during Halloween evokes a delightful sense of nostalgia. As children, we anxiously awaited the day when we could whip up treats decorated with spooky sprinkles, transforming the ordinary into something magical. Now, as an adult, I find equal joy in sharing the experience of baking Halloween cookies with friends and family.
The aroma of warm chocolate chips mingling with the sweetness of sugar creates an irresistible atmosphere. Gathering in the kitchen, we create memories that last a lifetime. These Halloween chocolate chip cookies capture that spirit—colorful, festive, and most importantly, delicious.
This recipe blends classic cookie flavors with a festive twist. The soft, chewy texture paired with playful decorations makes these cookies a highlight of any Halloween celebration. Let’s embark on the journey to create the perfect batch of Halloween chocolate chip cookies!
Halloween Chocolate Chip Cookies: The Fundamentals
Baking Halloween chocolate chip cookies requires understanding the fundamental elements of cookie-making. Familiarize yourself with the various components, and watch how they work together to produce a delightful treat. Each ingredient plays a crucial role, providing flavor, texture, and structure to the cookies.
Fundamentals
The foundation of any cookie recipe lies in its ingredients. The harmony between butter, sugars, and flour creates that classic cookie texture. When you melt the unsalted butter, you set the stage for a rich, chewy cookie. The brown sugar adds moisture and hints of caramel, while granulated sugar gives just the right amount of sweetness.
Moreover, the inclusion of an egg helps bind the ingredients, contributing to the cookies’ soft consistency. Vanilla extract elevates the flavor profile, ensuring each bite is filled with warmth and nostalgia. Don’t forget the baking soda, which helps the cookies puff up perfectly, creating that desired chewy edge.
Preparation/Setup
Begin by gathering all your ingredients and tools. A mixing bowl and spatula simplify the process. Prepping your baking sheets with parchment paper or silicone mats eliminates the hassle of cleanup and prevents sticking. Organizing your workspace can make the baking experience much smoother.
Ingredients
For these Halloween chocolate chip cookies, ensure you gather the following ingredients:
- 1/2 cup unsalted butter (melted)
- 1/3 cup granulated sugar (67 g)
- 1/2 cup packed light brown sugar (100 g)
- 1 large egg
- 1 teaspoon vanilla extract
- 1/2 teaspoon salt
- 1/2 teaspoon baking soda
- 1 1/2 cups all-purpose flour (spooned and leveled, 186g)
- 1 1/2 cups chocolate chips
- 1/2-3/4 cup Halloween sprinkles
- Candy eyes (optional)
Directions
- Start by adding the melted butter, brown sugar, and granulated sugar to a bowl. Mix until smooth and fully combined.
- Incorporate the vanilla and egg into the mixture, continuing to mix until everything blends harmoniously.
- Gradually add the flour, salt, and baking soda to the bowl. Mix on low until the mixture begins to combine. Increase the speed and mix for an additional 15-30 seconds until the batter becomes smooth. Be cautious not to over-mix, as this can lead to tougher cookies.
- Using a spatula or large spoon, gently fold in the Halloween sprinkles and chocolate chips until evenly distributed.
- Scoop 2-tablespoon balls of dough onto a baking sheet lined with parchment paper. Don’t worry about spacing; you’ll chill the dough before baking.
- Cover with plastic wrap and refrigerate for 1.5 to 2 hours, or even up to 24 hours if you’re planning ahead.
- Preheat your oven to 350℉.
- Remove the dough from the refrigerator. Place the balls of cookie dough onto a prepared baking sheet, making sure they are about 2 inches apart.
- Bake for 11-13 minutes, or until the edges turn golden brown.
- If using candy eyes, place them onto the cookies right after removing them from the oven for a fun, spooky touch.
- Allow the cookies to cool before enjoying your delicious Halloween chocolate chip cookies!
Tricks for Making Perfect Halloween Chocolate Chip Cookies
Transforming your cookie baking into a masterpiece involves some techniques and best practices. By paying attention to details and incorporating clever tricks, you can elevate your Halloween chocolate chip cookies to the next level. Let’s dive into some essential techniques and tips for success.
Technique
To achieve cookies that are soft in the center and slightly crispy on the edges, consider the baking time carefully. As ovens can vary, keep an eye on the first batch—you’ll find that slight adjustments can make all the difference. If the dough has chilled properly, the cookies will spread just enough for a lovely texture.
For an added depth of flavor, consider browning the butter before melting. This process infuses a nutty taste that enhances the overall flavor of your cookies. Just be sure to let it cool slightly before mixing it with the sugars.
Tips/Tricks
- Use high-quality chocolate chips for the best flavor impact.
- For an extra festive touch, consider mixing in alternative candies or nuts in addition to chocolate and sprinkles.
- Experiment with different sprinkle colors for a unique twist on your Halloween cookies.
- If you like a more pronounced sweetness, add a touch more granulated sugar, but be careful not to disrupt the cookie structure.
- Consider portioning your cookie dough balls before refrigerating—a game changer for keeping the dough chilled and ready for baking!
Tricks for Perfecting Halloween Cookies
Every cook encounters challenges when it comes to baking. Fear not! Troubleshooting common issues can elevate your cookie game significantly. Let’s explore how to perfect those Halloween chocolate chip cookies and troubleshoot variations.
Perfecting Results
To ensure consistent results, always spoon and level your flour rather than scooping directly from the bag. This prevents over-packing and results in tender cookies. If you prefer thicker cookies, chill the dough longer to reduce spreading during baking.
For an optimal texture, consider using a mix of chocolate chips, such as dark and milk chocolate. This variety creates a delightful contrast in flavor that everyone will enjoy.
Troubleshooting/Variations
Should your cookies turn out flatter than desired, it may be an issue with the flour or butter temperature. Make certain that the butter is melted but not too warm. If the cookies are too soft after baking, try adding a bit more flour. Each variation allows you to customize your recipe until you find your perfect chocolate chip cookie.
Substituting some of the all-purpose flour with whole wheat flour can add nutritional benefits without sacrificing too much flavor or texture. Depending on the desired outcome, experiment with spices like cinnamon or nutmeg for added warmth and depth.
Serving and Storing Your Halloween Treats
Once you’ve baked the perfect batch of Halloween chocolate chip cookies, you’ll want to present them beautifully and ensure they stay fresh. Let’s discuss ideal serving methods and storage tips that keep your delicious treats tasting delightful.
Serving/Presentation
Present your Halloween cookies with flair! Stack them on a festive platter or arrange them in cellophane bags tied with colorful ribbons. This adds a personal touch if you plan to gift these delightful treats or share them at parties. The vibrant colors of the sprinkles make for a beautiful display.
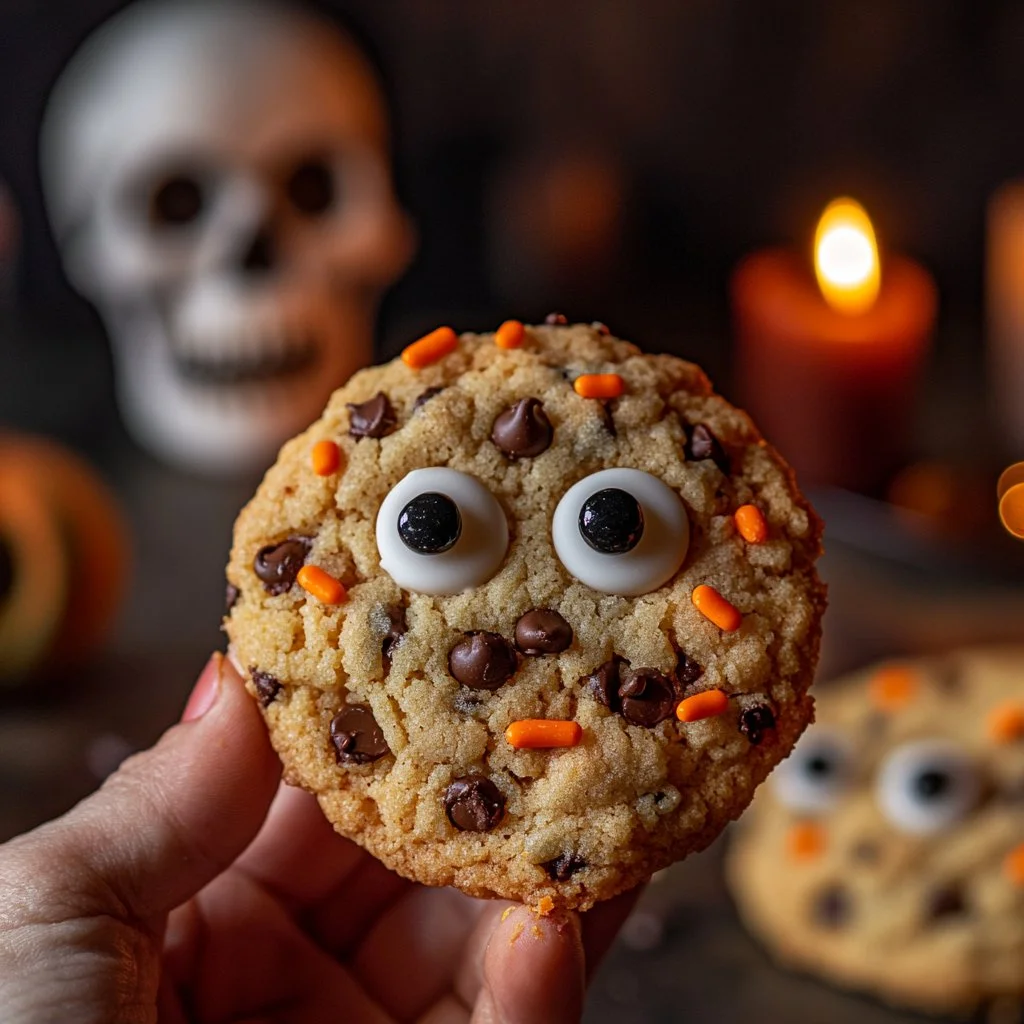
Encourage guests to take an “eye” from the cookie platter—pun intended! Adding candy eyes on a few cookies can spark conversations and fun among guests, generating joy as they admire their spooky team of cookies.
Pairings/Storage
These cookies pair wonderfully with cold milk or a cozy cup of hot cocoa, making for the ultimate treat combination. To store your cookies, keep them at room temperature in an airtight container for optimal freshness.
For longer storage, consider freezing the cookies. Place them in a single layer in a freezer-safe bag or container—simply thaw them at room temperature when you’re ready to indulge again. This way, you can make batches ahead of time and enjoy delicious Halloween cookies days beyond the holiday.
Conclusion
Baking Halloween chocolate chip cookies transforms ordinary moments into joyous celebrations. Whether you enjoy the process alone or invite friends to share in the fun, each cookie tells a story. The delightful aroma of chocolate and sugary sweetness fills the air, creating a festive atmosphere that beckons everyone to join in.
By following this simple yet charming recipe, you’ll create cookies that not only taste great but also encapsulate the spirit of Halloween. So, roll up your sleeves, gather your ingredients, and let the magic of cookie-baking begin!
Print
Halloween Chocolate Chip Cookies
- Total Time: 2 hours 28 minutes
- Yield: 24 cookies 1x
- Diet: Vegetarian
Description
Delicious and festive chocolate chip cookies perfect for Halloween, featuring soft, chewy texture and playful decorations.
Ingredients
- 1/2 cup unsalted butter (melted)
- 1/3 cup granulated sugar (67 g)
- 1/2 cup packed light brown sugar (100 g)
- 1 large egg
- 1 teaspoon vanilla extract
- 1/2 teaspoon salt
- 1/2 teaspoon baking soda
- 1 1/2 cups all-purpose flour (spooned and leveled, 186 g)
- 1 1/2 cups chocolate chips
- 1/2–3/4 cup Halloween sprinkles
- Candy eyes (optional)
Instructions
- Add melted butter, brown sugar, and granulated sugar to a bowl. Mix until smooth.
- Incorporate vanilla and egg into the mixture, mixing until well combined.
- Gradually add flour, salt, and baking soda. Mix on low until combined, then increase speed and mix for 15-30 seconds until smooth.
- Gently fold in Halloween sprinkles and chocolate chips.
- Scoop 2-tablespoon balls of dough onto a baking sheet lined with parchment paper.
- Cover with plastic wrap and refrigerate for 1.5 to 2 hours, or up to 24 hours.
- Preheat oven to 350℉.
- Remove dough, place cookie balls on baking sheet 2 inches apart.
- Bake for 11-13 minutes until edges are golden brown.
- Add candy eyes after removing from oven if desired.
- Allow cookies to cool before serving.
Notes
For best results, chill dough properly and consider browning the butter for added flavor.
- Prep Time: 15 minutes
- Cook Time: 13 minutes
- Category: Dessert
- Method: Baking
- Cuisine: American
Nutrition
- Serving Size: 1 cookie
- Calories: 150
- Sugar: 10g
- Sodium: 90mg
- Fat: 7g
- Saturated Fat: 4g
- Unsaturated Fat: 2g
- Trans Fat: 0g
- Carbohydrates: 20g
- Fiber: 1g
- Protein: 2g
- Cholesterol: 20mg
Keywords: Halloween, cookies, chocolate chip, dessert, baking
