
📑 Table of Contents ▶
- The Craft of Homemade Bread Bowls
- Fundamentals
- Preparation/setup
- Directions
- Elevating Your Bread Bowl Experience
- Technique
- Tips/tricks
- Perfecting the Results of Your Bread Bowls
- Perfecting results
- Troubleshooting/variations
- Serving and Storing Your Homemade Bread Bowls
- Serving/presentation
- Pairings/storage
- Related posts:
- Creamy Italian Sausage Gnocchi Soup
- Slow Cooker Salisbury Steak Meatballs
- Stuffed Flatbreads
Homemade Bread Bowls
Creating homemade bread bowls evokes fond memories of family gatherings and cozy evenings spent sharing warm meals. The aroma of freshly baked bread fills the house, enticing everyone to gather in the kitchen. Homemade bread bowls serve as the perfect edible vessels for soups or dips, bringing a comforting touch to any dish.
In my experience, making homemade bread bowls offers a charming blend of simplicity and satisfaction. Each bite of soft, buttery bread complements hearty fillings beautifully. The joy comes not just from eating but also from the process: kneading the dough, allowing it to rise, and finally seeing those golden-brown bowls emerge from the oven.
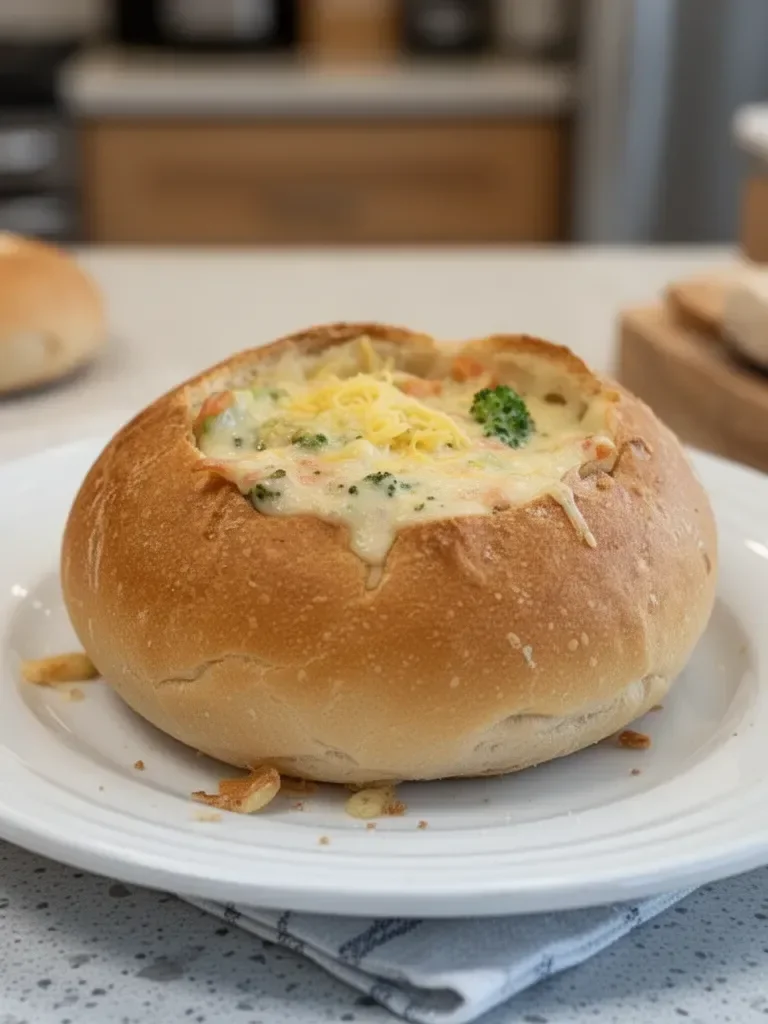
The beauty of homemade bread bowls lies in their versatility. You can fill them with everything from creamy chowders to savory chili. Each time, you create a new memory, enriching the experience of sharing food with loved ones. Let’s dive into the delightful process of making these scrumptious bread bowls, ensuring that your next meal together is as heartwarming as the memories that come with it.
The Craft of Homemade Bread Bowls
Fundamentals
Understanding the basic components of homemade bread bowls is crucial for successful baking. Bread consists primarily of flour, water, yeast, and salt, each playing a vital role in the texture and flavor. Ingredients like butter and sugar add richness and enhance the overall taste.
For this recipe, you’ll need 3 cups of warm water, 1 ½ tablespoons of active dry yeast, and both granulated sugar and salt. Using only all-purpose flour, your bread bowls will boast a tender crumb. The inclusion of melted butter elevates the softness of the dough, making each bowl irresistible.
Preparation/setup
Start by gathering all ingredients to streamline the process. Measure 3 cups of warm water, ensuring your yeast activates correctly. It’s essential for the water to be warm, not hot, as excessive heat can kill the yeast.
Begin by combining the water, yeast, and a small amount of sugar in a small bowl. Stir until the yeast dissolves and cover it with a towel. Allow this mixture to stand for about five minutes until it becomes foamy. This step is crucial for activating the yeast, which will help your bread rise beautifully.
Next, prepare a large bowl where you’ll mix the remaining ingredients. Adding salt, the rest of the sugar, the melted butter, and the foamy yeast mixture creates the foundation of your dough. Gradually mix in 3 ½ cups of flour, stirring until everything starts to blend together.
Ingredients
Here’s what you’ll need:
- 3 cups warm water
- 1 ½ tablespoons active dry yeast (2 packets)
- 2 tablespoons + ½ teaspoon granulated sugar, divided
- 1 tablespoon salt
- 4 tablespoons butter, melted
- 7 to 9 cups all-purpose flour, divided
- 1 tablespoon milk
- 1 egg white
Having all ingredients ready ensures the process flows smoothly. As you can see, baking bread bowls requires relatively simple components, making it an accessible and enjoyable experience.
Directions
- Combine the 3 cups of warm water, the active dry yeast, and ½ teaspoon of granulated sugar in a small bowl.
- Stir gently until the yeast is dissolved. Cover the bowl with a towel and let it stand for about five minutes until the mixture becomes foamy.
- In a large bowl, add the salt, the remaining sugar, melted butter, and the foamy yeast mixture. Mix thoroughly.
- Gradually add the flour, about 1 cup at a time, until the dough begins to pull away from the sides of the bowl.
- Knead the dough by hand or with a stand mixer for approximately five minutes. Stop and check the texture. It shouldn’t be sticky but may slightly cling to your finger.
- If necessary, add more flour in small amounts until you achieve the right consistency. Knead for an additional 2-3 minutes.
- Lightly spray a second large bowl with nonstick spray. Transfer the dough into this bowl, flipping it to coat both sides with oil.
- Cover the bowl with a dish towel and let it rise until doubled, which will take about 30-45 minutes.
- Once risen, divide the dough into 6 or 8 equal pieces, depending on the desired size of your bowls.
- Pat each section of dough down gently to remove any air, then shape it into a tight ball.
- Place the dough balls on a baking sheet lined with parchment paper. Make a small "X" slit on top of each with a serrated knife.
- Create an egg wash by beating the egg white with 1 tablespoon of milk. Lightly brush the tops of the dough balls with this wash.
- Cover the rolls lightly with plastic wrap and allow them to rise until doubled again, about 30-40 minutes.
- Preheat your oven to 400°F. Bake the rolls for about 25-30 minutes or until golden brown. Allow to cool for at least 15 minutes before cutting them into bowls.
Elevating Your Bread Bowl Experience
Technique
Perfecting each step in your bread bowl recipe can significantly elevate the outcome. Kneading the dough thoroughly ensures even gluten development, which contributes to that perfect chewy bite. Utilizing a stand mixer can save time and energy, but don’t shy away from using your hands for a more tactile experience.
Remember to be mindful when incorporating flour. Adding it gradually allows you to control the dough’s consistency better. Kneading should feel satisfying, transforming the sticky mixture into a smooth and elastic ball.
Tips/tricks
Baking is both an art and a science, and a few essential tips can lead you to success. Proofing the yeast in warm water is critical, so be sure it’s at the right temperature. An instant-read thermometer can be a reliable tool for this task, ensuring optimal yeast activity.
If your kitchen is particularly cool, consider placing the dough in a warm spot while it rises. A turned-off oven with the light on can provide just the right environment. Covering the dough well prevents it from drying out, ensuring a soft texture.
Perfecting the Results of Your Bread Bowls
Perfecting results
Achieving the ideal raised bread bowls involves carefully monitoring your dough’s rise. Allow adequate time for fermentation; this enhances flavor and texture. A well-risen dough results in airy, soft bread bowls perfect for holding any delicious filling.
Baking until they achieve a beautiful golden color ensures a crust that holds its shape. This outer layer offers a delightful contrast to the soft interior, enhancing the entire bread bowl experience.
Troubleshooting/variations
If the bread bowls don’t rise as expected, check the yeast’s freshness. Expired yeast will lead to disappointing results. Additionally, ensure your water temperature was correct—too hot or too cold will hinder activation.
Variations can enhance your bread bowls according to personal preferences or dietary needs. Consider adding spices or herbs to the dough for additional flavor. If you prefer a richer taste, substituting some of the water with milk can lead to an even softer result, perfect for heartier fillings.
Serving and Storing Your Homemade Bread Bowls
Serving/presentation
Presenting your homemade bread bowls can add a charming touch to your meal. Serve them with an array of fillings like creamy soups or savory stews. Consider adding a sprinkle of fresh herbs or a drizzle of olive oil on top for a more appealing presentation.
You can also create a lovely centerpiece by arranging the bowls on a large platter, creating an inviting atmosphere during meal times. Guests will be excited to dig into these warm, soft bowls filled with their favorite dishes.
Pairings/storage
Serve your homemade bread bowls with hearty soups, fresh salads, or flavorful dips. They pair beautifully with chowders, chili, or a rich cheese sauce. The bread will soak up delicious flavors, enhancing any dish you choose.
If you have leftovers, store them in an airtight container at room temperature for a day or two. For longer storage, freeze the bread bowls before filling. This method preserves their freshness until you’re ready to use them. When rewarming, ensure they toast slightly to maintain their crispy outer texture.
Creating homemade bread bowls brings both joy and comfort to the dining experience. The process is a fulfilling journey through flavors and aromas that unite friends and family around the table. As you embrace this art, you’ll find that these simple ingredients transform into something truly special with each batch.
Print
Homemade Bread Bowls
- Total Time: 45 minutes
- Yield: 6-8 servings 1x
- Diet: Vegetarian
Description
Delicious homemade bread bowls perfect for soups and dips, bringing warmth to your meals and memories.
Ingredients
- 3 cups warm water
- 1 ½ tablespoons active dry yeast (2 packets)
- 2 tablespoons + ½ teaspoon granulated sugar, divided
- 1 tablespoon salt
- 4 tablespoons butter, melted
- 7 to 9 cups all-purpose flour, divided
- 1 tablespoon milk
- 1 egg white
Instructions
- Combine the 3 cups of warm water, the active dry yeast, and ½ teaspoon of granulated sugar in a small bowl.
- Stir gently until the yeast is dissolved. Cover the bowl with a towel and let it stand for about five minutes until the mixture becomes foamy.
- Add the salt, the remaining sugar, melted butter, and the foamy yeast mixture to a large bowl. Mix thoroughly.
- Gradually add the flour, about 1 cup at a time, until the dough begins to pull away from the sides of the bowl.
- Knead the dough by hand or with a stand mixer for approximately five minutes. Stop and check the texture; it shouldn’t be sticky but may slightly cling to your finger.
- If necessary, add more flour in small amounts until you achieve the right consistency. Knead for an additional 2-3 minutes.
- Lightly spray a second large bowl with nonstick spray. Transfer the dough into this bowl, flipping it to coat both sides with oil.
- Cover the bowl with a dish towel and let it rise until doubled, which will take about 30-45 minutes.
- Once risen, divide the dough into 6 or 8 equal pieces, depending on the desired size of your bowls.
- Pat each section of dough down gently to remove any air, then shape it into a tight ball.
- Place the dough balls on a baking sheet lined with parchment paper. Make a small “X” slit on top of each with a serrated knife.
- Create an egg wash by beating the egg white with 1 tablespoon of milk. Lightly brush the tops of the dough balls with this wash.
- Cover the rolls lightly with plastic wrap and allow them to rise until doubled again, about 30-40 minutes.
- Preheat your oven to 400°F. Bake the rolls for about 25-30 minutes or until golden brown.
- Allow to cool for at least 15 minutes before cutting them into bowls.
Notes
Proof yeast in warm water for best results. Use fresh ingredients for optimal flavor.
- Prep Time: 15 minutes
- Cook Time: 30 minutes
- Category: Main Course
- Method: Baking
- Cuisine: American
Nutrition
- Serving Size: 1 bread bowl
- Calories: 250
- Sugar: 5g
- Sodium: 350mg
- Fat: 8g
- Saturated Fat: 4g
- Unsaturated Fat: 3g
- Trans Fat: 0g
- Carbohydrates: 32g
- Fiber: 2g
- Protein: 7g
- Cholesterol: 10mg
Keywords: bread bowls, homemade bread, edible bowls, soups, baking, comfort food
