📑 Table of Contents ▶
- Maple Pecan Pie Bars
- Mastering Maple Pecan Pie Bars
- Fundamentals
- Preparation/Setup
- Creating the Perfect Maple Pecan Filling
- Technique
- Tips/Tricks
- Refining Your Pecan Pie Bars
- Perfecting Results
- Troubleshooting/Variations
- Serving and Storing Your Maple Pecan Pie Bars
- Serving/Presentation
- Pairings/Storage
- Conclusion
- FAQs – Maple Pecan Pie Bars
- Related posts:
- Cinnamon-Sugar Air Fryer Banana Chips: How to Make Cinnamon-Sugar Crunchiness
- Blackberry Pistachio Dream Bars: How to Make the Best 5-Ingredient Treat
- Vampire Bite Cupcakes: Sinfully Delicious Bloody Treats
I’m Emma, the heart and hands behind GrandMmaDelights, where every recipe is a journey to the heart of home cooking. One of my all-time favorites is the Maple Pecan Pie Bars, a dessert that never fails to bring joy to any gathering. Growing up, I remember my grandmother’s kitchen filled with the rich aroma of pecans and maple syrup, creating a symphony of flavors that was simply irresistible.
The beauty of Maple Pecan Pie Bars lies in their simplicity, yet they offer a depth of flavor that feels like a warm embrace. These bars are a delightful twist on a classic pecan pie, and they carry all the comforting notes of rich maple syrup and crunchy pecans. Whenever I make these treats, I’m reminded of the joy of sharing something truly special with loved ones.
In my kitchen, Maple Pecan Pie Bars have become a staple for celebrations and casual get-togethers alike. The process of making them is as enjoyable as the result, transforming simple ingredients into a dessert that’s both nostalgic and refreshing. Whether it’s a cozy weekend or a festive occasion, these bars never fail to impress.
Cooking from scratch has always been about creating connections, and this recipe perfectly exemplifies that. With every bite, these Maple Pecan Pie Bars invite you to savor the rich tapestry of flavors that make home cooking so special. Let’s dive into this delicious journey and explore how you can bring this delightful dessert to your table.
Print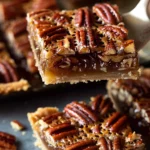
Maple Pecan Pie Bars
- Total Time: 1 hour
- Yield: 16 squares
Description
Indulge in the deliciousness of homemade Maple Pecan Pie Bars with this easy recipe. Learn how to bake these mouthwatering treats today!
Ingredients
- – 5 tbsp (75g) unsalted butter, melted
- – 1/3 cup (80 ml) (tightly packed) brown sugar
- – 1/4 tsp (1 ml) cooking salt / kosher salt
- – 1 cup (240 ml) plain flour (all-purpose flour)
- – 1 1/2 cup (360 ml) pecans
- – 5 tbsp (75g) unsalted butter
- – 1/2 cup (120 ml) (tightly packed) brown sugar
- – 1/4 tsp (1 ml) cooking salt / kosher salt
- – 1/3 cup (80 ml) maple syrup, real not artificially flavored (honey would also work)
- – 2 large eggs (~55g/2oz each)
- – 1 tsp (5 ml) vanilla extract
- – 1/3 cup (80 ml) pecans
- – 2 tsp (10 ml) maple syrup
- – 1 pinch salt
- – 1/4 tsp (1 ml) salt flakes, for sprinkling at the end (optional but recommended)
Instructions
- Prepare the crust by combining the melted butter, brown sugar, and a pinch of salt, then incorporate the flour. Press this mixture into a lined 20cm/8″ pan and bake for 15 minutes at 180°C/350°F (160°C for fan ovens). Let it cool for 15 minutes. In the meantime, toast the pecans in the oven for 10 minutes alongside the base, then chop them coarsely.
- For the filling, heat butter, brown sugar, maple syrup, and a dash of salt in a saucepan until it simmers. Allow it to cool for 5 minutes, then whisk in the eggs and vanilla. Stir in the chopped pecans. Pour this filling over the cooled base and distribute evenly.
- For the topping, toss whole pecans in maple syrup and sprinkle them over the filling. Bake for 25 minutes.
- Let the dessert cool completely at room temperature, approximately 2 hours, or speed up the process by placing it in the fridge. Once set, cut into 16 or 9 squares and enjoy by hand!
Notes
- Toast pecans for the crust to enhance the nutty flavor.
- Allow the filling to cool slightly before adding eggs to avoid overcooking.
- Sprinkle salt flakes for added crunch and flavor, or drizzle extra maple syrup for a sweeter option.
- Prep Time: 20 minutes
- Cook Time: 40 minutes
- Category: Dessert
- Method: Baking
- Cuisine: American
Nutrition
- Calories: 200
- Fat: 12g
- Protein: 3g
Keywords: maple pecan bars, buttery pecan squares, easy pecan dessert, homemade maple pecans, pecan maple slice
Mastering Maple Pecan Pie Bars
Fundamentals
Understanding the fundamentals of making Maple Pecan Pie Bars is crucial to achieving that perfect balance of flavors and textures. The base of these bars is a simple yet flavorful crust made from melted unsalted butter, brown sugar, and a pinch of salt. This combination creates a sweet, buttery foundation that supports the rich pecan filling.
Incorporate plain flour into the mixture, pressing it into a lined 20cm/8″ pan. This crust needs a brief stint in the oven to develop its golden hue and set the stage for the pecan topping. Meanwhile, the pecans, the star of this dessert, are toasted to enhance their natural nuttiness, adding depth to each bite.
Preparation/Setup
Begin by preheating your oven to 180°C/350°F (160°C for fan ovens) and lining your baking pan with parchment paper. This ensures easy removal of the bars once they’re set. As the crust bakes, toast the pecans in the oven for about 10 minutes. Once toasted, chop them coarsely to prepare them for the filling.
Allow the crust to cool for approximately 15 minutes after baking. This step is essential to prevent the filling from soaking into the crust, maintaining the distinct layers that make these bars so appealing. Cooling also helps the crust firm up, providing a stable base for the luscious pecan topping.
Creating the Perfect Maple Pecan Filling
Technique
The filling is where the magic happens, combining rich flavors into a harmonious blend. Start by heating unsalted butter, brown sugar, and maple syrup in a saucepan. Allow this mixture to simmer gently, releasing an inviting aroma that’s the hallmark of Maple Pecan Pie Bars.
After simmering, let the mixture cool for a few minutes. This step is crucial for incorporating the eggs without scrambling them. Whisk the eggs and vanilla extract into the cooled syrup, then fold in the chopped pecans to ensure even distribution throughout the filling. This method guarantees a consistent nutty texture in every bite.
Maple Pecan Pie Bars
Tips/Tricks
To enhance the flavor of your Maple Pecan Pie Bars, consider using real maple syrup instead of artificial substitutes. The authentic flavor of pure maple syrup elevates the entire dessert. As you prepare the filling, stir gently to avoid incorporating too much air, which can affect the texture.
For an extra touch of elegance, sprinkle salt flakes over the top before baking. This addition highlights the sweetness of the filling and adds a sophisticated layer of flavor. If you’re interested in more no-bake treats, explore our No-Bake Pecan Pie Balls for a quick and delightful alternative.
Refining Your Pecan Pie Bars
Perfecting Results
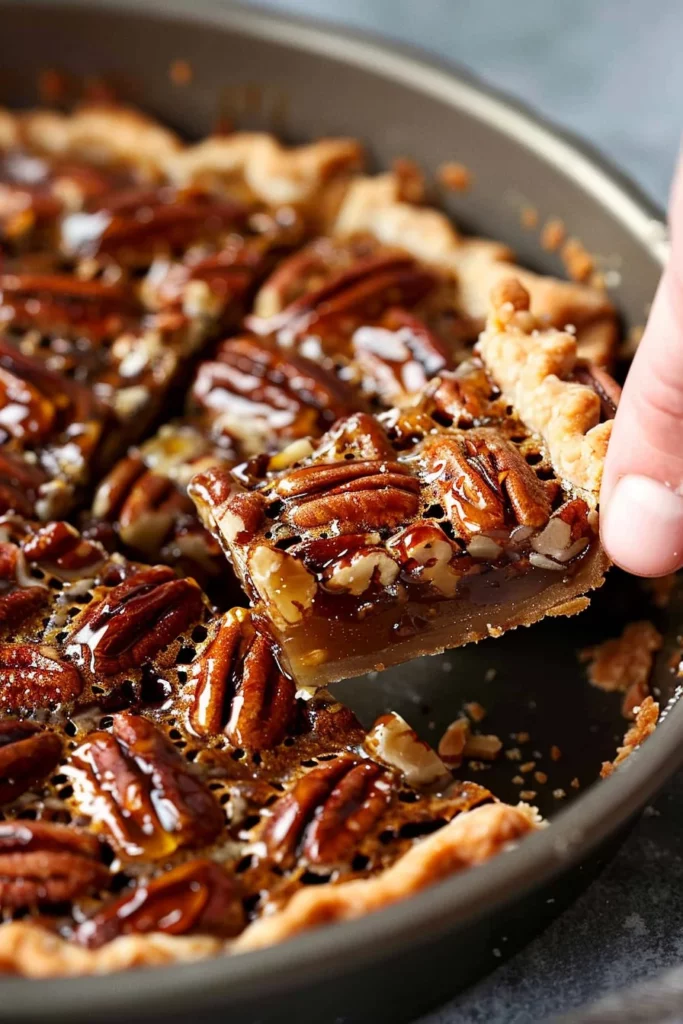
Achieving the perfect Maple Pecan Pie Bars requires attention to detail in both preparation and baking. Pour the pecan filling over the cooled crust, spreading it evenly to ensure a uniform layer. This step is vital for creating the classic pecan pie bar appearance, with a smooth, glossy top and a crunchy, nutty surface.
Bake the bars for approximately 25 minutes, keeping an eye on the edges to ensure they don’t overbrown. The center should be slightly set but still have a gentle wobble. This subtle movement indicates the filling will maintain its creamy texture as it cools.
Troubleshooting/Variations
If the bars seem too soft after cooling, place them in the refrigerator for a firmer texture. This technique also enhances the flavors, allowing the maple and pecan notes to meld beautifully. For a creative twist, try adding a layer of dark chocolate chips before pouring the filling.
For those seeking a healthier twist on classic treats, our Healthy Chocolate Banana Oat Muffin Bars with Greek Yogurt offer a delightful alternative. These bars provide a nutritious yet indulgent option that’s perfect for any occasion.
Serving and Storing Your Maple Pecan Pie Bars
Serving/Presentation
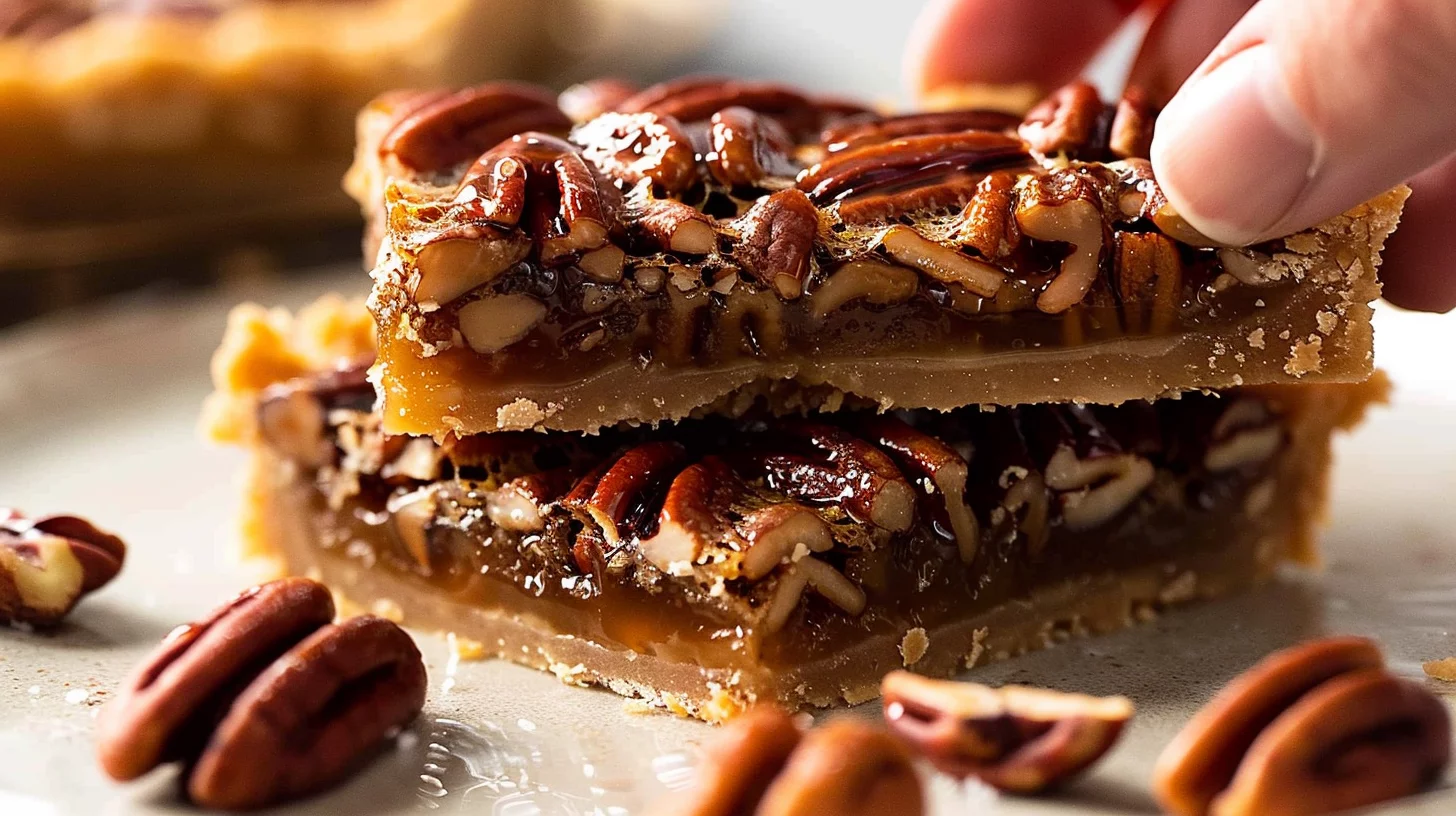
Once the Maple Pecan Pie Bars have cooled completely, cut them into 16 or 9 squares, depending on your preference. Their elegant appearance makes them a perfect choice for both casual and formal settings. Arrange them on a platter for a stunning presentation that invites everyone to indulge.
For a touch of flair, consider serving these bars alongside a scoop of vanilla ice cream or a dollop of whipped cream. The creamy accompaniment balances the rich, nutty flavor of the bars, creating a delightful contrast that’s sure to impress your guests.
Pairings/Storage
Store any leftover bars in an airtight container at room temperature for up to three days. For extended storage, refrigerate them for up to a week, ensuring they retain their flavor and texture. These bars also freeze well, making them a convenient treat to enjoy anytime.

Maple Pecan Pie Bars
Pair your Maple Pecan Pie Bars with a warm beverage like coffee or tea, enhancing their comforting nature. For a savory complement, explore our Maple Glazed Sweet Potatoes with Pecans and Goat Cheese for a delightful balance of flavors. If you’re in the mood for a different culinary adventure, try the Sous Vide Maple Dijon Salmon for a main dish that’s as flavorful as it is unique.
Conclusion
Maple Pecan Pie Bars offer a deliciously nostalgic journey into the world of home baking, blending simple ingredients into a masterpiece of flavor. The combination of a buttery crust and a rich, nutty filling creates a dessert that’s both comforting and impressive.
These bars are versatile, perfect for both everyday treats and special occasions. Their ease of preparation and delightful taste make them a favorite for anyone who loves the taste of pecan pie with a twist. Whether enjoyed fresh or stored for later, they remain a testament to the joys of homemade desserts.
By mastering the art of Maple Pecan Pie Bars, you embrace the essence of baking with love and creativity. Each batch is an opportunity to indulge in flavors that connect us to cherished memories and new experiences alike. Happy baking!
