📑 Table of Contents ▶
- Peppermint Mocha Mousse Cups
- Creating Peppermint Mocha Mousse Cups
- Fundamentals
- Preparation
- Peppermint Mocha Mousse Technique
- Technique
- Tips and Tricks
- Perfecting Your Peppermint Mocha Mousse
- Perfecting Results
- Troubleshooting and Variations
- Serving and Presenting Peppermint Mocha Mousse Cups
- Serving and Presentation
- Storage
- Conclusion
- FAQs – Peppermint Mocha Mousse Cups
- Related posts:
- Maple Pecan Banana Oat Cookies: Irresistibly Chewy and Nutty Delight
- Heavenly Oreo Lemon Dessert
- Pumpkin Pie Energy Bites: Irresistible Frozen Chocolate Drizzle
I’m Emma, and today we’re diving into a delightful culinary creation—Peppermint Mocha Mousse Cups. This dessert has a special place in my heart, reminiscent of holidays spent with family, where the refreshing blend of peppermint and mocha would light up our gatherings. These mousse cups are not just a treat but a journey back to those cherished moments.
The Peppermint Mocha Mousse Cups are a delightful indulgence that beautifully balances rich cocoa with the refreshing zing of peppermint. The inspiration for this dessert came from my love of combining classic flavors with a twist, much like the No-Bake Peanut Butter Cheesecake Cups on my blog that offer a similar sense of comfort.
As we explore the Peppermint Mocha Mousse Cups, you’ll find that they are not only a feast for the taste buds but also a joy to create. The process of transforming simple ingredients into a dessert that dazzles is truly magical. This recipe is perfect for anyone who loves to experiment with flavors and create something extraordinary.
Join me as we embark on this culinary adventure, learning the nuances of making these mousse cups from scratch. Whether you’re an experienced cook or just starting out, this journey promises to be as rewarding as it is delicious.
Print
Peppermint Mocha Mousse Cups
- Total Time: 1 hour 30 minutes
- Yield: 8 servings 1x
Description
Indulge in decadence with our irresistible Peppermint Mocha Mousse Cups recipe. Learn how to create these delightful treats with a perfect balance of flavors. Perfect for any occasion!
Ingredients
- 2 envelopes gelatin (14 g)
- 60 ml (1/4 cup) water
- 120 ml (1/2 cup) hot water
- 150 g (3/4 cups) sugar
- 50 g (1/2 cup) cocoa powder
- 480 ml (2 cups) heavy whipping cream
- 180 ml (3/4 cups) non-alcoholic peppermint mocha creamer
- 5 ml (1 tsp) peppermint extract
- 240 ml (1 cup) heavy whipping cream
- 30 g (2 Tbsp) sugar
- 5 ml (1/2 tsp) vanilla extract
- crushed peppermint candy or candy cane
Instructions
- In a bowl, evenly distribute the gelatin over the cold water and stir until fully combined. Pour in the boiling water and mix until the gelatin has dissolved completely. Set this mixture aside.
- Fill a large bowl with ice and place a smaller bowl inside it. Into the smaller bowl, combine the sugar, cocoa powder, peppermint mocha creamer, heavy whipping cream, and peppermint extract. Whisk at high speed until the blend begins to thicken. Incorporate the gelatin mixture and continue beating until the texture becomes wavy. Refrigerate the bowl for 10-15 minutes to allow the mixture to firm up.
- Transfer the mousse into 5-ounce dessert cups using a spoon, or for a more polished presentation, fill a piping bag with the mousse and pipe it into the cups. Keep the cups in the refrigerator while you prepare the topping.
- Once again, fill a large bowl with ice and place a smaller bowl inside. In the smaller bowl, combine the heavy whipping cream, sugar, and vanilla extract. Beat on high until the cream reaches stiff peaks. Transfer the whipped cream into a piping bag and pipe it onto the mousse. You may serve the dessert as is, or enhance it by adding crushed peppermint candy as a garnish.
- For an optional garnish, place 8 peppermint candies or 2 candy canes into a plastic bag and crush them. Sprinkle the crushed pieces over each mousse cup just before serving, and add a whole peppermint for decoration. Serve immediately.
Notes
- Use high-quality cocoa powder for a more intense flavor.
- Beat heavy whipping cream until stiff peaks form for a light, fluffy texture.
- Experiment with different flavored creamers and garnishes for a unique twist.
- Prep Time: 30 minutes
- Cook Time: 15 minutes
- Category: Dessert
- Method: Refrigeration
- Cuisine: International
Nutrition
- Calories: 320
- Fat: 25g
- Protein: 5g
Keywords: peppermint mocha, creamy mousse, dessert cups, whipped cream, crushed peppermint candy
Creating Peppermint Mocha Mousse Cups
Fundamentals
The magic of Peppermint Mocha Mousse Cups lies in the balance of flavors and textures. We start with gelatin, which acts as the stabilizing agent, allowing our mousse to hold its shape. When combined with water, it forms a base that ensures a smooth texture.
Next, we introduce the key ingredients: sugar, cocoa powder, heavy whipping cream, and peppermint mocha creamer. These elements come together to create the luscious body of the mousse. The peppermint extract adds a refreshing note, elevating the overall experience.
Understanding the role of each component is crucial. The sugar provides sweetness, the cocoa adds depth, and the cream brings richness and volume. The peppermint mocha creamer and extract infuse the dessert with a festive flair, making it perfect for any occasion.
Preparation
Begin by evenly sprinkling gelatin over cold water, stirring until fully combined. Add hot water to dissolve the gelatin completely, setting this mixture aside. This step ensures that the gelatin fully integrates into the mousse, preventing any lumps.
In a bowl set over ice, combine sugar, cocoa powder, peppermint mocha creamer, heavy whipping cream, and peppermint extract. Whisk on high speed until the mixture begins to thicken. This method helps achieve the desired consistency and temperature, crucial for a stable mousse.
Incorporate the gelatin mixture into the cream blend, continuing to beat until wavy. Refrigerate for 10-15 minutes, allowing the mousse to firm up slightly. This chilling period is essential for setting the mousse, ensuring it holds its shape when served.
Peppermint Mocha Mousse Technique
Technique
The technique of making Peppermint Mocha Mousse Cups involves a few critical steps that ensure success. Start by preparing a stable gelatin base, which is crucial for the mousse’s texture. This base provides the structure needed for the cream and other ingredients to blend seamlessly.
Whisking the cream mixture over ice is another vital technique. This step not only cools the mixture quickly but also helps achieve the perfect aeration. The rapid cooling allows the mousse to hold air, giving it a light, fluffy texture.
Once the mousse is prepared, piping it into dessert cups adds a touch of elegance. Using a piping bag ensures a neat presentation and makes serving easier. This method also allows for even distribution, resulting in a uniform look across all servings.

Peppermint Mocha Mousse Cups
Tips and Tricks
For best results, ensure that all ingredients are at room temperature before starting. This prevents any clumping and allows for smooth mixing. Additionally, when whisking the cream mixture, use a high-speed setting to incorporate as much air as possible.
Chill your bowls and whisk attachments beforehand. This step is particularly helpful in warmer climates or kitchens, as it maintains the cool temperature needed for the mousse to set properly.
When piping the mousse, work quickly to prevent the mixture from warming up. If the mousse becomes too warm, it may not hold its shape as well. Refrigerating the mousse cups immediately after piping helps maintain their structure.
Perfecting Your Peppermint Mocha Mousse
Perfecting Results
To achieve the perfect Peppermint Mocha Mousse, focus on the balance of flavors. The peppermint should be present but not overpowering, complementing the rich cocoa and creamy base. Taste as you go, adjusting the peppermint extract to suit your preference.
Achieving the right texture is equally important. The mousse should be light and airy, holding peaks when piped. If it feels too dense, continue whisking until it reaches the desired consistency. The chilling time is crucial here, allowing the mousse to set and develop its flavor.
Presentation plays a significant role in the overall experience. Use a piping bag for a clean, professional look. Consider garnishing with crushed peppermint candy for added crunch and visual appeal. This simple touch can elevate the dessert from delicious to show-stopping.
Troubleshooting and Variations
If your mousse doesn’t set, it may be due to insufficient gelatin or inadequate chilling time. Ensure the gelatin is fully dissolved before incorporating it into the cream mixture. If needed, extend the refrigeration period to allow the mousse to firm up properly.
For a variation, consider adding a layer of crushed cookies at the bottom of each cup for added texture. This base can provide a delightful contrast to the creamy mousse. Alternatively, experiment with different extracts, like vanilla or almond, for a unique twist.
If you enjoy experimenting with flavors, try incorporating elements from my High Protein Greek Yogurt Peanut Butter Brownie Cups or the Greek Yogurt Chocolate Brownie Muffin Cups for additional layers of flavor and texture.
Serving and Presenting Peppermint Mocha Mousse Cups
Serving and Presentation
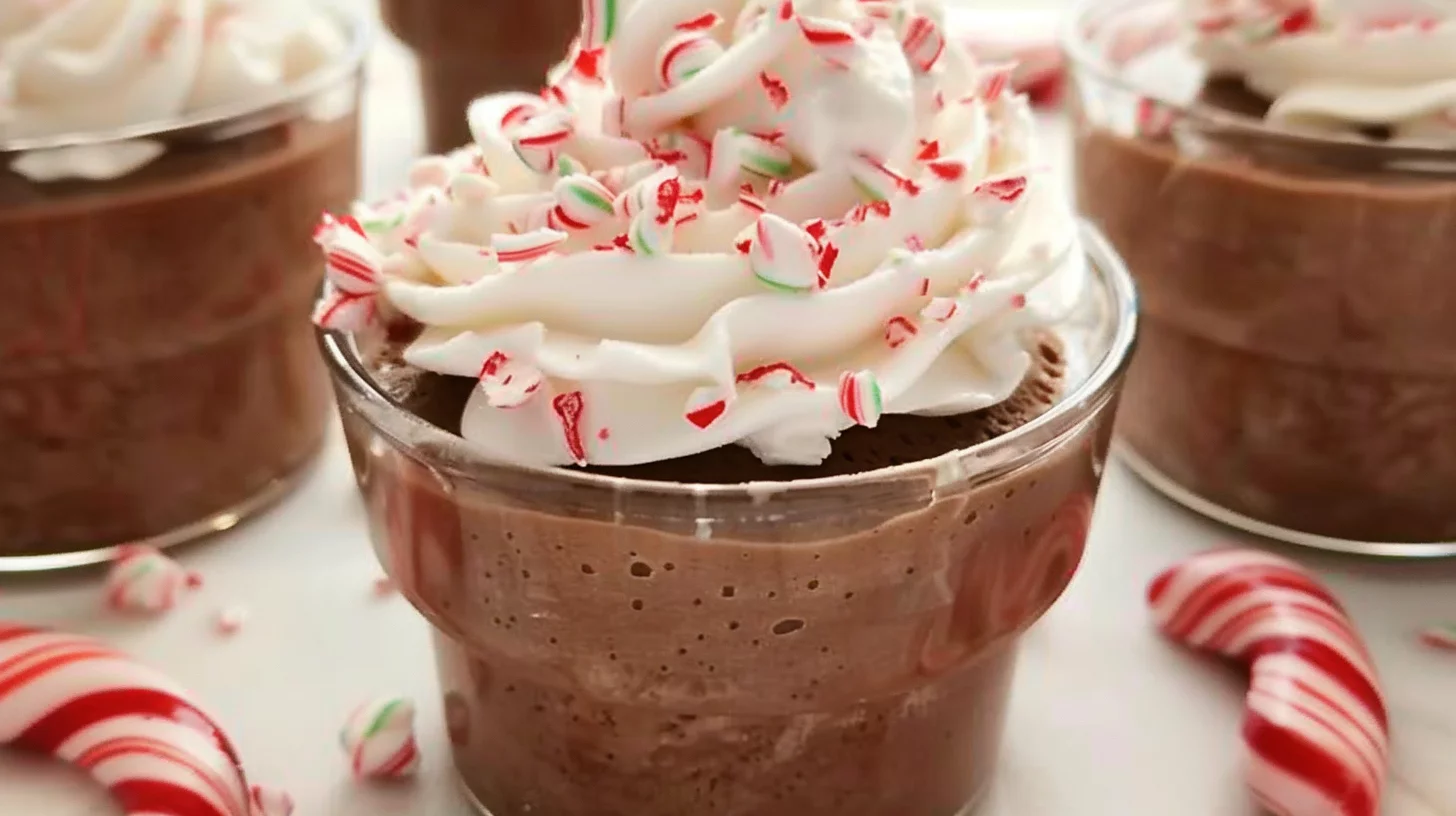
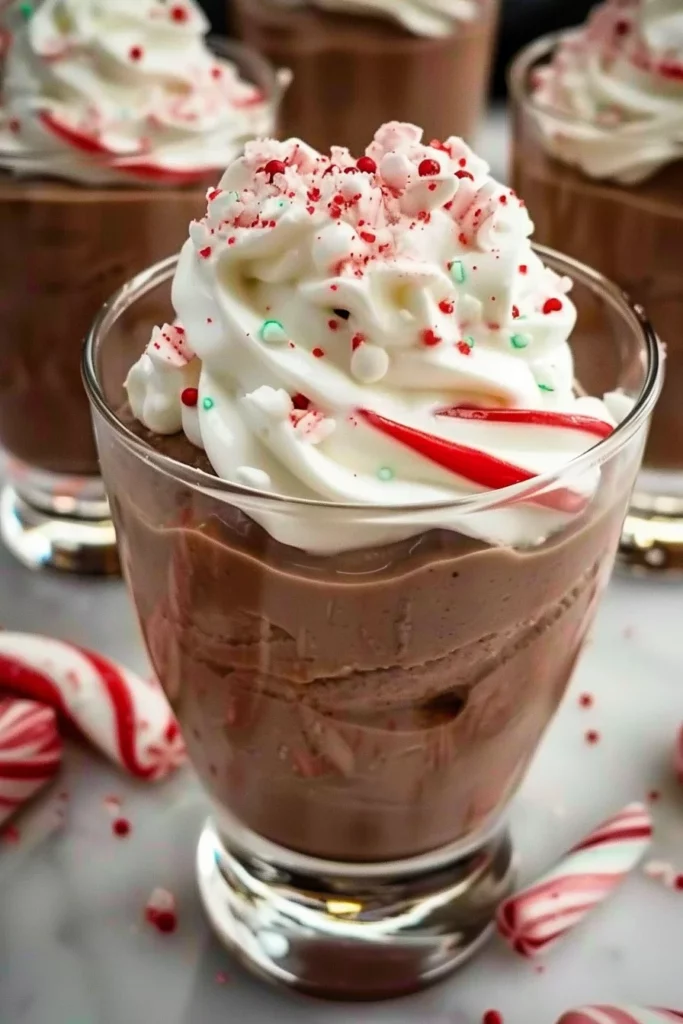
When serving Peppermint Mocha Mousse Cups, focus on presentation. Use clear dessert cups to showcase the beautiful layers and textures. A dollop of whipped cream adds a classic touch, while a sprinkle of crushed peppermint candy or a whole candy cane provides festive flair.
Consider serving these mousse cups alongside a selection of desserts for a more elaborate spread. Pair them with Fluffy Egg Cups for a delightful contrast between savory and sweet. This combination offers a balanced variety for any gathering or special occasion.
For a more interactive experience, set up a dessert bar where guests can add their own toppings. Options like chocolate shavings, crushed cookies, and different flavored syrups can enhance the mousse cups, making the experience even more personalized and enjoyable.
Peppermint Mocha Mousse Cups
Storage
Store the mousse cups in the refrigerator until ready to serve. The mousse can be made a day in advance, making it a convenient option for entertaining. Cover each cup with plastic wrap to prevent the mousse from drying out or absorbing any fridge odors.
If you have leftovers, they’re best enjoyed within a couple of days for optimal freshness. The mousse may lose some of its airy texture over time, so consuming it sooner ensures the best experience. For more dessert ideas that can be made ahead, check out the Mini Turkey and Vegetable Puff Pastry Cups Recipe for a savory option.
Conclusion
Peppermint Mocha Mousse Cups offer a delightful combination of flavors and textures that are sure to impress. From the rich cocoa and creamy base to the refreshing peppermint, every element comes together harmoniously. The versatility of this dessert allows for creativity, whether through presentation or flavor variations.
This recipe showcases the joy of transforming simple ingredients into something extraordinary. It highlights the beauty of home cooking and the satisfaction of creating a dessert that brings people together. With the right techniques and a bit of creativity, you can master these mousse cups to perfection.
Whether you’re serving these at a holiday gathering or a casual get-together, Peppermint Mocha Mousse Cups are sure to be a hit. Their elegant presentation and delightful flavors make them a standout choice for any occasion, embodying the essence of culinary delight and shared moments.
