
📑 Table of Contents ▶
- Soft and Fluffy Sandwich Bread
- Fundamentals
- Preparation/setup
- Directions
- Perfectly Soft Sandwich Bread
- Technique
- Tips/tricks
- Troubleshooting Homemade Sandwich Bread
- Perfecting Results
- Troubleshooting/variations
- Meeting Your Needs with Homemade Sandwich Bread
- Serving/presentation
- Pairings/storage
- Conclusion
- Related posts:
- Guiso de Maiz: How to Make this Delicious Corn Stew
- Creamy Roasted Garlic Tomato Soup
- Creamy Bacon One Pot Pasta: How to Make a Quick and Delicious Meal
Soft and Fluffy Homemade Sandwich Bread
Making soft and fluffy homemade sandwich bread is a delightful experience that brings back fond memories of bustling kitchens filled with warmth and the aroma of freshly baked bread. When I was younger, my family would gather around the kitchen as my grandmother kneaded dough, ready to transform simple ingredients into something truly magical. The sight of that dough rising, the anticipation of baking, and the joy of seeing smiles as we sliced into a warm loaf filled my heart with happiness.
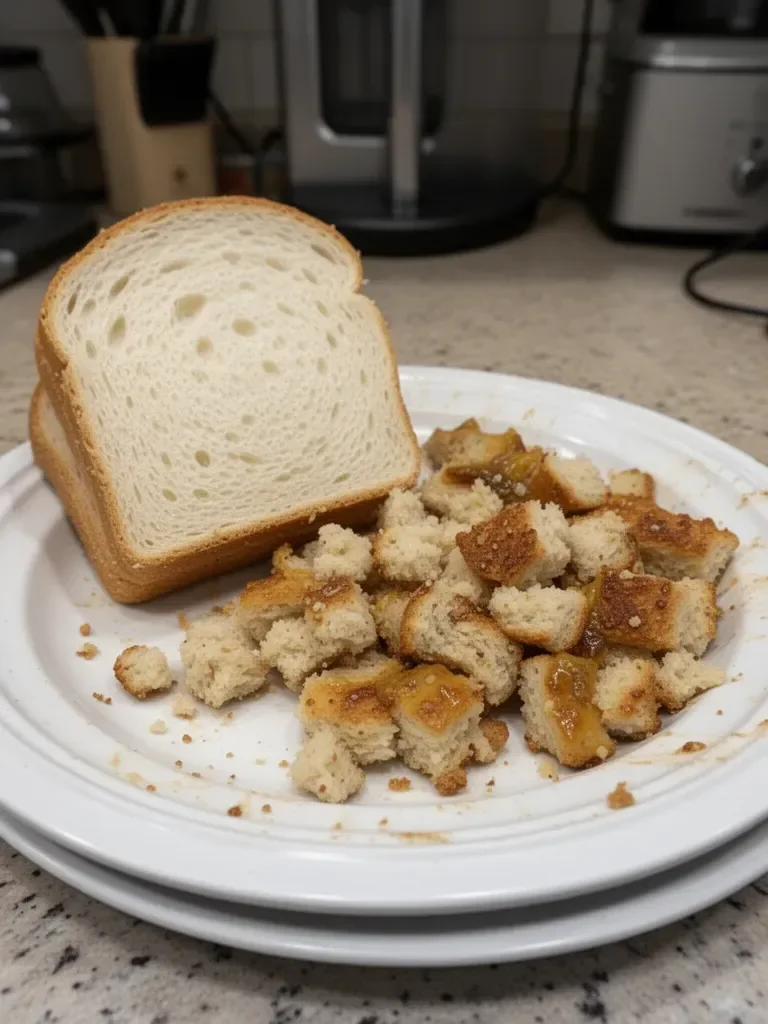
Homemade sandwich bread is not just a staple for sandwiches. It’s a canvas for delicious creations, whether for toasted breakfasts, nourishing lunchboxes, or snack time with a smear of butter. The beauty of this bread lies in its versatility and comforting texture, making it perfect for every meal.
In this recipe, the combination of warm water, honey, coconut oil, and quality bread flour works together to create a soft bread that’s perfect for sandwiches. Each ingredient plays a role, contributing to the delightful softness and inviting flavor. There’s something truly satisfying about creating homemade bread from scratch, and it’s a rewarding process that brings people together around the table. Let’s dive into the steps of making this soft and fluffy homemade sandwich bread.
Soft and Fluffy Sandwich Bread
Fundamentals
Understanding the basics of bread-making sets the foundation for creating the softest and fluffiest sandwich bread possible. The main elements include yeast, flour, flour hydration, and kneading technique.
Yeast Activation:
The yeast, specifically instant yeast in this recipe, is crucial in creating the bread’s rise. The initial step involves activating the yeast with warm water and honey, allowing the yeast to bubble and release that distinct "yeasty" aroma.
Flour Choice:
Bread flour is your best ally in crafting a soft texture. Its higher protein content supports gluten development, which contributes to that satisfying chew and elasticity. By using the right flour, you set the stage for achieving a light and airy loaf.
Kneading Technique:
Kneading the dough properly involves mixing the ingredients until they come together and then kneading it for about 8-10 minutes. This process strengthens the dough and prepares it for a good rise. The dough should feel slightly tacky but not overly sticky. Adjusting flour as needed is key to achieving the right consistency.
Preparation/setup
To get started, gather your ingredients. You will need:
- 475 grams warm water (about 98-100ºF)
- 160 grams honey (1/2 cup)
- 10 grams instant yeast (1 tablespoon)
- 50 grams liquid coconut oil (1/4 cup)
- 1 large egg (50 grams)
- 16 grams salt (2 teaspoons)
- 1000 grams bread flour (about 6 cups)
The initial mixing of ingredients is vital to building flavor and structure. In your stand mixer, combine the warm water, honey, and yeast. After a few minutes of waiting, you can look for a lively reaction from the yeast, an indication that it’s ready for the next stage.
Next, incorporate the coconut oil, egg, and salt into the mixture. Slowly add most of the bread flour to help bring everything together. Your mixer will help combine the ingredients into a cohesive dough.
As you knead the dough, aim for a smooth, elastic texture. If the dough feels too sticky, add flour gradually. This step ensures the dough is workable without being dry. Once kneaded, transfer the dough to a greased container, cover it, and let it rise until doubled in size.
Ingredients
- 475 grams warm water (about 98-100ºF)
- 160 grams honey (1/2 cup)
- 10 grams instant yeast (1 tablespoon)
- 50 grams liquid coconut oil (1/4 cup)
- 1 large egg (50 grams)
- 16 grams salt (2 teaspoons)
- 1000 grams bread flour (about 6 cups)
Using quality ingredients significantly impacts your final bread. The warm water not only activates the yeast but also helps dissolve the honey, ensuring sweet notes throughout the loaf. Honey brings depth, while coconut oil contributes to the soft crumb. Together, these make your homemade sandwich bread nothing short of heavenly.
Directions
- In a bowl of a stand mixer, combine warm water, honey, and instant yeast and let sit for a few minutes until bubbly.
- Add coconut oil, egg, salt, and most of the bread flour. Mix until combined.
- Gradually add remaining flour until the dough comes together. Knead for 8-10 minutes until the dough is smooth and slightly tacky.
- Transfer dough to a greased container and cover. Let rise for 1-2 hours until doubled in size.
- Once doubled, dump the dough onto a lightly floured surface. Divide into two portions (850-900 grams each).
- Pat out one portion into a rectangle (about 7 inches by 12-14 inches) and roll it up tightly, pinching the seams closed.
- Place in a greased 8.5 by 4.5 loaf pan and cover. Repeat with the second portion.
- Let rise in the pan for 1 to 1.5 hours until dough rises over the edges.
- Preheat the oven to 350ºF and bake for 40 minutes until golden brown and internal temperature reaches 190-195ºF.
- Brush with melted butter if desired, then let cool before slicing.
Perfectly Soft Sandwich Bread
Technique
Achieving perfect bread involves mastering a few techniques that ensure your sandwich loaves turn out just right. The way you manipulate the dough makes all the difference in texture and flavor.
Knead Properly:
Kneading is not only about strength; it’s about time. Knead for the full duration, as this enhances gluten formation. A well-kneaded dough will yield a soft sandwich bread that maintains its structure, making it perfect for hearty toppings without falling apart.
Feel the Dough:
As you knead, pay close attention to the dough’s feel. It should be elastic and slightly tacky. If your fingers stick too much, incorporate small amounts of flour until you achieve a workable texture.
Tips/tricks
- Warm Environment: Place your rising dough in a warm, draft-free area. This can accelerate the rising process, especially in cooler kitchens.
- Watch for the First Rise: The dough doesn’t need to double perfectly. Aim for a significant puffiness and increase in size, but don’t overproof.
- Steam in the Oven: For a crisp crust, place a shallow pan of water in the oven while baking. This creates steam that helps develop a beautiful crust.
Troubleshooting Homemade Sandwich Bread
Perfecting Results
Creating the ideal sandwich bread may take a little practice, but with time, it becomes an easy task. Several factors influence the final product.
Proper Proofing Time:
If your bread doesn’t rise appropriately during the second rise, it could lead to denser loaves. Ensure you’re allowing enough time and controlling the environment where the dough rests.
Temperature Matters:
The temperature of your water is crucial for activating yeast. Too hot, and you risk killing the yeast; too cold, and it won’t activate properly.
Troubleshooting/variations
- Underproofed Bread: If your bread is dense after baking, it may not have risen enough. Make sure to check the dough’s springiness during the second rise.
- Overproofed Loaf: If the dough collapses or is hard to shape, it might have overproofed. Next time, decrease the rise time slightly.
- Flavor Variations: Experiment with different sweeteners like maple syrup for varied flavor profiles. You can also add herbs or spices for a unique twist.
Meeting Your Needs with Homemade Sandwich Bread
Serving/presentation
Presenting your homemade sandwich bread can elevate any meal. Serve freshly baked loaves on a wooden board, sliced thick or thin, depending on your preference. Pair it with creamy butters or even flavored spreads to delight everyone at the table.
Pairings/storage
Storing your homemade bread properly is key to maintaining its fresh, soft texture. Once cooled, wrap the loaf in plastic wrap or keep it in an airtight container to retain moisture.
For sandwiches, use the bread as the base for classic pairings like turkey, lettuce, and tomatoes. When slicing for toast, try an avocado spread topped with a pinch of salt and pepper for a breakfast classic that starts your day on the right note.
If you’ve made too much, freeze the bread! Slice before freezing; it allows you to take only as much as you need. Enjoy your delicious, homemade sandwich bread at any time!
Conclusion
Creating soft and fluffy homemade sandwich bread is a process filled with joy, anticipation, and satisfaction. As you combine warm ingredients, knead the dough, and watch it rise, you’re not just crafting bread; you’re making memories. The experience of baking brings families together, inviting everyone to enjoy the labor of love fresh from the oven. Explore this recipe, and soon enough, you’ll find yourself with a beautiful loaf of sandwich bread ready to delight taste buds and make every meal special.
Print
Soft and Fluffy Homemade Sandwich Bread
- Total Time: 55 minutes
- Yield: 2 loaves 1x
- Diet: Vegetarian
Description
A delightful recipe for soft and fluffy homemade sandwich bread, perfect for any meal.
Ingredients
- 475 grams warm water (about 98-100ºF)
- 160 grams honey (1/2 cup)
- 10 grams instant yeast (1 tablespoon)
- 50 grams liquid coconut oil (1/4 cup)
- 1 large egg (50 grams)
- 16 grams salt (2 teaspoons)
- 1000 grams bread flour (about 6 cups)
Instructions
- Combine warm water, honey, and instant yeast in a bowl of a stand mixer and let sit for a few minutes until bubbly.
- Add coconut oil, egg, salt, and most of the bread flour. Mix until combined.
- Gradually add remaining flour until the dough comes together. Knead for 8-10 minutes until the dough is smooth and slightly tacky.
- Transfer dough to a greased container and cover. Let rise for 1-2 hours until doubled in size.
- Once doubled, dump the dough onto a lightly floured surface. Divide into two portions (850-900 grams each).
- Pat out one portion into a rectangle (about 7 inches by 12-14 inches) and roll it up tightly, pinching the seams closed.
- Place in a greased 8.5 by 4.5 loaf pan and cover. Repeat with the second portion.
- Let rise in the pan for 1 to 1.5 hours until dough rises over the edges.
- Preheat the oven to 350ºF and bake for 40 minutes until golden brown and internal temperature reaches 190-195ºF.
- Brush with melted butter if desired, then let cool before slicing.
Notes
For a crisp crust, place a shallow pan of water in the oven while baking.
- Prep Time: 15 minutes
- Cook Time: 40 minutes
- Category: Baking
- Method: Baking
- Cuisine: Bread
Nutrition
- Serving Size: 1 slice
- Calories: 200
- Sugar: 8g
- Sodium: 300mg
- Fat: 7g
- Saturated Fat: 1g
- Unsaturated Fat: 6g
- Trans Fat: 0g
- Carbohydrates: 34g
- Fiber: 1g
- Protein: 4g
- Cholesterol: 50mg
Keywords: bread, homemade bread, sandwich bread, fluffy bread, baking
