
📑 Table of Contents ▶
- Yaki Onigiri with Cheese: The Basics
- Fundamentals
- Preparation/Setup
- Directions
- Elevate Your Yaki Onigiri: Techniques and Tricks
- Technique
- Tips/Tricks
- Perfecting Your Yaki Onigiri: Results and Variations
- Perfecting Results
- Troubleshooting/Variations
- Serving and Storing Yaki Onigiri: Presentation and Pairings
- Serving/Presentation
- Pairings/Storage
- Conclusion
- Related posts:
- Garlic Butter Steak Bites
- Cranberry Apple Chutney: Taste Autumn Bliss in Every Bite
- Slow Cooker Garlic Butter Beef Bites & Potatoes
Yaki Onigiri with Cheese – Recipe for Japanese Grilled Rice Balls
Creating Yaki Onigiri, or Japanese grilled rice balls, offers an exciting culinary adventure. These delightful morsels combine the comforting texture of rice with the rich taste of cheese, creating a fusion of flavors that can brighten any meal. This treat holds a special place in my heart, evoking memories of family gatherings and shared meals.
The first time I crafted Yaki Onigiri, I couldn’t imagine how simply blending cooked rice with various ingredients could lead to such satisfaction. The aroma of grilled rice fills the kitchen, inviting everyone to come and join in. Scooping the rice into onigiri shapes, I felt the anticipation rise for that first bite.
These Japanese rice balls are not just easy to prepare; they also pack a punch of flavor thanks to the addition of soy sauce, mirin, and sesame oil. Choosing the right cheese adds an extra dimension to each bite. Yaki Onigiri makes for an excellent snack or dish for gatherings, and adding a simple nori wrap elevates the experience even more.
Now, let’s dive into how to make these delightful Yaki Onigiri with cheese at home.
Yaki Onigiri with Cheese: The Basics
Fundamentals
Yaki Onigiri starts with the key ingredient—cooked Japanese short-grain rice. This rice, often labeled as sushi rice, has the ideal stickiness that holds the shape of the onigiri perfectly. The preparation requires careful seasoning, which enhances the overall flavor and makes the rice even more delicious.
Soy sauce, mirin, and sesame oil come together to transform the plain rice into a flavorful base. The salt adds just the right touch for seasoning, ensuring every bite is packed with taste.
Making Yaki Onigiri allows for creativity as you choose your favorite cheese type. The cheese melts beautifully in the warm rice, creating a delightful surprise in the center.
Preparation/Setup
Before starting, gather all the necessary ingredients and tools. A bowl will help mix the seasoned rice, and a cutting board will assist when portioning the rice. Also, keep a small bowl of water nearby—it’s essential for wetting your hands, making the shaping process easier and preventing sticking.
Once everything is in place, you can focus on mixing and shaping. The fun lies in portioning the rice and forming the shapes. Each piece takes on a character of its own, especially when filled with cheese.
Ingredients
- 1000 g cooked Japanese short-grain rice
- 4 tablespoons soy sauce
- 3 teaspoons mirin
- 3 teaspoons sesame oil
- 1.5 teaspoons salt (adjust to taste)
- Cheese of your choice (for filling)
- Nori sheets (optional)
Directions
- Combine the cooked rice with soy sauce, mirin, sesame oil, and salt in a large mixing bowl. Mix thoroughly until the ingredients evenly coat the rice.
- Divide the rice into equal portions, approximately 100g each.
- Take one portion of rice and flatten it slightly in your hands. Place your chosen cheese in the center and mold the rice around it. Shape it into a triangle or round ball to create your onigiri.
- Brush the formed Yaki Onigiri with a bit of sesame oil for added flavor before cooking.
- Preheat the Air Fryer to 200 degrees Celsius (390 degrees Fahrenheit). Place the onigiri inside and cook for about 15 minutes, turning them halfway through to achieve an even golden brown.
- If you prefer, you may also pan-fry them or bake them in the oven until they are evenly golden brown.
Optional: Cut the nori sheets into strips and wrap them around the onigiri for an authentic Japanese touch.
Elevate Your Yaki Onigiri: Techniques and Tricks
Technique
The technique for making Yaki Onigiri is quite straightforward but requires a bit of practice to achieve the perfect texture and shape. The key is to ensure the rice mixture is well combined and sticky without being too wet or dry.
When shaping the onigiri, wet your hands with water to avoid sticking. This small step can make all the difference in successfully forming your rice balls.
Using the right amount of filling is also important. You want enough cheese to have a delicious molten center but not so much that it overflows or makes the onigiri difficult to shape.
Tips/Tricks
- If you want a crispy exterior, brush the onigiri with more sesame oil before cooking.
- Experiment with different types of cheese, such as cheddar, mozzarella, or even cream cheese, to find your favorite flavor combination.
- Adjust the seasoning based on your taste preferences. Add more soy sauce for a saltier kick or reduce the amount of mirin for a subtler sweetness.
Perfecting Your Yaki Onigiri: Results and Variations
Perfecting Results
The ultimate goal with Yaki Onigiri is to achieve that perfect balance of crispy outside and tender inside. If your first batch doesn’t turn out as expected, don’t get discouraged. Adjust the cooking time and method as needed.
Using different cooking methods might yield varying results. The Air Fryer typically gives a unique crisp compared to traditional pan-frying, so it’s worth trying both.
Troubleshooting/Variations
If you find your onigiri falling apart, the issue may stem from insufficient stickiness of the rice. Make sure you’re using short-grain rice and that it’s fully cooked and well-mixed with the seasonings.
If you wish to try variations, consider adding vegetables to the mix or using spices in addition to cheese. Creating a spicy version with chili flakes or even using pesto as a filling can transform your onigiri experience.
Serving and Storing Yaki Onigiri: Presentation and Pairings
Serving/Presentation
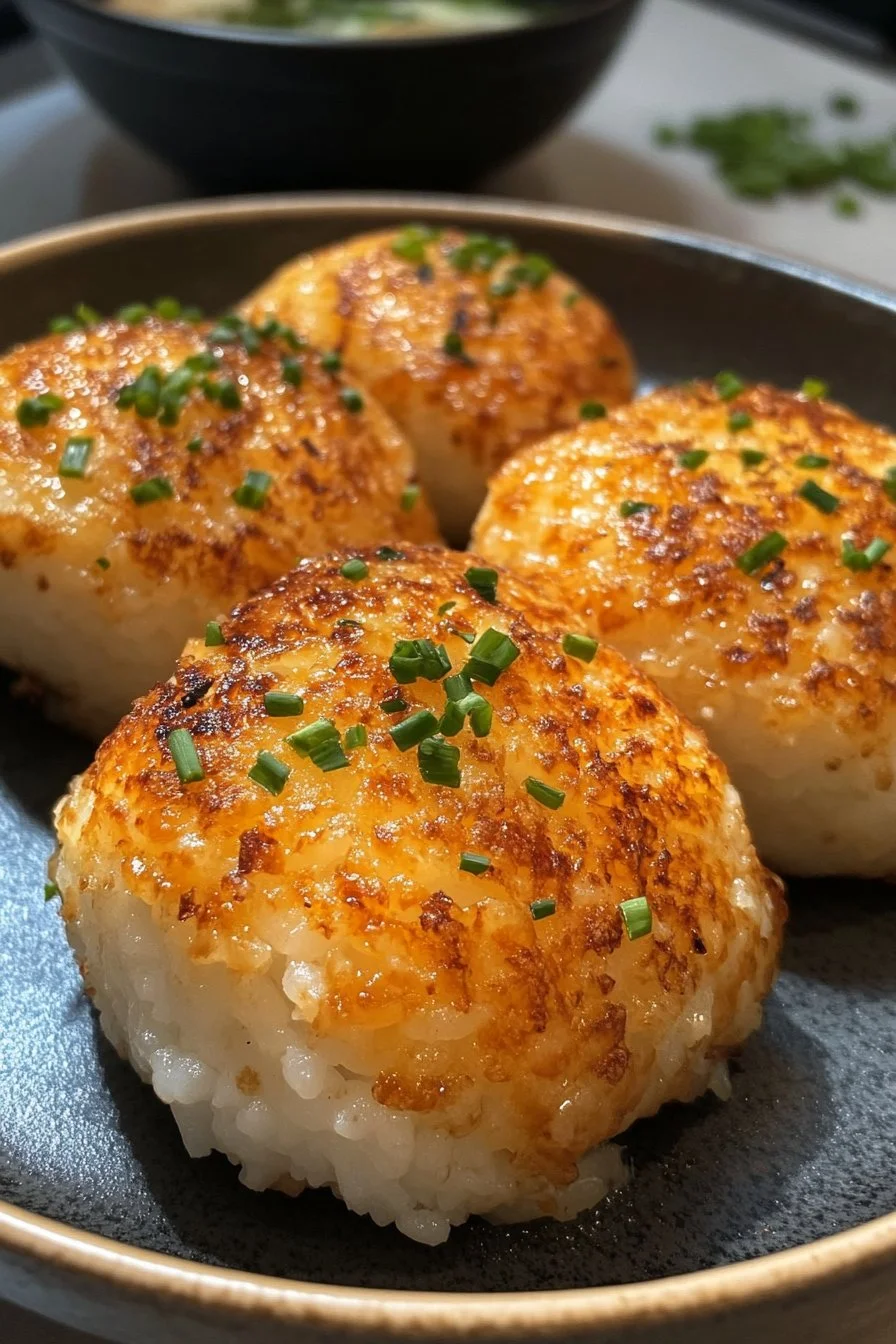
Present your Yaki Onigiri on a clean plate, allowing the golden-brown exterior to shine. If you’ve wrapped them in nori, arrange them neatly for an aesthetic appeal. The visual presentation can enhance the dining experience, making it more inviting.
Pairings/Storage
These rice balls go well with various sides, including a simple salad or pickled vegetables, to balance their richness. Serve alongside light dips like soy sauce or a Sesame dressing for an extra layer of flavor.
For storage, place any leftover onigiri in an airtight container in the refrigerator. They are best enjoyed fresh but can be reheated in the Air Fryer or microwave to restore some warmth.
Conclusion
Yaki Onigiri with cheese is a delightful dish that brings warmth and comfort, making any meal special. Combining the comforting flavors of seasoned rice and melted cheese results in something truly delicious. With this recipe, you can create a memorable dish that celebrates the joy of cooking and sharing food with others. Dive into this culinary adventure and make your kitchen come alive with the flavors of Japan.
Print
Yaki Onigiri with Cheese
- Total Time: 30 minutes
- Yield: 4 servings 1x
- Diet: Vegetarian
Description
Delightful Japanese grilled rice balls filled with melted cheese, seasoned perfectly with soy sauce, mirin, and sesame oil.
Ingredients
- 1000 g cooked Japanese short-grain rice
- 4 tablespoons soy sauce
- 3 teaspoons mirin
- 3 teaspoons sesame oil
- 1.5 teaspoons salt (adjust to taste)
- Cheese of your choice (for filling)
- Nori sheets (optional)
Instructions
- Combine the cooked rice with soy sauce, mirin, sesame oil, and salt in a large mixing bowl. Mix thoroughly until the ingredients evenly coat the rice.
- Divide the rice into equal portions, approximately 100g each.
- Take one portion of rice and flatten it slightly in your hands. Place your chosen cheese in the center and mold the rice around it. Shape it into a triangle or round ball to create your onigiri.
- Brush the formed Yaki Onigiri with a bit of sesame oil for added flavor before cooking.
- Preheat the Air Fryer to 200 degrees Celsius (390 degrees Fahrenheit). Place the onigiri inside and cook for about 15 minutes, turning them halfway through to achieve an even golden brown.
- If preferred, pan-fry or bake the onigiri until they are evenly golden brown.
- Optionally, cut the nori sheets into strips and wrap them around the onigiri for an authentic Japanese touch.
Notes
For a crispy exterior, brush the onigiri with more sesame oil before cooking. Experiment with different cheeses to find your favorite flavor combination.
- Prep Time: 15 minutes
- Cook Time: 15 minutes
- Category: Main Course
- Method: Grilling
- Cuisine: Japanese
Nutrition
- Serving Size: 1 onigiri
- Calories: 300
- Sugar: 1g
- Sodium: 600mg
- Fat: 10g
- Saturated Fat: 5g
- Unsaturated Fat: 5g
- Trans Fat: 0g
- Carbohydrates: 45g
- Fiber: 2g
- Protein: 8g
- Cholesterol: 30mg
Keywords: Yaki Onigiri, Japanese rice balls, grilled rice, cheese onigiri
