📑 Table of Contents ▶
- Princess Cake
- Crafting the Perfect Princess Cake
- Fundamentals
- Preparation/Setup
- Mastering the Princess Cake Technique
- Technique
- Tips/Tricks
- Achieving Perfection with Your Princess Cake
- Perfecting Results
- Troubleshooting/Variations
- Presenting and Storing Your Princess Cake
- Serving/Presentation
- Pairings/Storage
- Conclusion
- FAQs – Princess Cake
- Related posts:
- Maple Pecan Pie Bars: Irresistible Sweet Sensation
- Chocolate Zucchini Banana Bread Recipe: Decadent Chocolate Delight
- Figjamfilled Puff Tarts: Irresistible Indulgence in Every Bite
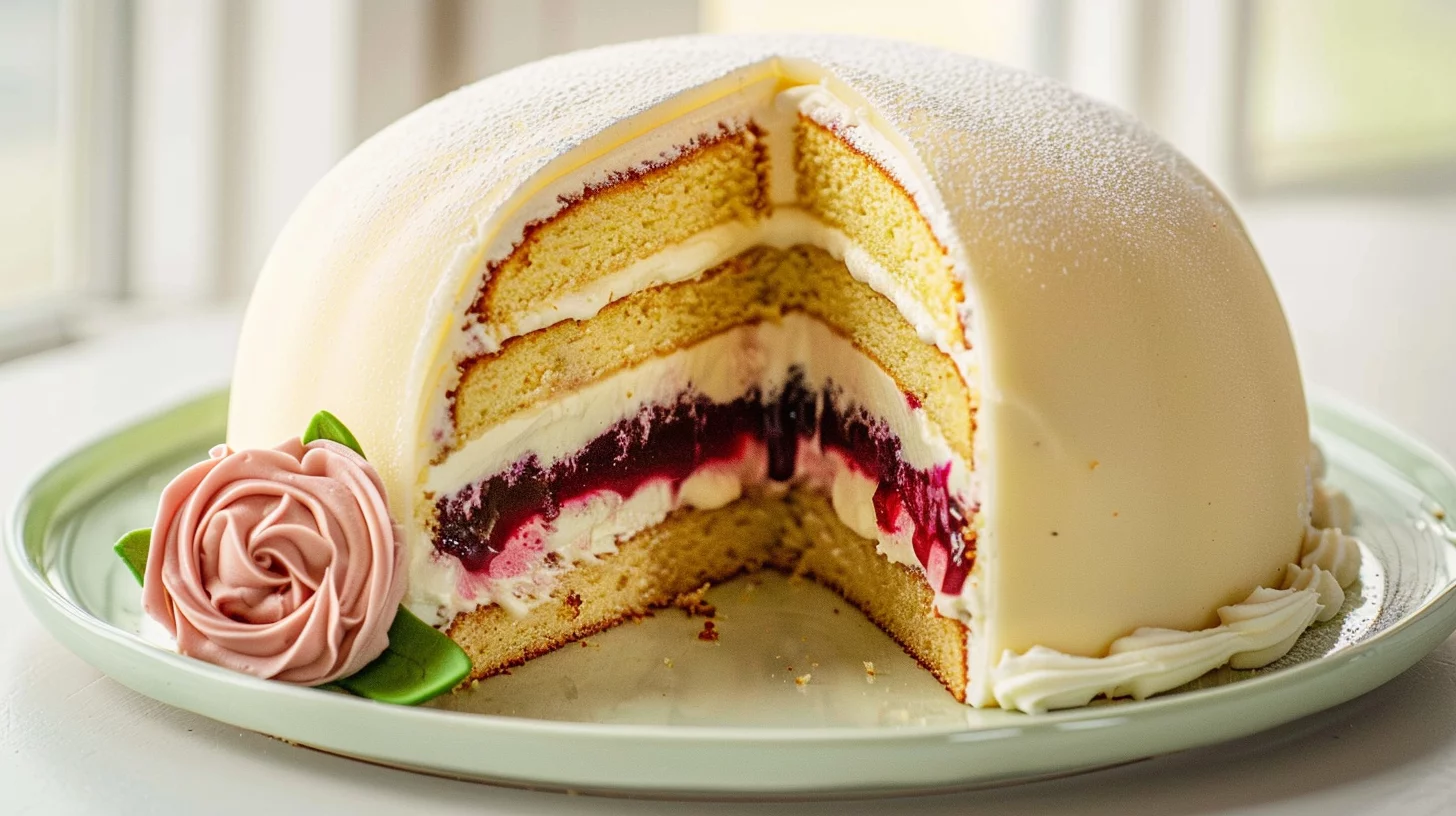
There’s something magical about a Princess Cake, a dessert that epitomizes elegance and a touch of whimsy. I remember the first time I encountered this delightful confection. It was during a family gathering, where the cake’s vibrant colors and intricate marzipan rose caught my eye. The cake seemed almost too beautiful to eat, yet the temptation was undeniable. The blend of soft sponge, rich custard, and sweet jam left a lasting impression on my taste buds.
Creating a Princess Cake at home can seem daunting, but with a little guidance, it transforms into a rewarding experience. It’s a chance to bring a bit of enchantment into your kitchen, combining meticulous craftsmanship with the joy of baking. The process of layering flavors and textures in the Princess Cake is not just about following a recipe; it’s an opportunity to express creativity and delight in every detail.
As a lover of all things culinary, I find immense joy in sharing recipes that inspire others to explore the art of home cooking. Through GrandMmaDelights, I aim to provide accessible recipes that make every meal special—from simple weeknight dinners to show-stopping desserts like the Princess Cake. In this article, we’ll dive into the steps of crafting this stunning creation, infusing each piece with love and creativity.
The Princess Cake, with its layers of sponge, custard, and marzipan, is a true celebration of flavors. Whether you’re a seasoned baker or a curious novice, the process of making this cake can be as delightful as enjoying the final product. Let’s embark on this culinary journey together and bring a piece of sweetness to your table.
Print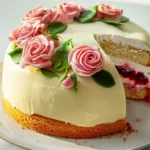
Princess Cake
- Total Time: 3 hours
- Yield: 10 to 12 servings 1x
Description
Discover how to make a stunning Princess Cake with our easy step-by-step guide. Master the art of this Swedish classic and impress your guests with its exquisite layers.
Ingredients
- Nonstick cooking spray or oil, for the pan
- 3 large eggs
- 1/2 cup (120 ml)/100 grams granulated sugar
- 3 tablespoon (45 ml) s/45 milliliters whole milk
- 21/2 tablespoon (158 ml) s/30 milliliters vegetable oil or other flavorless oil, plus more for the pan if needed
- 1 teaspoon (5 ml) vanilla extract
- 1/4 teaspoon (1 ml) kosher salt (such as Diamond Crystal) or 1/8 teaspoon (1 ml) fine salt
- 1 cup (240 ml)/120 grams all-purpose flour
- 1/2 teaspoon (3 ml) baking powder
- 2 large egg yolks
- 3 tablespoon (45 ml) s/30 grams granulated sugar
- 2 tablespoon (30 ml) s/15 grams cornstarch
- 1 teaspoon (5 ml) vanilla extract
- 3/4 cup (180 ml)/180 milliliters whole milk
- 1 tablespoon (15 ml)/14 grams unsalted butter
- 17 1/2 ounce (496 g) s/500 grams marzipan
- Powdered sugar, for dusting
- A few drops of green food coloring
- A few drops of pink food coloring
- 2 cup (480 ml) s/480 milliliters heavy cream
- 1 cup (240 ml)/226 grams mascarpone
- 1/2 cup (120 ml)/75 grams powdered sugar
- 2 teaspoon (10 ml) s vanilla extract
- 1/2 cup (120 ml)/150 grams raspberry jam
Instructions
- Preheat your oven to 350 degrees Fahrenheit. Coat an 8-inch circular cake or springform pan with a nonstick spray, place a parchment circle at the base, and line the sides with parchment strips to secure.
- Separate the eggs into two separate large bowls. In the bowl with the yolks, mix in 3 tablespoons of sugar, milk, oil, vanilla, and salt. It may look separated initially, but continue mixing until smooth.
- Using a mixer, whisk the egg whites on medium until frothy. Gradually add the remaining sugar while mixing. Increase speed to high and continue until the meringue is firm with medium-stiff peaks.
- Stir one-fourth of the meringue into the yolk mixture to lighten it. Sift in the flour and baking powder, mixing thoroughly with a spatula. The mixture will be slightly dense.
- Carefully fold in the rest of the meringue in three parts, using a “D” shape motion with the spatula. Pour the batter into the pan and tap it against the counter to even it out.
- Bake for 25 to 30 minutes until golden and firm. Remove from the oven and drop it onto the counter from a foot high three times to prevent shrinking.
- Allow the cake to cool for 5 minutes, then invert it onto a rack, remove the parchment, and turn it right-side up to cool.
- As the cake bakes, prepare the custard by whisking the yolks, sugar, cornstarch, and vanilla in a saucepan. Add milk and ensure it is well mixed.
- Cook the custard on medium heat, stirring continuously until thick, then lower the heat and cook for an additional 30 seconds. Stir in the butter, then transfer to a container and cover with plastic wrap to cool in the fridge.
- Once cooled, take a portion of marzipan for flower decoration, wrap, and set aside. Dust your work area with powdered sugar, and knead the marzipan with green food coloring until evenly colored.
- Roll the marzipan into a 5-inch disk. Clean your work surface, dust it with powdered sugar, and roll out the marzipan into a 14-inch circle. Dust as needed to prevent sticking.
- Use a bowl as a mold for the cake. Dust the marzipan with powdered sugar and place it over the bowl, shaping it gently to fit. Allow the marzipan to overhang by an inch and cover it with a damp cloth.
- Prepare the mascarpone cream by mixing all ingredients with a mixer until stiff peaks form.
- Smooth the cooled custard using a mixer, then fold in part of the mascarpone cream. Chill until needed.
- Assemble the cake by adding mascarpone cream into the marzipan bowl, spreading it evenly.
- Slice the cake horizontally into two layers. Place the top layer, cut side up, onto the cream in the bowl. Spread raspberry jam, followed by the custard, smoothing to the edges.
- Place the second cake layer, cut side down, over the custard. Fill any gaps around the edges with remaining mascarpone cream.
- Trim the marzipan, leaving a half-inch border. Fold it over the cake, smoothing the edges with your hands.
- Flip the cake onto a serving plate and remove the bowl. Adjust the shape if needed.
- Dust the cake with a dry brush, then a damp brush, to remove excess sugar. Chill the cake for an hour before serving.
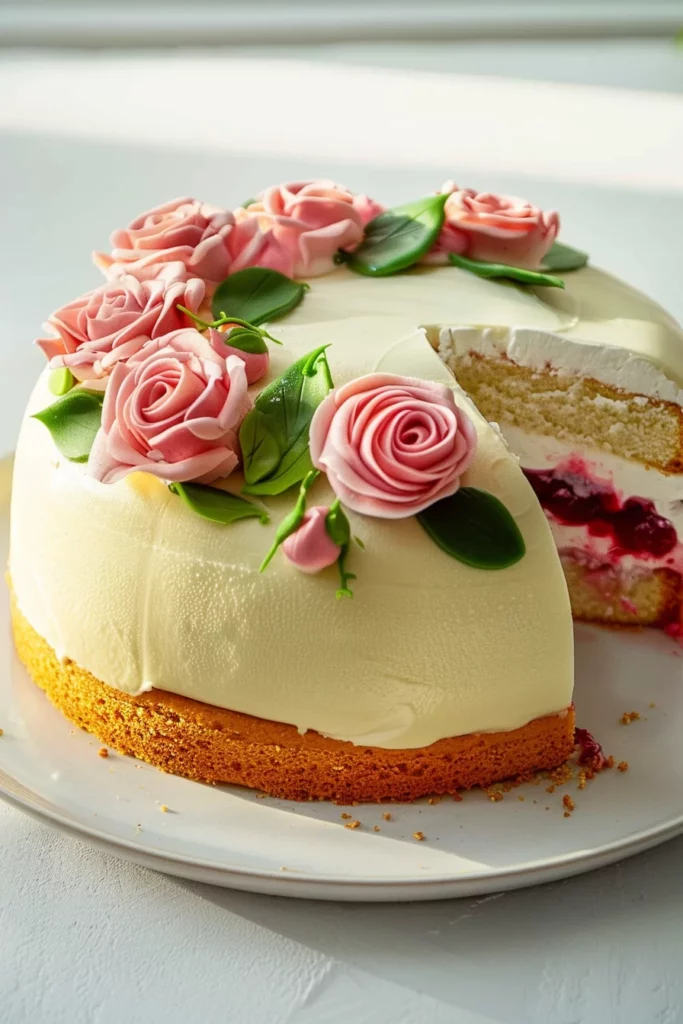
- Color the reserved marzipan with pink food coloring to create a rose. Form petals by rolling small pieces and attach them to the cake with water. Use any extra marzipan for additional decoration.
- Store the finished cake in the refrigerator for up to four days, covering it with a dome or bowl if desired.
Notes
- Blend egg yolks with sugar, milk, oil, vanilla, and salt into a smooth mixture for a consistent batternFold meringue into yolk mixture gently with a “D” motion to maintain its lightnessnStir custard continuously over medium heat to ensure a smooth texture before adding butter
- Prep Time: 10 minutes
- Cook Time: 3 hours
- Category: Dessert
- Method: Baking
- Cuisine: Asiatique
Nutrition
- Calories: 300
- Fat: 12g
- Protein: 20g
Keywords: princess cake recipe, marzipan cake decoration, mascarpone cream filling, make custard from scratch, fluffy sponge cake, raspberry jam filling
Crafting the Perfect Princess Cake
Fundamentals
The foundation of a Princess Cake lies in its careful layering and the harmonious blend of flavors and textures. The sponge cake provides a soft, airy base, while the custard and raspberry jam add richness and a hint of tartness. The marzipan covering ties everything together with a smooth, sweet finish. To ensure each component shines, it’s important to use fresh, high-quality ingredients and follow each step diligently.
Begin by gathering your ingredients. You’ll need large eggs, granulated sugar, whole milk, vegetable oil, vanilla extract, kosher salt, all-purpose flour, baking powder, and marzipan. Each element plays a crucial role, from the eggs providing structure to the vanilla infusing warmth and aroma. Preparing these elements in advance will streamline the process and ensure a seamless baking experience.
Preparation/Setup
Start by preheating your oven to 350 degrees Fahrenheit and preparing your baking pan. Coat an 8-inch circular cake or springform pan with nonstick spray, placing a parchment circle at the base and lining the sides with parchment strips. This setup prevents sticking and ensures easy removal once the cake is baked. As the oven warms, separate the eggs into two large bowls, setting the stage for the mixing process.
In the bowl with the yolks, mix in sugar, milk, oil, vanilla, and salt. Though the mixture may appear separated initially, continue stirring until it becomes smooth. In the second bowl, beat the egg whites until frothy, gradually adding sugar until firm peaks form. This meringue will lighten the batter, giving the cake its signature airy texture.
Mastering the Princess Cake Technique
Technique
Incorporating the meringue into the yolk mixture is a delicate process that requires patience and care. Begin by folding a quarter of the meringue into the yolk mixture to lighten it. Sift in the flour and baking powder, mixing thoroughly with a spatula. The batter will be slightly dense, but this is expected. Carefully fold in the remaining meringue in three parts, using a “D” shape motion to maintain the batter’s airiness.
Princess Cake
Pour the batter into the prepared pan, gently tapping it against the counter to even it out. Bake for 25 to 30 minutes, or until the cake is golden and firm. Immediately drop the cake onto the counter from a foot high three times to prevent shrinking. Allow the cake to cool for five minutes before inverting it onto a rack to cool completely. This method ensures a moist, fluffy cake that serves as the perfect canvas for the remaining components.
Tips/Tricks
For the custard, whisk the yolks, sugar, cornstarch, and vanilla in a saucepan, ensuring the mixture is smooth. Slowly add milk, blending well. Cook over medium heat, stirring continuously until the custard thickens. Reduce the heat and cook for an additional 30 seconds, then stir in the butter. Transfer the custard to a container, covering it with plastic wrap to cool in the fridge. This step is crucial for achieving the custard’s silky texture.
When working with marzipan, dust your work area with powdered sugar to prevent sticking. Knead the marzipan with green food coloring until evenly colored, then roll it into a 5-inch disk. Clean your surface, dust it again, and roll the marzipan into a 14-inch circle. Carefully drape it over a bowl to mold, leaving a slight overhang for easy shaping later. This step requires a gentle touch to avoid tearing the delicate marzipan.
Achieving Perfection with Your Princess Cake
Perfecting Results
Assembling the Princess Cake involves layering the mascarpone cream, cake, jam, and custard. Begin by preparing the mascarpone cream, mixing all ingredients until stiff peaks form. Once the custard has cooled, smooth it with a mixer and fold in a portion of the mascarpone cream. Chill until needed. This creamy mixture forms the luscious center of the cake, adding richness and balance to the sweet marzipan.
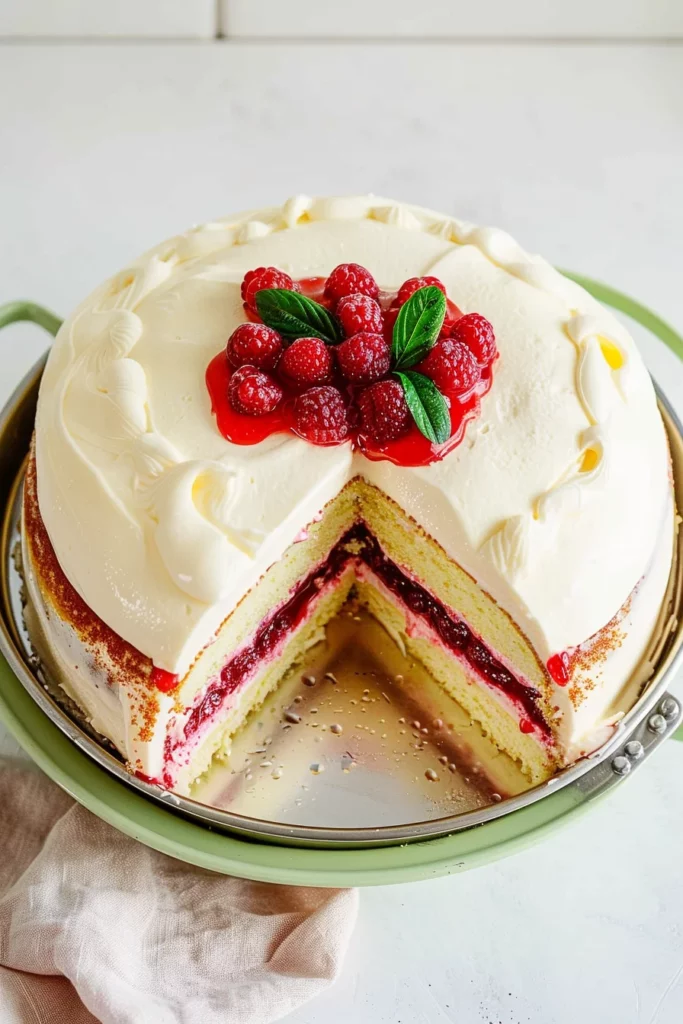
Carefully slice the cake horizontally into two layers. Place the top layer, cut side up, into the marzipan-lined bowl, spreading raspberry jam and custard over it. Place the second layer, cut side down, over the custard. Fill any gaps around the edges with remaining mascarpone cream, ensuring a smooth, even surface. Trim the marzipan, folding it over the cake and smoothing the edges with your hands. Flip the cake onto a serving plate and adjust the shape if needed.
Troubleshooting/Variations
If the cake appears uneven or the marzipan tears, don’t worry. Gently reshape the cake with a damp cloth, and patch any tears with extra marzipan. For variations, consider adding a touch of citrus zest to the custard for a refreshing twist. Alternatively, experiment with different jam flavors, such as apricot or strawberry, to complement the marzipan’s almond notes. These small adjustments can personalize the Princess Cake, making it uniquely yours.
For more dessert inspiration, check out these delightful recipes: Minecraft Cake Recipe, Reese’s Peanut Butter Cup Cheesecake, and Mini Taco Cupcakes with Ground Beef and Cheese.
Presenting and Storing Your Princess Cake
Serving/Presentation
To present your Princess Cake, dust it with a dry brush, then a damp brush, to remove excess sugar. This ensures a polished, professional look. Chill the cake for an hour before serving, allowing the flavors to meld and the marzipan to set. For a decorative finish, color the reserved marzipan with pink food coloring to create a rose. Form petals by rolling small pieces, attaching them to the cake with water. This floral touch adds elegance and charm to the final presentation.
When serving, slice the cake with a sharp knife, wiping it clean between cuts for neat, even slices. The layers of sponge, custard, and cream create a stunning visual effect, making each piece a work of art. This dessert is perfect for special occasions or as a centerpiece for a festive gathering, impressing guests with its beauty and delicious taste.
Princess Cake
Pairings/Storage
Store the finished Princess Cake in the refrigerator for up to four days, covering it with a dome or bowl to retain freshness. This cake pairs beautifully with a cup of coffee or tea, complementing its rich, sweet flavors with a touch of bitterness. For those looking to explore more baking adventures, consider trying these recipes: No-Bake Caramel Rolo Cheesecake and Cream Cheese Cake.
The Princess Cake, with its intricate layers and artful presentation, is a testament to the beauty of home baking. By following these steps, you can create a dessert that not only delights the palate but also captivates the eye. This recipe encourages creativity and passion, transforming simple ingredients into a masterpiece that celebrates the joy of cooking.
Conclusion
The Princess Cake is more than just a dessert; it’s a celebration of flavors and craftsmanship. Each component, from the airy sponge to the rich custard and marzipan, comes together to create a harmonious blend that delights the senses. This cake not only showcases your baking skills but also brings joy to those who gather around to enjoy it.
Whether you’re making this cake for a special occasion or simply to indulge in a bit of culinary artistry, the Princess Cake stands out as a testament to the joys of home baking. Its intricate layers and elegant presentation make it a standout dessert that leaves a lasting impression. By following the steps outlined in this guide, you can create a masterpiece that embodies the spirit of GrandMmaDelights—bringing people together through the magic of food.