📑 Table of Contents ▶
- Indulging in Chocolate Munchkins
- Fundamentals
- Preparation/setup
- Directions
- Perfecting the Art of Chocolate Munchkins
- Technique
- Tips/tricks
- Troubleshooting and Variations
- Perfecting results
- Troubleshooting/variations
- Serving and Storage of Munchkins
- Serving/presentation
- Pairings/storage
- Glazed Chocolate Munchkins
- Related posts:
- Halloween Chocolate Chip Cookies
- One Bowl Gluten Free Chocolate Zucchini Bread: Indulge in Decadence & Nourish Your Soul
- Dunkin Donuts Glazed Donuts Recipe Copycat Ultimate Treat
Glazed Chocolate Munchkins (Donut Holes)
There’s something incredibly nostalgic about glazed chocolate munchkins—they remind me of early Saturday mornings spent at the local bakery with my family. The air always buzzed with excitement as we debated which flavor to choose. Everyone wanted a chocolate bite, those little donut holes coated in a shiny glaze, crispy on the outside yet soft on the inside. The first bite always sparked joy, leaving a smear of chocolate across our grinning faces.
Creating these glazed chocolate munchkins at home transforms the kitchen into a warm haven where sweet memories are made. From mixing flour and cocoa to frying the munchkins in bubbling oil, the process is filled with delight. Each step pulls me into the delightful journey of preparing a family favorite.
As you dive into this recipe, I want you to experience the joy of creating these luscious bites of chocolate goodness. Let each munchkin serve as a reminder of connection, comfort, and the irresistible charm of sharing good food with loved ones.
These glazed chocolate munchkins are a breeze to make, and every bite will take you back to those blissful mornings. Let’s roll up our sleeves and start!
Indulging in Chocolate Munchkins
Fundamentals
Before diving into the making of our glazed chocolate munchkins, let’s talk about the basics. Achieving the perfect texture and taste requires a few key components. First, the flour serves as the backbone, giving structure to our munchkins. The cocoa powder infuses deep, rich chocolate flavor, while the sugar promotes sweetness and helps create that delectable glaze.
Key leavening agents like baking powder and baking soda ensure that our munchkins puff up beautifully during frying, creating that lovely light, airy consistency. Balancing flavors with a touch of kosher salt enhances the sweetness and brings all the components together.
Preparation/setup
Once you’ve gathered all your ingredients, it’s time to set up for success. Start by preparing your workspace—make sure your utensils, bowls, and frying equipment are within reach.
You’ll need a double boiler to melt the salted butter and baker’s chocolate. This gentle heat prevents burning and helps achieve that glossy melted texture. As the chocolate and butter melt together, the tantalizing aroma fills the kitchen, setting the stage for deliciousness.
In a large mixing bowl, combine your dry ingredients: flour, granulated sugar, cocoa powder, baking powder, baking soda, and salt. Make sure to sift these together to avoid lumps and ensure an even mix.
Ingredients
Here’s what you’ll need to create your delicious glazed chocolate munchkins:
- 1 cup all-purpose flour
- 1/4 cup granulated sugar
- 1/4 cup + 2 tablespoons Dutch-process cocoa powder
- 3/4 teaspoon baking powder
- 1/4 teaspoon baking soda
- 1/2 teaspoon kosher salt
- 2 tablespoons salted butter
- 1 1/2 oz baker’s chocolate, unsweetened
- 1/4 cup buttermilk (check the link for a quick homemade version)
- 1 tablespoon vanilla extract
- 1 large egg, whisked
- 2 cups confectioner’s sugar for the glaze
- 2 tablespoons milk for the glaze
- 2 teaspoons vanilla extract for flavoring the glaze
- Water if needed for consistency
Directions
Following the gathering of ingredients and setting up your workspace, let’s jump into the step-by-step directions for crafting these amazing munchkins.
-
Melt the butter and chocolate: In your double boiler, melt the salted butter and baker’s chocolate together. Stir gently until the mixture is smooth and combined. Be sure to remove it from the heat once melted to prevent it from scorching.
-
Mix the dry ingredients: In a large bowl, whisk together the all-purpose flour, granulated sugar, cocoa powder, baking powder, baking soda, and kosher salt. This mixture lays the groundwork for your munchkins, infusing each bite with cocoa’s rich flavor.
-
Combine wet and dry ingredients: Pour the melted chocolate-butter mixture into the bowl with the dry ingredients. Add in the buttermilk, vanilla extract, and whisked egg. Mix well until everything is combined.
-
Knead the dough: Gently knead the mixture with your hands until you have a cohesive dough formed into a ball. Wrap the dough in plastic wrap and refrigerate it for 30 minutes.
-
Shape into balls: After chilling, the dough becomes easier to manage. Roll pieces into 1 to 2 tablespoon-sized balls, ensuring they are uniform for even cooking.
-
Prepare to fry: Heat 3 inches of vegetable oil in a deep skillet or saucepan until it reaches 350 degrees.
-
Fry the munchkins: Carefully place 4 to 5 balls into the hot oil at a time. Fry for about 2 to 4 minutes or until they puff slightly and develop a beautiful golden-brown exterior. Use a slotted spoon to remove them from the oil, letting excess oil drip off before placing them on a paper towel-lined plate.
-
Finish frying: Continue this process until all the dough balls are cooked.
-
Prepare the glaze: In a clean bowl, combine the confectioner’s sugar, 2 tablespoons of milk, and 2 teaspoons of vanilla extract. Mix until smooth, adding water gradually if necessary to achieve the desired consistency.
-
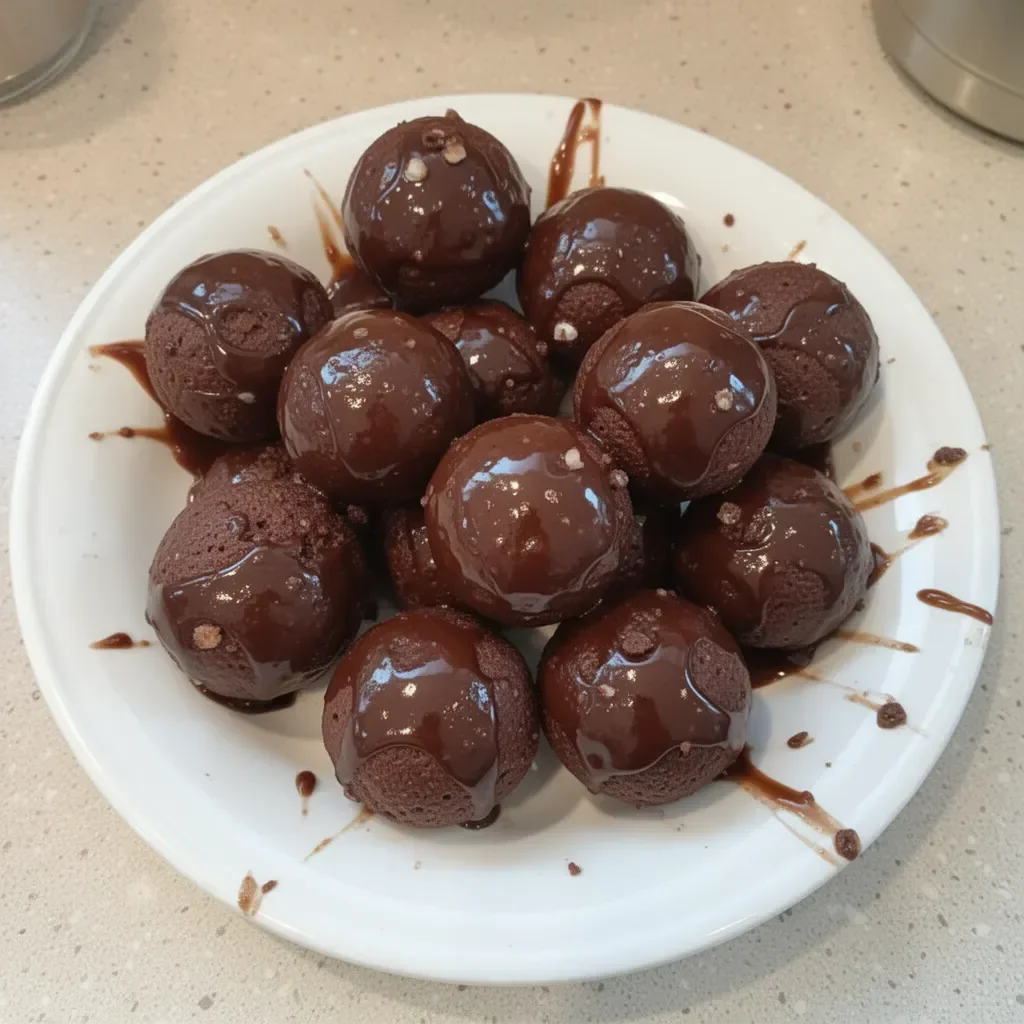
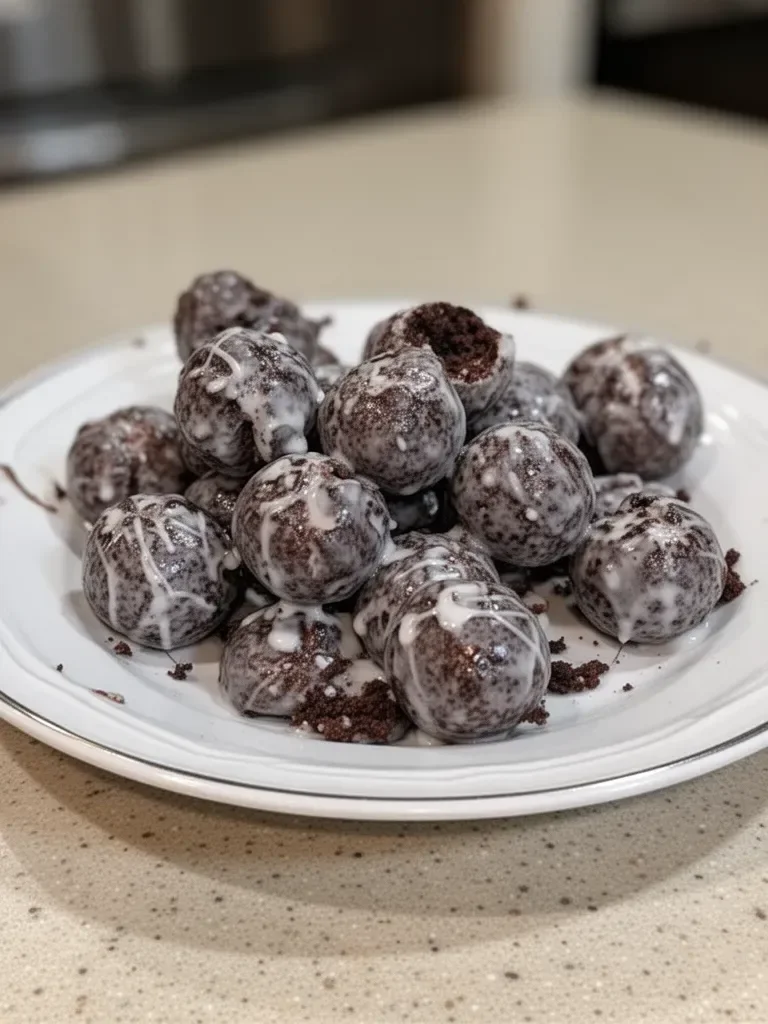
Glaze the munchkins: Once the munchkins are cool enough to handle, dip each one into the glaze, ensuring they get an even coat. Place them on a lined baking sheet or rack until the glaze sets.
Perfecting the Art of Chocolate Munchkins
Technique
Creating perfect glazed chocolate munchkins revolves around technique and timing. Make sure to manage your oil temperature carefully; if it’s too low, the munchkins will absorb excess oil and become greasy. Conversely, if it’s too high, the outside might brown quickly while the inside remains raw.
Use a candy thermometer or digital infrared thermometer to achieve precision. A good temperature range for frying is between 350 to 365 degrees.
Tips/tricks
When rolling out your dough, you can use a small ice cream scoop for equal sizing to ensure uniform cooking. If the dough remains too sticky to work with, a sprinkle of flour on your hands or the workspace can alleviate the problem.
Experimenting with flavors can spice up your glazed chocolate munchkins. Consider adding a dash of espresso powder to the dry ingredients for a mocha twist, or incorporating some citrus zest for a fresh pop of flavor.
Troubleshooting and Variations
Perfecting results
If your munchkins don’t puff up as expected, check your baking powder and soda for freshness. Old leavening agents lose efficacy, impacting the final texture.
Runtime is crucial; too long can yield dry munchkins. Keep an eye on them as they fry, and trial a couple first to gauge cooking times. You’re looking for a light puffy feel and a nice crisp outside.
Troubleshooting/variations
Sometimes, glazing can be tricky. If it’s too thick, add a bit more milk or water for a runnier consistency. Conversely, if it’s too thin, add additional confectioner’s sugar until you reach the desired thickness for coating.
If you want to switch things up, consider adding chocolate chips into the dough for delightful melted pockets of chocolate. You can also roll these munchkins in powdered sugar or sprinkles after glazing for an added fun effect.
Serving and Storage of Munchkins
Serving/presentation
Present your glazed chocolate munchkins on a vibrant plate or tiered stand to elevate their visual appeal. They make delightful treats for gatherings, parties, or even as a simple dessert at home.
Consider pairing these munchkins with a rich cup of coffee or a cold glass of milk for a classic combination. Guests will love the flavor harmony with a warm beverage that complements the chocolate richness.
Pairings/storage
To store glazed chocolate munchkins, keep them in an airtight container at room temperature. They will maintain freshness for about two days, but they taste best when enjoyed the same day they’re made. If you want to store them longer, consider placing them in the refrigerator, though they may lose some of their glossy texture and taste.
Reheat leftovers in the microwave for a few seconds to return their soft texture while enjoying them anytime.
The allure of glazed chocolate munchkins lies in their simplicity and the delightful experience they create. Revisit cherished moments in your kitchen while indulging in these sweet bites.
Print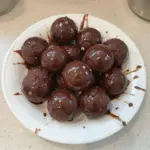
Glazed Chocolate Munchkins
- Total Time: 45 minutes
- Yield: 24 munchkins 1x
- Diet: Vegetarian
Description
Delicious glazed chocolate munchkins that are crispy on the outside and soft on the inside, reminiscent of nostalgic bakery treats.
Ingredients
- 1 cup all-purpose flour
- 1/4 cup granulated sugar
- 1/4 cup + 2 tablespoons Dutch-process cocoa powder
- 3/4 teaspoon baking powder
- 1/4 teaspoon baking soda
- 1/2 teaspoon kosher salt
- 2 tablespoons salted butter
- 1 1/2 oz baker’s chocolate, unsweetened
- 1/4 cup buttermilk
- 1 tablespoon vanilla extract
- 1 large egg, whisked
- 2 cups confectioner’s sugar for the glaze
- 2 tablespoons milk for the glaze
- 2 teaspoons vanilla extract for flavoring the glaze
- Water if needed for consistency
Instructions
- Melt the butter and chocolate: In your double boiler, melt the salted butter and baker’s chocolate together. Stir gently until the mixture is smooth and combined.
- Mix the dry ingredients: In a large bowl, whisk together the all-purpose flour, granulated sugar, cocoa powder, baking powder, baking soda, and kosher salt.
- Combine wet and dry ingredients: Pour the melted chocolate-butter mixture into the bowl with the dry ingredients. Add in the buttermilk, vanilla extract, and whisked egg. Mix well until everything is combined.
- Knead the dough: Gently knead the mixture with your hands until you have a cohesive dough formed into a ball. Wrap the dough in plastic wrap and refrigerate it for 30 minutes.
- Shape into balls: After chilling, roll pieces into 1 to 2 tablespoon-sized balls.
- Prepare to fry: Heat 3 inches of vegetable oil in a deep skillet or saucepan until it reaches 350 degrees.
- Fry the munchkins: Carefully place 4 to 5 balls into the hot oil at a time. Fry for about 2 to 4 minutes or until they puff slightly and develop a golden-brown exterior.
- Finish frying: Continue this process until all the dough balls are cooked.
- Prepare the glaze: In a clean bowl, combine the confectioner’s sugar, milk, and vanilla extract. Mix until smooth.
- Glaze the munchkins: Once cool, dip each munchkin into the glaze.
Notes
For added flavor, consider incorporating a dash of espresso powder or citrus zest.
- Prep Time: 15 minutes
- Cook Time: 30 minutes
- Category: Dessert
- Method: Frying
- Cuisine: American
Nutrition
- Serving Size: 1 munchkin
- Calories: 150
- Sugar: 12g
- Sodium: 150mg
- Fat: 6g
- Saturated Fat: 3g
- Unsaturated Fat: 3g
- Trans Fat: 0g
- Carbohydrates: 21g
- Fiber: 1g
- Protein: 2g
- Cholesterol: 25mg
Keywords: chocolate, munchkins, donuts, dessert, baking, fried sweets