
📑 Table of Contents ▶
- The Art of Lemon Bars
- Fundamentals
- Preparation/Setup
- Directions
- Techniques for Perfecting Lemon Bars
- Technique
- Tips & Tricks
- Troubleshooting and Variations
- Perfecting Results
- Variations
- Serving Lemon Bars
- Presentation
- Pairings & Storage
- Ina Garten’s Lemon Bars
- Related posts:
- Red White and Blue Rice Krispie Treats: How to Make Patriotic Snacks
- Pancakes Recipe: How to Make Fluffy Pancakes in 20 Minutes
- Homemade Cheese Crackers
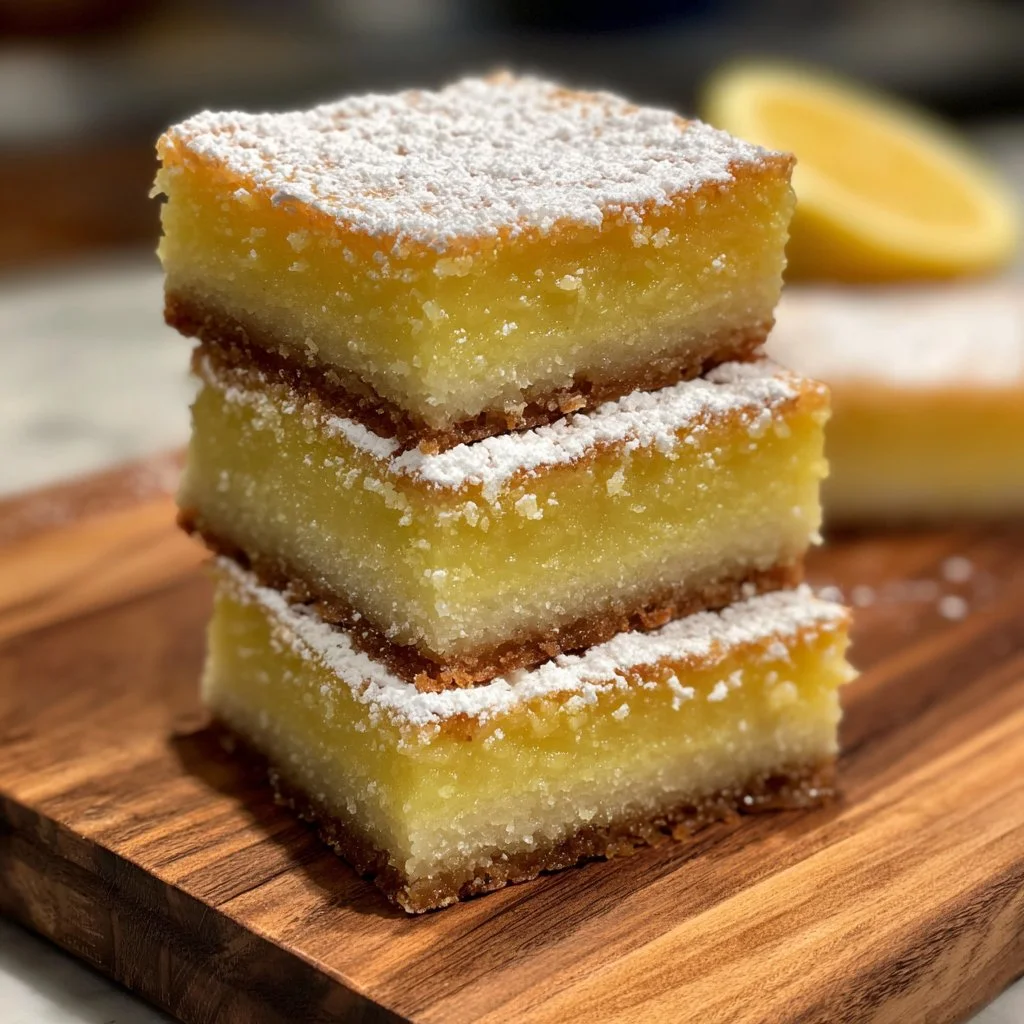
Ina Garten’s Lemon Bars
Baking lemon bars brings to mind sunny afternoons and laughter shared among family and friends. The combination of sweet and tart that a well-made lemon bar offers is simply irresistible. I can still remember the first time I bit into one at a family gathering. The brightness of the lemon zest paired with the buttery crust created a perfect harmony, and I was instantly hooked.
Ina Garten’s lemon bars do more than just satisfy a sweet tooth. They evoke memories of warm gatherings, where everyone eagerly waits for dessert. Each square, dusted with powdered sugar, invites you to grab another piece. Sharing these bars becomes a joyful affair, whether at a picnic, a holiday, or just an everyday treat.
With just a handful of ingredients, Ina’s recipe turns ordinary staples into extraordinary lemon bars. The simplicity of this dessert captures the essence of baking—transforming humble items into something spectacular. Anyone can master this recipe, filling their kitchens with the delightful aroma of fresh lemons and baked goodness.
Now, let’s dive into the details that bring these beloved lemon bars to life.
The Art of Lemon Bars
Fundamentals
Understanding the fundamentals of making lemon bars is crucial. The balance between the sweet and tart elements defines the dessert. A good lemon bar features a crisp, buttery crust that perfectly contrasts the creamy, tangy filling. This classic combination elevates it from simple dessert to show-stopping treat.
Butter plays a pivotal role in achieving that melt-in-your-mouth texture. Using softened butter allows for easy creaming with sugar, enabling it to incorporate air, which results in a tender base. The right balance of granulated sugar in both the crust and filling achieves a delightful contrast of flavors.
Lemon bars also require fresh ingredients to truly shine. Fresh lemons create the zesty, tart flavor that makes each bite so refreshing. As you gather your materials, remember that quality counts when aiming for the best lemon bars.
Preparation/Setup
When setting up your kitchen for this baking adventure, organization makes all the difference. Start by preheating your oven to 350°F, providing the perfect environment for baking. This warmth ensures an even cook for the crust and filling.
Next, prepare a 9×13 pan by lining it with foil, allowing the edges to hang over the sides. This simple step will help you lift the bars out once they cool. Lightly spraying the foil with non-stick cooking spray keeps your crust from sticking, ensuring each piece comes out nicely.
Now, gather your ingredients: butter, granulated sugar, flour, eggs, lemon zest, and lemon juice. Familiarize yourself with the entire process before you begin. This preparation helps you move smoothly from one step to the next, avoiding any last-minute scrambles. Familiarity breeds success in the kitchen, especially when it comes to baking lemon bars.
Ingredients
Here’s what you need to create Ina Garten’s irresistible lemon bars:
- 1 cup of butter (or 2 sticks), softened at room temperature
- 1/2 cup granulated sugar for the crust
- 2 cups all-purpose flour for the crust
- 1/8 teaspoon salt
- 6 large eggs, at room temperature
- 3 cups granulated sugar for the filling
- 2 tablespoons grated lemon zest
- 1 cup freshly squeezed lemon juice
- 1 cup flour for thickening
- Powdered sugar for dusting the finished bars
Each ingredient serves a unique purpose, creating the signature taste and texture of lemon bars. The creamy filling relies on the perfect combination of eggs and sugar, while the zest adds an aromatic punch. Simple yet powerful, these ingredients transform into an unforgettable dessert.
Directions
- Preheat your oven to 350°F.
- Line your 9×13 pan with foil, leaving the ends hanging over the sides, and lightly spray with non-stick cooking spray.
- In a large bowl, cream together the softened butter and 1/2 cup granulated sugar using a hand mixer.
- Add in 2 cups of flour and the salt, mixing until large crumbles form.
- Press the dough evenly into the pan, building the crust up on all sides for a delightful edge.
- Bake the crust for 15-20 minutes, or until it is very lightly golden brown.
- Allow the crust to cool for 30 minutes before preparing the filling.
- In another large bowl, whisk together the 6 eggs, 3 cups of granulated sugar, 1 cup of flour, lemon zest, and lemon juice.
- Pour the lemon mixture over the cooled crust.
- Bake for 30-35 minutes, until the filling is set; it can be slightly jiggly in the middle.
- Allow the lemon bars to cool to room temperature, then chill them in the refrigerator for at least 2 hours, but overnight is best.
- Lift the bars out of the pan using the hanging foil and set them on a cutting board.
- Dust with powdered sugar before cutting into bars and serving.
These directions lead to delicious lemon bars, perfect for sharing or enjoying by yourself. Mastering this recipe not only impresses but also creates lasting memories with those you cherish.
Techniques for Perfecting Lemon Bars
Technique
Perfecting the art of lemon bars often involves mastering your technique. One essential skill is achieving the right level of doneness for the filling. Allowing the filling to be slightly jiggly in the center signals that the bars are perfectly baked. Overcooking can result in a dry texture, while undercooking leaves them too soft.
Also, pay attention when mixing your filling. Whisk the eggs until fully blended before adding the sugars and flour. This step ensures a smooth consistency, preventing lumps in the final filling. Mixing at a moderate pace helps maintain air in the mixture, contributing to the luscious texture.
Lastly, chilling the lemon bars is crucial. This step allows them to set and firm up, making them easier to cut into clean squares. The longer they chill, the better the flavors meld.
Tips & Tricks
Using fresh ingredients is one of the best tricks for enhancing flavor. Fresh lemon juice and zest offer superior brightness compared to bottled alternatives. Squeeze your lemons right before using them to maximize flavor and fragrance.
When it comes to cutting the bars, ensure your knife is sharp. A warm knife cuts through the chilled filling effortlessly, preventing the bars from crumbling. Rinsing your knife under hot water between cuts can also help ensure clean edges. This little trick creates visually appealing squares.
Lastly, don’t skip the dusting of powdered sugar. It not only adds an extra sweet touch but also enhances the presentation, making the bars look irresistibly inviting.
Troubleshooting and Variations
Perfecting Results
Achieving the perfect lemon bar can sometimes feel challenging, but troubleshooting ensures great results. If your lemon bars turn out too sweet, reduce the sugar slightly in your next batch. Balancing sweetness with acidity is key for that perfect bite.
For a more intense lemon flavor, consider increasing the lemon zest or juice by a tablespoon. This simple adjustment can elevate the lemony notes, making your bars even more unforgettable.
Baking time matters too. Always watch closely as baking time approaches the end. Every oven differs, and you want to catch that perfect moment when the filling is set but soft.
Variations
Embrace creativity by experimenting with flavors. Adding a hint of fresh herbs like thyme or basil can elevate your lemon bars into something unique. You can also try incorporating berries or a swirl of raspberry purée for a beautiful presentation and flavor contrast.
Alternatively, consider making a coconut version by replacing part of the flour with shredded coconut. This variation creates a delightful texture while keeping the essence of the original lemon bar intact.
Don’t hesitate to mix things up. Baking is all about experimentation, and your takes on lemon bars can lead to delicious discoveries.
Serving Lemon Bars
Presentation
Serving lemon bars requires a touch of care to showcase their vibrant, zesty nature. After dusting the bars with powdered sugar, arrange them neatly on a platter. You can garnish with additional lemon zest or fresh mint leaves for a pop of color and flavor.
Cutting the bars into uniform squares enhances the visual appeal. Alternatively, consider using cookie cutters for fun shapes if you’re serving at gatherings. Each bite should look as delightful as it tastes.
Pairings & Storage
Lemon bars pair wonderfully with fresh fruits or a scoop of whipped cream. They also complement a variety of desserts, creating delightful dessert platters. For storage, keep the lemon bars in the refrigerator, where they can stay fresh for up to three days. They also freeze well, ensuring you have a delicious treat ready whenever a craving strikes.
When preparing to serve a gathering, make sure you bring these lemon bars out last. Their bright appearance makes them a fantastic finale to any meal, leaving everyone with a smile.
Lemon bars are a classic dessert staple that never goes out of style. Their delightful combination of flavors and textures creates a memorable experience each time they are shared. The ease of making them ensures they can be a regular delight, inviting those around the table to savor life’s simple joys.
Ina Garten’s lemon bars not only taste wonderful; they also bring warmth to everyday moments, reminding us that the best recipes often lead to the most cherished memories.
Print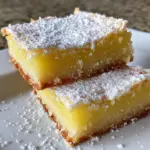
Ina Garten’s Lemon Bars
- Total Time: 80 minutes
- Yield: 16 servings 1x
- Diet: Vegetarian
Description
Irresistibly sweet and tart lemon bars with a buttery crust, perfect for sharing on any occasion.
Ingredients
- 1 cup butter, softened
- 1/2 cup granulated sugar for the crust
- 2 cups all-purpose flour for the crust
- 1/8 teaspoon salt
- 6 large eggs, at room temperature
- 3 cups granulated sugar for the filling
- 2 tablespoons grated lemon zest
- 1 cup freshly squeezed lemon juice
- 1 cup all-purpose flour for thickening
- Powdered sugar for dusting
Instructions
- Preheat your oven to 350°F.
- Line a 9×13 pan with foil, leaving the ends hanging over the sides, and lightly spray with non-stick cooking spray.
- Cream together the softened butter and 1/2 cup granulated sugar using a hand mixer.
- Add in 2 cups of flour and the salt, mixing until large crumbles form.
- Press the dough evenly into the pan, building the crust up on all sides for a delightful edge.
- Bake the crust for 15-20 minutes, or until it is very lightly golden brown.
- Allow the crust to cool for 30 minutes before preparing the filling.
- Whisk together the 6 eggs, 3 cups of granulated sugar, 1 cup of flour, lemon zest, and lemon juice.
- Pour the lemon mixture over the cooled crust.
- Bake for 30-35 minutes, until the filling is set; it can be slightly jiggly in the middle.
- Allow the lemon bars to cool to room temperature, then chill them in the refrigerator for at least 2 hours, but overnight is best.
- Lift the bars out of the pan using the hanging foil and set them on a cutting board.
- Dust with powdered sugar before cutting into bars and serving.
Notes
Use fresh lemons for the best flavor. Chilling the lemon bars is essential for clean cuts.
- Prep Time: 30 minutes
- Cook Time: 50 minutes
- Category: Dessert
- Method: Baking
- Cuisine: American
Nutrition
- Serving Size: 1 bar
- Calories: 250
- Sugar: 30g
- Sodium: 150mg
- Fat: 10g
- Saturated Fat: 6g
- Unsaturated Fat: 4g
- Trans Fat: 0g
- Carbohydrates: 35g
- Fiber: 1g
- Protein: 4g
- Cholesterol: 50mg
Keywords: lemon bars, dessert, Ina Garten, sweet and tart, easy desserts
