📑 Table of Contents ▶
- Zombie Finger Cookies
- Crafting the Perfect Zombie Finger Cookies
- Fundamentals
- Preparation/setup
- Mastering the Technique
- Technique
- Tips/tricks
- Perfecting Your Zombie Finger Cookies
- Perfecting results
- Troubleshooting/variations
- Serving and Storing Zombie Finger Cookies
- Serving/presentation
- Pairings/storage
- Conclusion
- FAQs – Zombie Finger Cookies
- Related posts:
- Peppermint Chocolate Fudge Truffles: Decadent Bliss in Every Bite
- Maple Pecan Sticky Buns: Irresistible Indulgence for Your Soul
- Soft Fluffy Rice Cake Recipe: Delicious and Easy
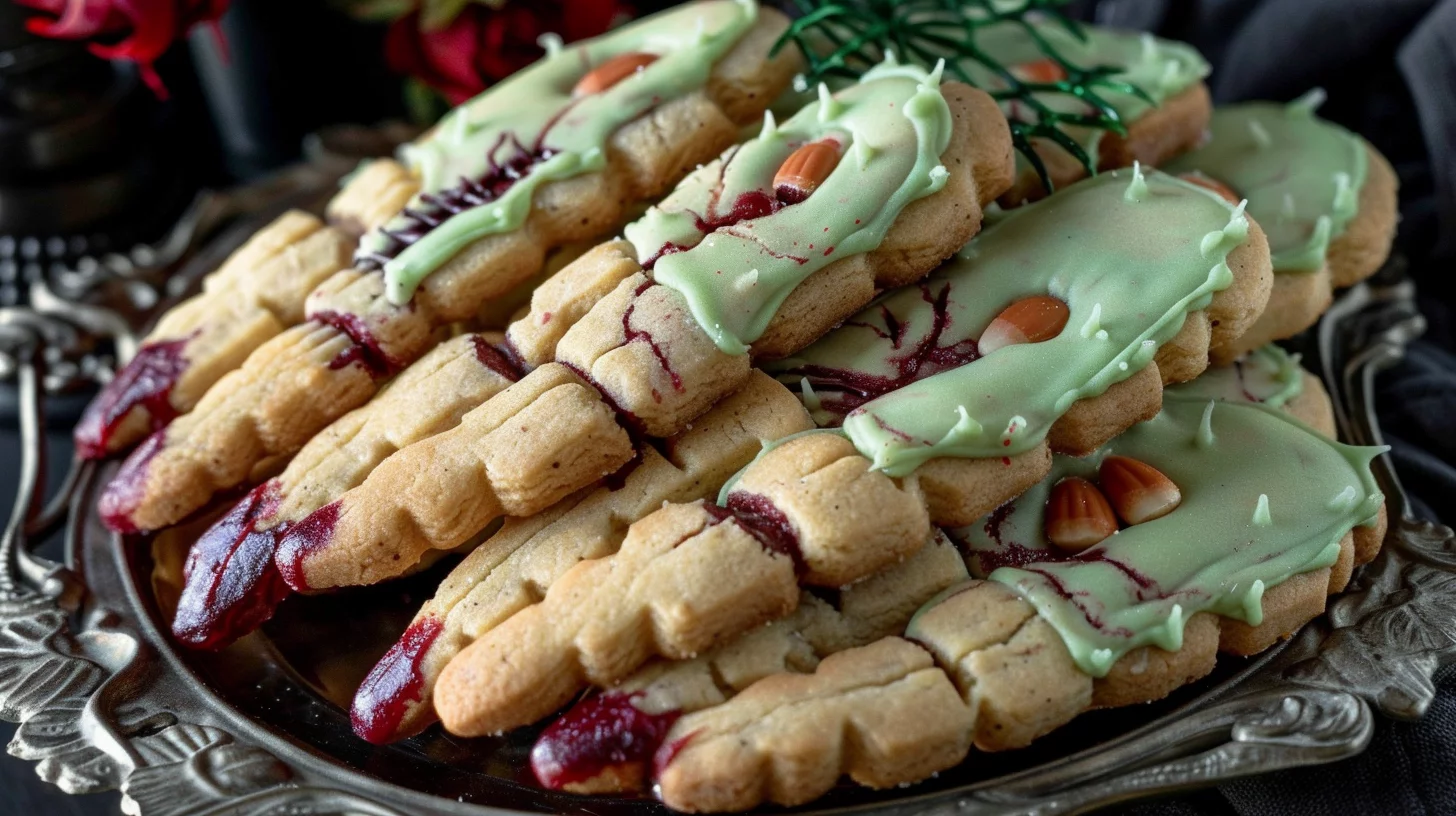
Every Halloween, my kitchen transforms into a laboratory of spooky delights, and among my favorite creations are Zombie Finger Cookies. They’re the perfect mix of eerie and delicious, bringing a playful, ghoulish twist to any gathering. The first time I made these, the kids were both horrified and delighted, their faces lighting up with excitement as they bit into the green, almond-topped treats. It’s become a tradition, and each year, the anticipation grows as we prepare to bake and share these creepy cookies.
Zombie Finger Cookies are more than just a treat—they’re a conversation starter and a fun way to bond over baking. The process is as enjoyable as the end product, with each step inviting creativity and a bit of theatrical flair. These cookies are not just about taste but also about the experience of crafting something spooky and festive. The green food coloring and blanched almonds give them their signature look, while the fruit jam adds a gruesome yet tasty touch.
As we gather around the kitchen, mixing and shaping the dough, there’s a sense of shared purpose and joy. Cooking these Zombie Finger Cookies is more than just a culinary task; it’s a chance to create memories and indulge in the spirit of Halloween. The kids love molding the dough into finger shapes, pressing almonds as nails, and adding the finishing touches with jam. These moments of creativity and laughter make the cookies even more special.
Whether you’re a seasoned baker or someone just looking to try something new, these cookies are approachable and rewarding. The simple ingredients and straightforward instructions ensure that anyone can jump in and create these spooky treats. So, gather your ingredients, invite some friends or family, and get ready to experience the fun and flavor of Zombie Finger Cookies.
Print
Zombie Finger Cookies
- Total Time: 32 minutes
- Yield: 28 cookies 1x
Description
Learn how to make spooky Zombie Finger Cookies with our easy step-by-step recipe. Perfect for Halloween parties and themed events. Click to bake now!
Ingredients
- 2 cups all-purpose flour (240g)
- 1/2 tsp baking powder (2.5 ml)
- pinch of salt
- 1/2 cup vegetable oil (120 ml)
- 1 cup granulated sugar (200g)
- 1 large egg, room temperature
- 1 tsp vanilla extract (5 ml)
- green food coloring as needed
- 28 blanched and skinned almonds
- 1/2 cup fruit jam (120 ml)
Instructions
- Set your oven to 325℉ and prepare two baking sheets with parchment paper.
- In a large mixing bowl, use a hand mixer with the paddle attachment to cream together the vegetable oil and granulated sugar until the mixture is light and fluffy. Use a rubber spatula to scrape down the sides as needed to ensure a uniform blend. ! PARENTAL SUPERVISION RECOMMENDED
- Add the egg, vanilla extract, and green food coloring, mixing until the batter is smooth.
- In a separate small bowl, combine the all-purpose flour, baking powder, and a pinch of salt by whisking them together.
- Slowly incorporate the dry ingredients into the wet mixture until just combined, forming a dough.
- Divide the dough into 28 identical portions. Roll each piece between your hands to shape them into 5-inch long finger-like forms and place them on the baking sheets, leaving a ¼ inch space between each.
- Press one almond into the tip of each cookie to mimic a fingernail.
- Use the back of a butter knife to create several horizontal lines for knuckles.
- Pinch the dough gently on either side of the lines to give a more defined knuckle appearance.
- Bake the cookies for 16 minutes, removing them from the oven just as they begin to color. Allow them to cool. ! PARENTAL SUPERVISION RECOMMENDED
- In a small saucepan, gently heat the fruit jam over medium heat until it is warm. ! PARENTAL SUPERVISION RECOMMENDED
- Carefully take out the almonds. Dip the blunt end of each cookie into the heated jam, then return them to the baking sheet to set.
- With the remaining jam, dip the base of each almond and reattach it to the cookie to create a bleeding nail effect.
- Allow the cookies to dry completely before arranging them for serving.
Notes
- Note: Use eggs at room temperature for a smoother batter consistency.
- Second note: Press almonds firmly into cookies to ensure they stay in place while baking.
- Third note: Adjust green food coloring amount for desired “zombie finger” shade; let cookies cool before dipping in warm fruit jam.
- Prep Time: 16 minutes
- Cook Time: 16 minutes
- Category: Dessert
- Method: Baking
- Cuisine: Unknown
Nutrition
- Calories: 125 calories
- Fat: 4 grams fat
- Protein: 2 grams protein
Keywords: zombie fingers, spooky cookies, almond nails, Halloween treats, green fingers
Crafting the Perfect Zombie Finger Cookies
Fundamentals
The key to successful Zombie Finger Cookies lies in the balance of flavors and textures. Start with 2 cups of all-purpose flour, which forms the base of your dough. Combine this with 1/2 teaspoon of baking powder and a pinch of salt to ensure the cookies rise just enough while retaining their eerie shape. This dry mix sets the foundation for your cookies, making them light yet structured.
Next, create a smooth, creamy mixture with 1/2 cup of vegetable oil and 1 cup of granulated sugar. This blend brings moisture and sweetness to the cookies, ensuring they are both tender and flavorful. The addition of 1 large egg provides richness and helps bind the ingredients together, while 1 teaspoon of vanilla extract enhances the overall flavor profile, adding a subtle warmth.
Preparation/setup
Begin by preheating your oven to 325℉ and preparing two baking sheets with parchment paper. This step ensures your cookies bake evenly and don’t stick to the sheets. In a large mixing bowl, use a hand mixer with the paddle attachment to cream together the vegetable oil and sugar until the mixture is light and fluffy. Use a rubber spatula to scrape down the sides of the bowl as needed to ensure a uniform blend.
Add the egg, vanilla extract, and enough green food coloring to achieve the desired hue of your Zombie Finger Cookies. Mix until the batter is smooth and vibrant. In a separate bowl, whisk together the flour, baking powder, and salt, then slowly incorporate the dry ingredients into the wet mixture until just combined. This forms your dough, which should be pliable and easy to work with.
Mastering the Technique
Technique
Divide the dough into 28 identical portions. This ensures each Zombie Finger Cookie is uniform in size and bakes evenly. Roll each piece between your hands, shaping them into 5-inch long finger-like forms. Place them on the prepared baking sheets, leaving a ¼ inch space between each to allow for slight expansion during baking.
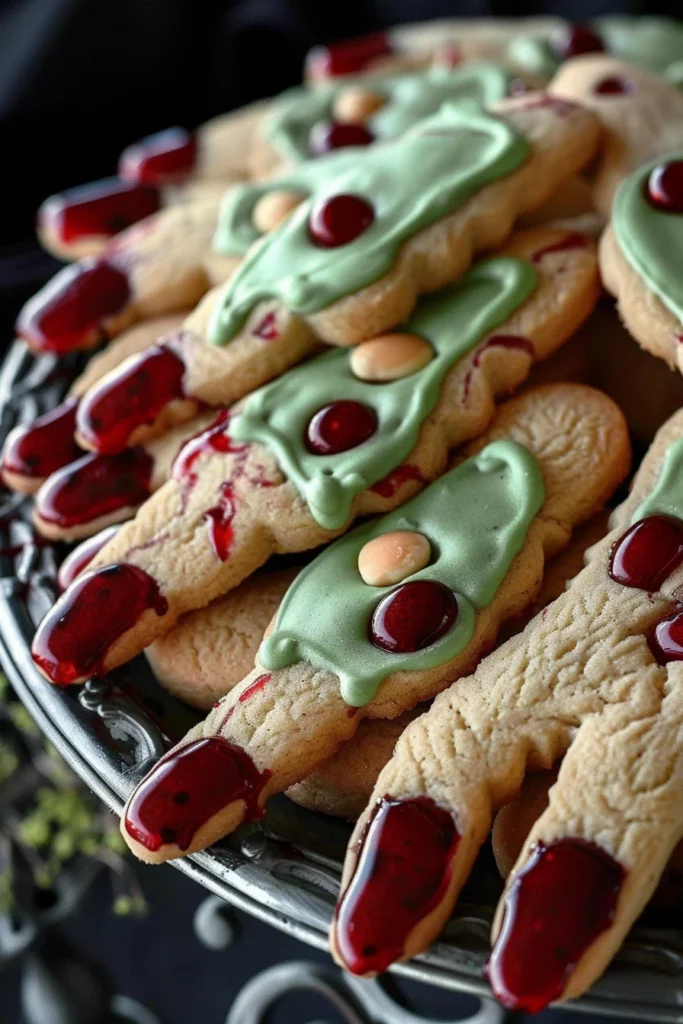
Zombie Finger Cookies
Press one almond into the tip of each cookie to mimic a fingernail. This detail gives the cookies their distinctive look. Use the back of a butter knife to create several horizontal lines on each cookie, forming knuckle details. Pinch the dough gently on either side of the lines to give a more defined knuckle appearance, enhancing the realistic effect of these spooky treats.
Tips/tricks
One tip for achieving perfect Zombie Finger Cookies is to chill the dough slightly before shaping. This can make it easier to handle and prevent spreading during baking. If you’re making these with kids, parental supervision is recommended, especially when handling the oven and hot jam. To further customize the cookies, experiment with different shades of green food coloring to achieve a variety of eerie effects.
If you love creative comfort food, you’ll definitely want to try these drop butter cookies and white chocolate cherry shortbread cookies for more delicious baking adventures.
Perfecting Your Zombie Finger Cookies
Perfecting results
Bake the cookies for 16 minutes, removing them from the oven just as they begin to color. This ensures they remain soft and tender, with a slightly crisp exterior. Allow them to cool completely on the baking sheet. While they cool, warm 1/2 cup of fruit jam in a small saucepan over medium heat, stirring occasionally.
Carefully remove the almonds from the tip of each cookie. Dip the blunt end of each cookie into the heated jam, then return them to the baking sheet to set. With the remaining jam, dip the base of each almond and reattach it to the cookie to create a bleeding nail effect. This adds a deliciously gruesome touch that completes the look of your Zombie Finger Cookies.
Troubleshooting/variations
If your cookies spread too much during baking, try chilling the dough for a bit longer before shaping. This can help maintain their intended shape. For those looking to experiment, consider using different types of nuts for the fingernails, or try adding a hint of almond extract to the dough for a unique twist on the flavor.
If you’re inspired by these spooky treats, don’t miss out on trying carrot cake breakfast cookies and peach cobbler cookies for more creative cookie ideas.
Serving and Storing Zombie Finger Cookies
Serving/presentation
Once your Zombie Finger Cookies have set, arrange them on a platter for a truly eye-catching display. Their realistic appearance and vibrant colors make them a fantastic centerpiece for any Halloween party. Pair them with other spooky snacks to create a themed dessert table that will delight guests of all ages.
These cookies are not only visually striking but also deliciously addictive. The combination of tender cookie, crunchy almond, and sweet jam creates a delightful contrast that will have everyone reaching for seconds. Encourage guests to enjoy the fun of biting into these creepy creations.
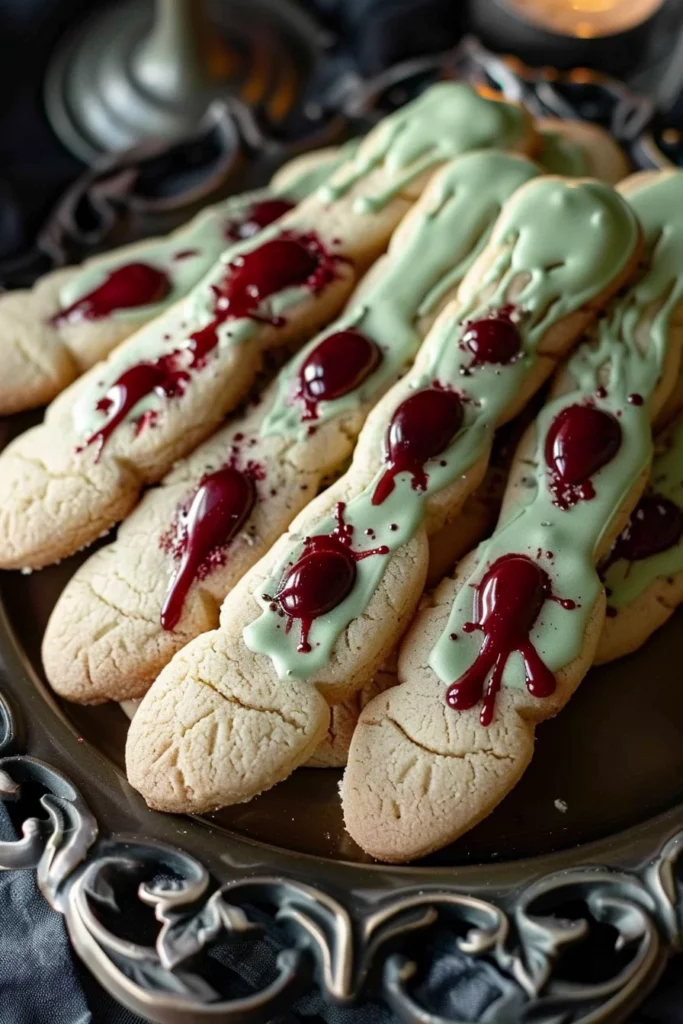
Zombie Finger Cookies
Pairings/storage
Zombie Finger Cookies pair wonderfully with a glass of cold milk or a steaming cup of coffee. If you’re looking for more cookie inspiration, check out these coffee butter cookies and whipped shortbread cookies for a delightful variety.
Store any leftover cookies in an airtight container at room temperature for up to a week. If you want to prepare them ahead of time, the dough can be frozen and thawed before baking, allowing you to enjoy fresh Zombie Finger Cookies whenever the occasion calls for it.
Conclusion
Zombie Finger Cookies are a delightful way to embrace the spooky spirit of Halloween. Their unique appearance and delicious flavor make them an unforgettable treat for both kids and adults. The simple ingredients and straightforward process ensure that anyone can craft these creepy cookies with ease.
Whether you’re serving them at a Halloween party or enjoying them as a festive snack at home, Zombie Finger Cookies are sure to impress. Their combination of texture, color, and flavor offers a fun and memorable baking experience. So gather your ingredients, invite some friends, and create a batch of these deliciously spooky treats.
