📑 Table of Contents ▶
- The Art of Homemade Lemon Bars
- Fundamentals
- Preparation/setup
- Directions
- Mastering the Technique of Homemade Lemon Bars
- Technique
- Tips/tricks
- Perfecting Your Homemade Lemon Bars
- Perfecting results
- Troubleshooting/variations
- Elevating the Experience of Homemade Lemon Bars
- Serving/presentation
- Pairings/storage
- Conclusion
- Related posts:
- Raspberry Swirl Brioche Loaf
- Lemon Pistachio Zucchini Bread: Heavenly Citrus Bliss
- Bakewell Tart With Almond Frangipane: Ultimate Indulgence in Every Bite
Homemade Lemon Bars
The smell of freshly baked Homemade Lemon Bars fills the kitchen with sunlight on a cloudy day. Growing up, lemon bars were a staple at family gatherings, providing a taste of summer regardless of the season. Each year, my family would eagerly await those delightful squares, dusted with powdered sugar, sitting like a beacon of joy on the dessert table.
These lemon bars hold a special place in my heart. The tangy lemon flavor perfectly balances the sweetness, creating an experience that resonates deeply with anyone who has tasted them. Whether it was a birthday celebration or a holiday feast, no occasion felt complete without these treats.
Making Homemade Lemon Bars is not just a recipe—it’s a chance to create memories. The simplicity of the ingredients allows creativity. Anyone can transform basic staples into mouthwatering bites that bring friends and family together. With each bite, you’ll find not just flavor but the warmth of shared moments that linger long after the last square has been enjoyed.
Let’s dive into the delightful process of making these zesty squares.
The Art of Homemade Lemon Bars
Fundamentals
When embarking on the journey of crafting Homemade Lemon Bars, understanding the fundamentals is crucial. These treats consist of a buttery crust paired with a tart lemon filling that strikes a perfect balance between sweet and sour. Combining these elements requires a few essential techniques.
The first step involves creating a crust that cradles the luscious lemon filling. This crust forms the foundation, supporting the vibrant flavors of the lemon. Ensuring the right consistency allows for a tender but sturdy base that complements the tartness above.
It’s essential to focus on the ratio of ingredients. The use of all-purpose flour, unsalted butter, and powdered sugar creates a crumbly texture that gives way to the smooth filling. Maintaining attention to these foundational elements will yield satisfying results.
Preparation/setup
Before diving into the process, preparation sets the stage for success. Preheating the oven to 350°F (175°C) ensures a consistent baking environment that promotes even cooking. Greasing an 8-inch square baking dish prevents sticking, allowing for easy removal once the Homemade Lemon Bars cool.
As you set up your workspace, gather your ingredients: one cup of all-purpose flour, a quarter cup of powdered sugar, and half a cup of softened unsalted butter. Having everything within reach streamlines the method. The next step involves mixing the flour and powdered sugar, preparing to cut in the butter until the mixture resembles coarse crumbs.
Press this prepared mixture into the bottom of the baking dish, forming the crust. This step needs attention as a well-formed crust sets the tone for the overall texture of the bars.
Ingredients
The choice of ingredients is paramount for creating the best Homemade Lemon Bars. Here’s a breakdown of what you’ll need:
- 1 cup all-purpose flour
- 1/4 cup powdered sugar
- 1/2 cup unsalted butter, softened
- 1 cup granulated sugar
- 2 large eggs
- 1/2 cup fresh lemon juice
- 1 teaspoon lemon zest
- 1/4 teaspoon salt
- Powdered sugar for dusting
Using fresh lemon juice and zest infuses the bars with vibrant flavor. The ratio of sugar balances the tartness, creating a harmonious taste. Each component plays a unique role, and together they transform simple ingredients into a delightful dessert.
Directions
To make these Homemade Lemon Bars, follow these simple steps:
- Preheat your oven to 350°F (175°C). Grease an 8-inch square baking dish.
- In a mixing bowl, combine flour and powdered sugar. Cut in the butter until the mixture resembles coarse crumbs. Press this mixture into the bottom of the prepared baking dish to form a crust.
- Bake the crust in the preheated oven for about 15 minutes or until lightly golden.
- While the crust is baking, in another bowl, whisk together granulated sugar, eggs, lemon juice, lemon zest, and salt until well combined.
- Pour the lemon mixture over the hot crust and return to the oven. Bake for an additional 20 minutes.
- Allow the lemon bars to cool completely before dusting with powdered sugar and slicing into squares.
Mastering the Technique of Homemade Lemon Bars
Technique
Creating Homemade Lemon Bars involves some basic techniques that can elevate your baking game. Begin by mastering the art of making the crust. The butter needs to be softened—not melted—as this preserves the texture when mixed with flour.
Cut the butter into the dry ingredients until you achieve that crumbly texture. This technique forms a base that’s crispy yet melts in your mouth when combined with the lemon filling.
Once the crust is ready, ensure it’s slightly cooled before adding the lemon mixture. This small step prevents the filling from seeping into the crust, maintaining distinct layers for optimal taste. Pay attention to baking times, as underbaking can lead to a too-soft filling.
Tips/tricks
Success in the kitchen often comes down to simple tips and tricks. When juicing lemons, roll them on the counter before cutting to maximize the juice yield. Always taste your lemon mixture before pouring it over the crust. This ensures the balance of sweet and sour suits your palate.
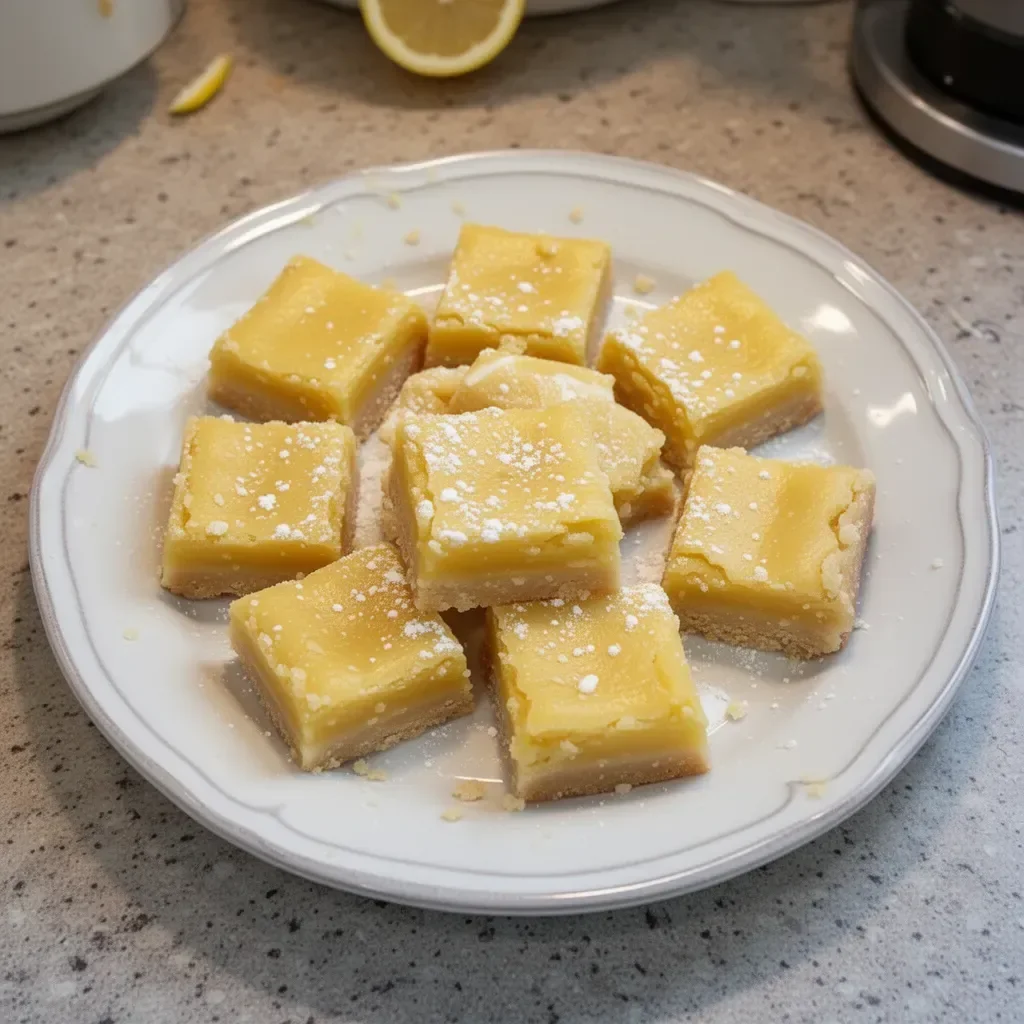
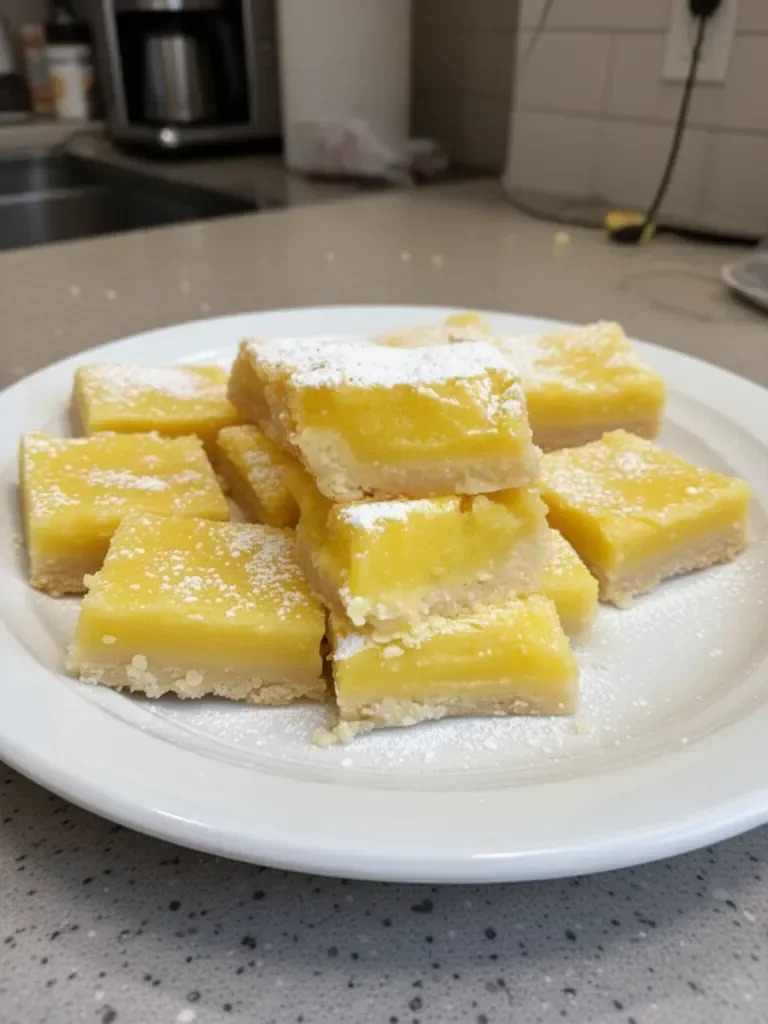
Let the lemon bars cool completely. This step is essential for ensuring clean cuts when slicing. Always dust with powdered sugar just before serving, as this adds a lovely presentation and prevents the powdered sugar from absorbing moisture.
Perfecting Your Homemade Lemon Bars
Perfecting results
To perfect your Homemade Lemon Bars, understanding the baking process is crucial. The ideal texture combines a crisp crust and a creamy filling. The filling should jiggle slightly when you take it out of the oven but continue baking until the center is set.
For a more robust lemon flavor, consider increasing the lemon juice or zest. Each small adjustment can elevate your dessert, turning a classic recipe into something uniquely yours.
Troubleshooting/variations
Sometimes, challenges arise during the baking process. If your crust doesn’t set correctly, it may be due to overmixing. Make sure to mix just until combined for the best texture. If your filling curdles, ensure you whisk eggs thoroughly and avoid overheating.
Experiment with flavors by adding fresh herbs to the filling or using different citrus fruits. Grapefruit or orange can provide an interesting twist. You can also use a gluten-free flour blend to cater to dietary preferences without losing flavor.
Elevating the Experience of Homemade Lemon Bars
Serving/presentation
Serving Homemade Lemon Bars can be as enjoyable as making them. Allow the bars to cool completely in the baking dish before slicing. Use a sharp knife to cut them into squares for a clean presentation. A light dusting of powdered sugar adds a touch of elegance, making them a perfect dessert for gatherings.
Consider serving these bars alongside fresh berries or a dollop of whipped cream for added richness. Each bite becomes an explosion of flavors when paired with the right accompaniments.
Pairings/storage
While enjoying these delightful squares, you might consider pairing them with beverages such as herbal tea or sparkling water. The refreshing flavors of lemon complement various drinks beautifully.
Storing your Homemade Lemon Bars is simple. Place them in an airtight container in the refrigerator, where they can last up to a week. Enjoy them chilled or let them come back to room temperature before serving for a soft, delicate texture.
Conclusion
The creation of Homemade Lemon Bars embodies the joy of baking. These squares encapsulate memories and bring people together through shared experiences. The satisfying blend of sweet and tart flavors creates a treat that delights everyone.
As you prepare to embark on your baking journey, let these techniques and tips guide you. By focusing on the balance of flavors and textures, your Homemade Lemon Bars will not only taste incredible but also bring warmth and joy to those around you.
Print
Homemade Lemon Bars
- Total Time: 50 minutes
- Yield: 9 servings 1x
- Diet: Vegetarian
Description
Delightfully tangy and sweet, these homemade lemon bars are perfect for any occasion, bringing a taste of summer to your dessert table.
Ingredients
- 1 cup all-purpose flour
- 1/4 cup powdered sugar
- 1/2 cup unsalted butter, softened
- 1 cup granulated sugar
- 2 large eggs
- 1/2 cup fresh lemon juice
- 1 teaspoon lemon zest
- 1/4 teaspoon salt
- Powdered sugar for dusting
Instructions
- Preheat your oven to 350°F (175°C). Grease an 8-inch square baking dish.
- Combine flour and powdered sugar in a mixing bowl. Cut in the butter until the mixture resembles coarse crumbs. Press this mixture into the bottom of the prepared baking dish to form a crust.
- Bake the crust in the preheated oven for about 15 minutes or until lightly golden.
- Whisk together granulated sugar, eggs, lemon juice, lemon zest, and salt in another bowl until well combined.
- Pour the lemon mixture over the hot crust and return to the oven. Bake for an additional 20 minutes.
- Allow the lemon bars to cool completely before dusting with powdered sugar and slicing into squares.
Notes
For an enhanced lemon flavor, consider increasing the lemon juice or zest to taste.
- Prep Time: 15 minutes
- Cook Time: 35 minutes
- Category: Dessert
- Method: Baking
- Cuisine: American
Nutrition
- Serving Size: 1 bar
- Calories: 210
- Sugar: 15g
- Sodium: 40mg
- Fat: 10g
- Saturated Fat: 5g
- Unsaturated Fat: 4g
- Trans Fat: 0g
- Carbohydrates: 25g
- Fiber: 1g
- Protein: 2g
- Cholesterol: 40mg
Keywords: lemon bars, dessert, homemade, sweet, tangy